This article will show you how to View your tasks on a Map and how to set "Priority" numbers within those tasks. This will help you put your "Tasks" into a specific order for your work day.
IMPORTANT - Before you can use the Task Mapping you must Geo-code your "Customer List". Please click this link and follow Steps 3 through 6 to perform a proper Geo-coding. CLICK HERE
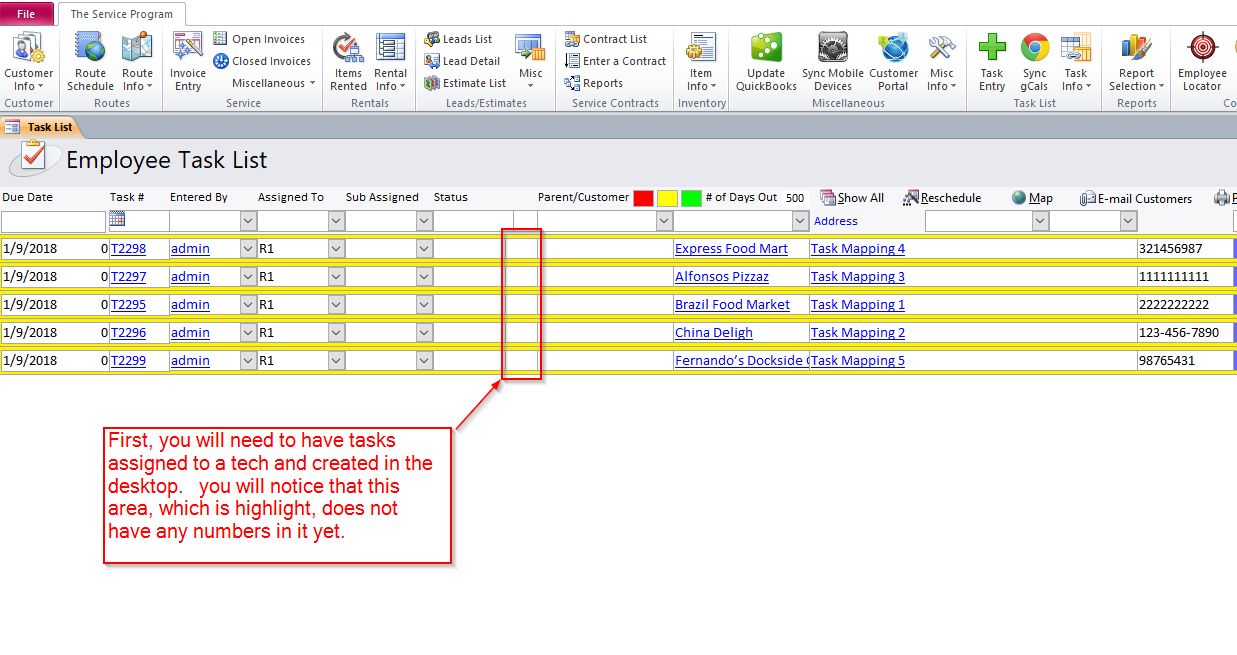
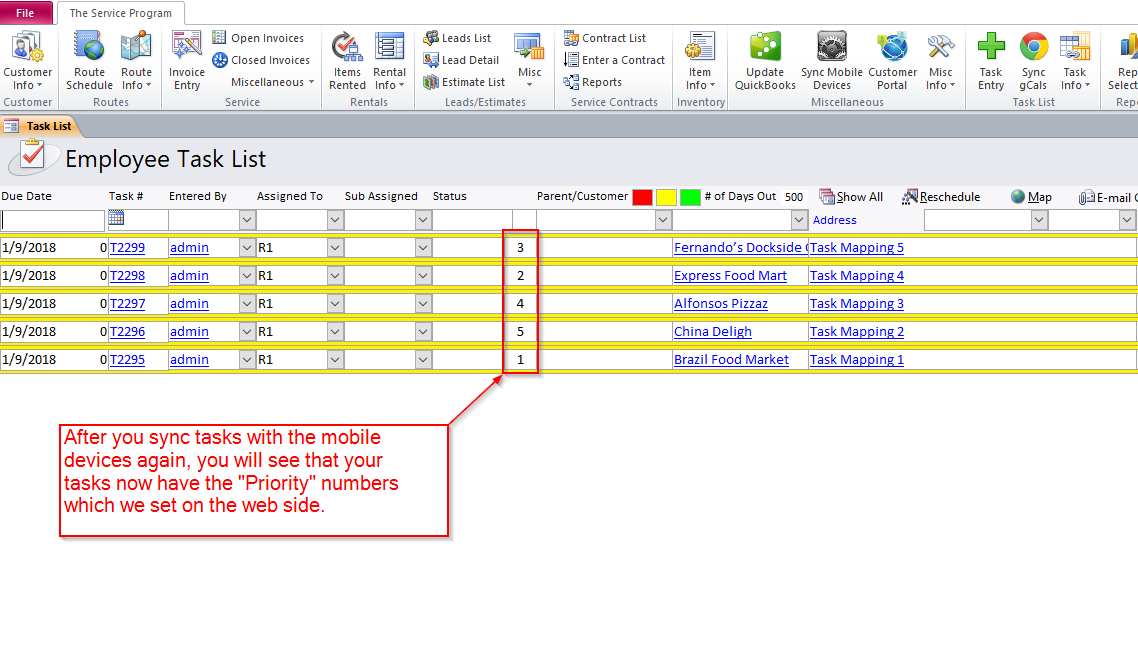
- First, you must have Tasks on your open task list and you must sync them with Mobile Devices (The Web App). If you do not have the Mobile Devices, you will not be able to use this feature. If you look at the screenshot below, you will notice that none of the tasks have a "Priority" number set, yet.
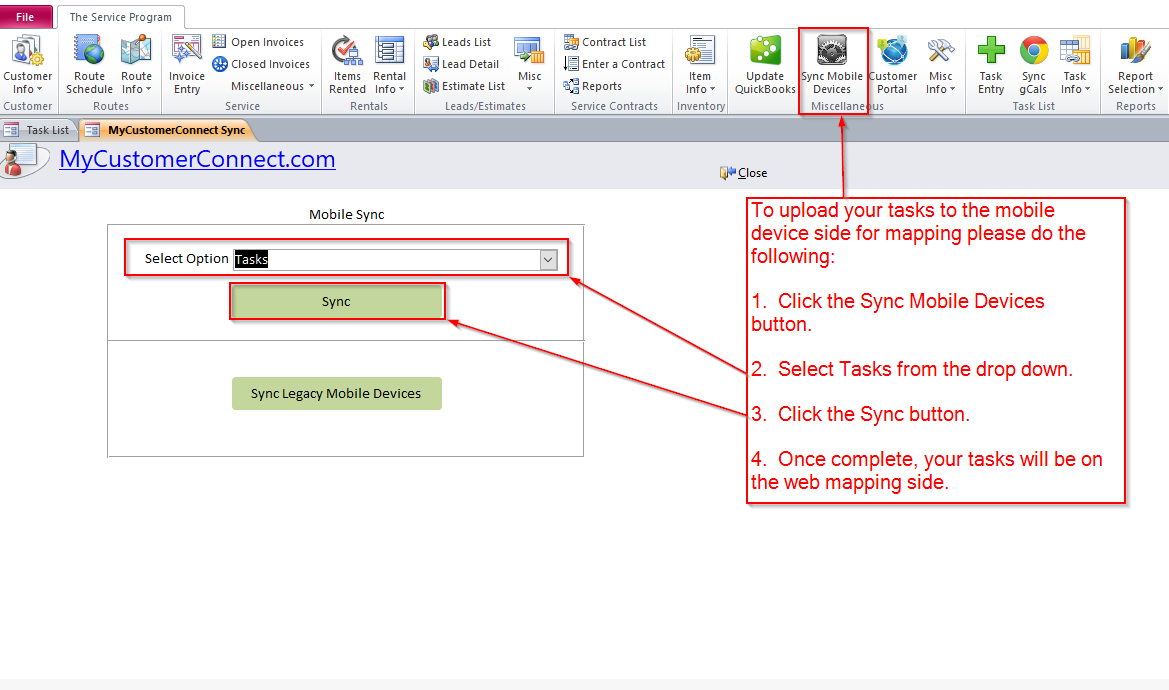
- To upload any new tasks to the mobile devices, click the "Sync Mobile Devices" button along the top of the software. Then, you will select "Tasks" from the drop down and click the "Sync" button. Once the sync is complete, move to the next step.
- To get to and sign into the Web App Mapping area. Click the button on the front of the task list that says "Map" to bring up the page that is shown below. You can sign in with the same username and password that you use on the desktop.

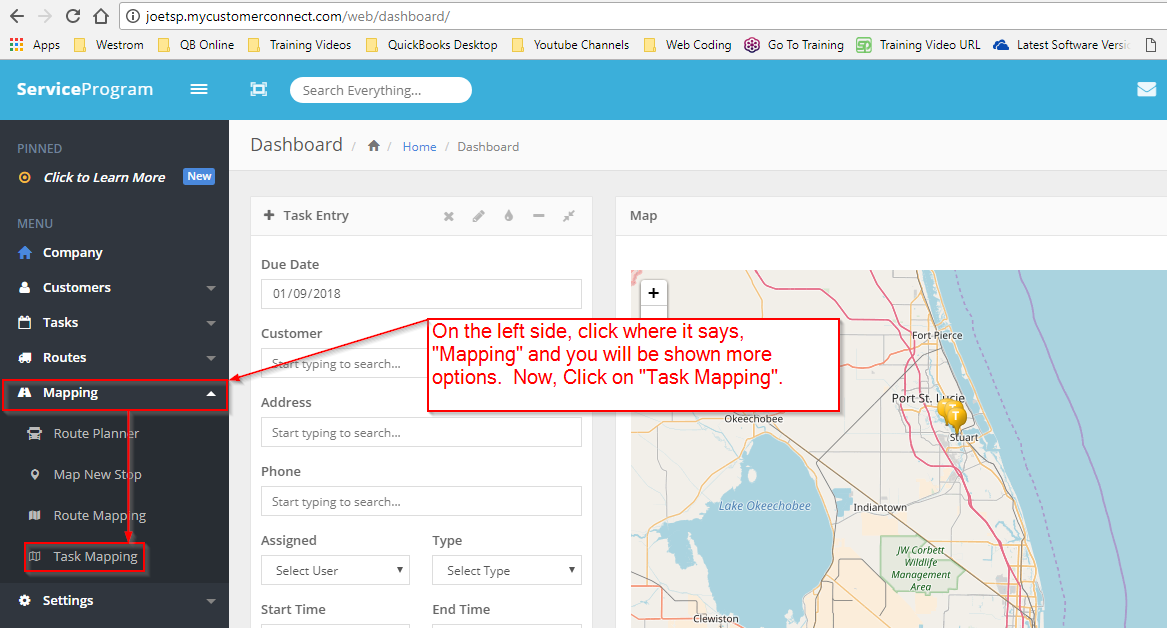
- Once you are signed in, On the left hand side click on Mapping -> Task Mapping.
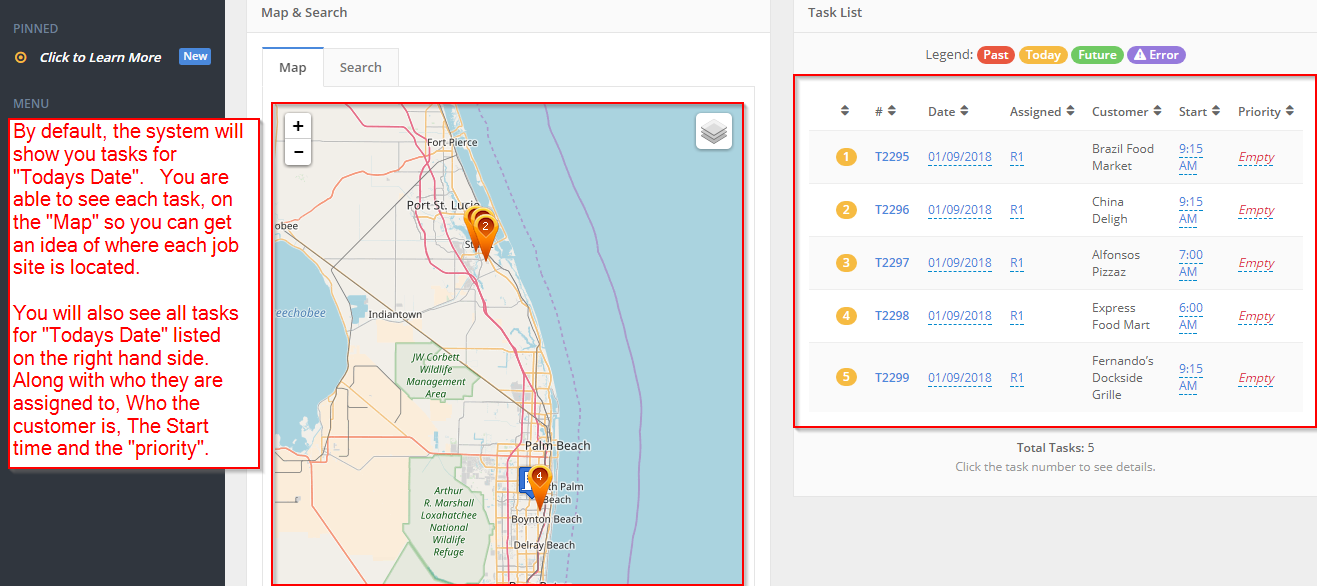
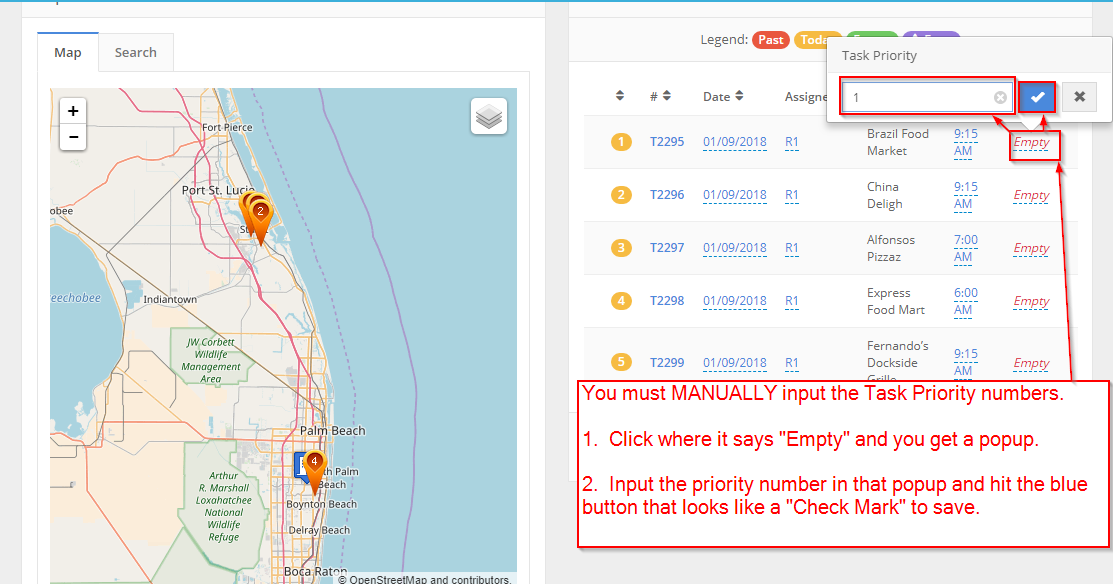
- By default, the system will show you tasks for "Today". The system will put them on a map so you can see where each stop is located. IF any of your stops have a purple "Error" button, click on that button and input a correct address so the system can map that Task.
- If you do not wish to look at today's date on the Task Mapping, then click the tab that says "Search". You can input a date range by using the "start date" and "end date" options. If you only want to see one day, use the same date for both of those options.
You can select an "Assigned" or "Task Type" if you wish or leave it blank for all.
Under the "Task Sequence" area, you do not have to choose any of the options, you can leave those blank and simply hit the Map button. However, if you want the system to display the tasks by "Distance", "Start Time" or "Priority", you can select one of those options and then click the MAP button. You will see the result on the right hand side where all tasks are listed.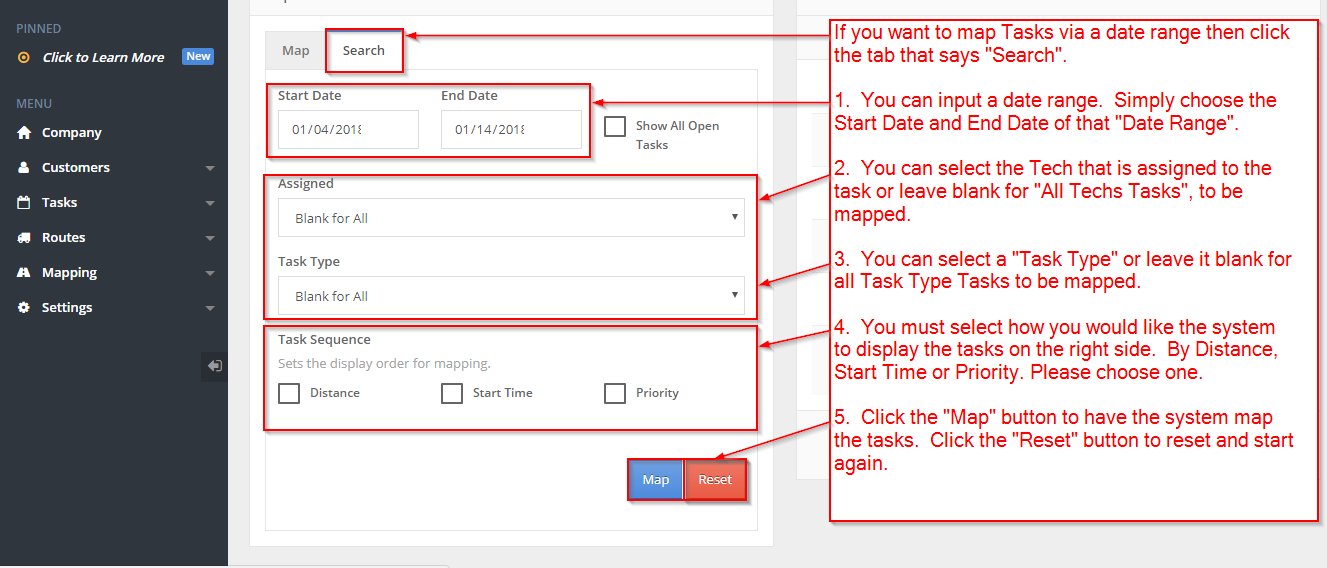
- Once the system has mapped all of your tasks. You will see that there is an area that keeps track of the task "Priority" numbers. You will use the map layout to review all of your tasks and then you can click the "Empty" link to fill in the task Priority numbers. These numbers will pull back into the desktop and then you can print those tasks out in "Priority" order.
- Once you have set a "Priority" for all tasks. You must sync tasks with the mobile devices to pull in those changes. Along the top of the software click the "Sync Mobile Devices" button and choose tasks from the top drop down. Then click the "Sync" button. Once complete, go back to the open task list and you will notice that all of your tasks now have the "Priority" numbers that were set in the previous step.
- The last step is to print these tasks out in "Priority" order for your Techs. To do this, click the "Print" button at the top of the task list and you will be brought to the "Task Reports" page. Select your "From Date" and "To Date", then choose the report named "Print Task Log by Priority". Click the Print button and you will see your tasks in "Priority" order. Now, you can send that to your printer and hand that info over to your Techs.
