- To use the Web Mapping and Optimization with Google you will first need to get to your route schedule. Click on the Route Schedule button. Then, Click on the MAP button along the top of the route schedule.

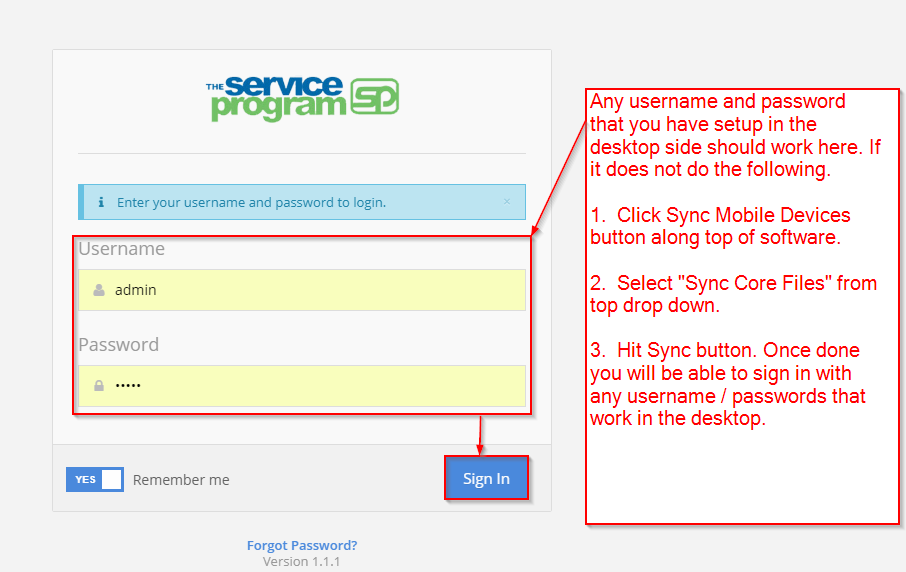
- You will be brought to the web mapping sign in page. We recommend that you add this page as a favorite and or bookmark. You can sign in with any username and password that works in the desktop. If you have added new usernames to the desktop and need to know how to sync them to the web CLICK HERE for a video or review the screenshot below.
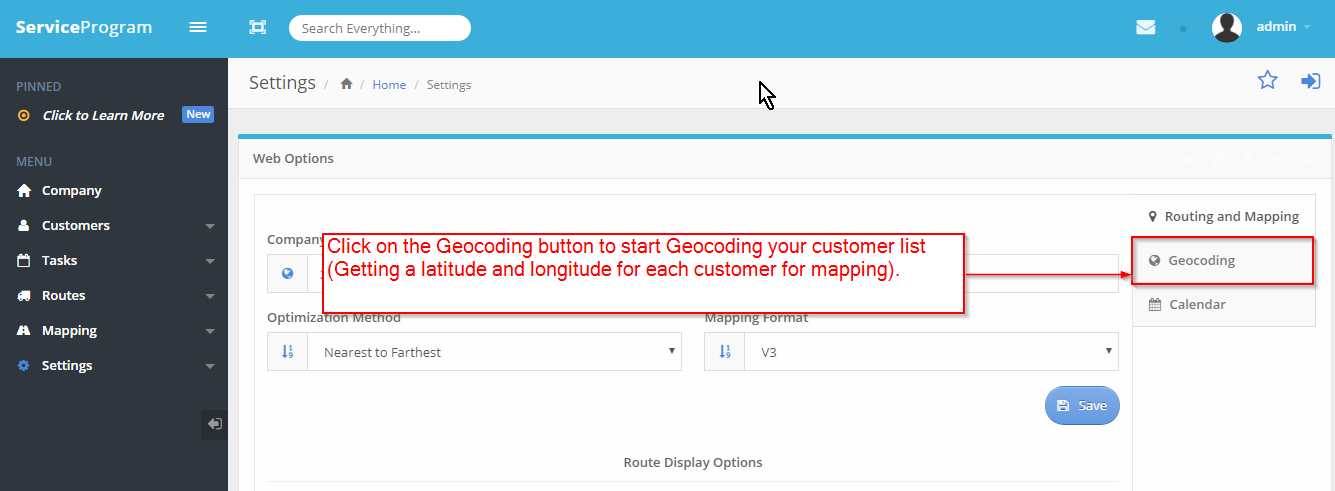
- If you have added any new customer names OR this is your first time using the Mapping System you will need to "Geo-Code" your customer list. When you Geo-Code the system is getting the Latitude and Longitude of all customer locations based upon the customer Addresses. Please make sure all customer addresses are setup properly in the QuickBooks side and carried into our software. For more information setting up your customer addresses properly please CLICK HERE . To start the Geo-Code process click on Settings - > Web Options.

- Next, Click on the button that says "Geocoding" on the right hand side.
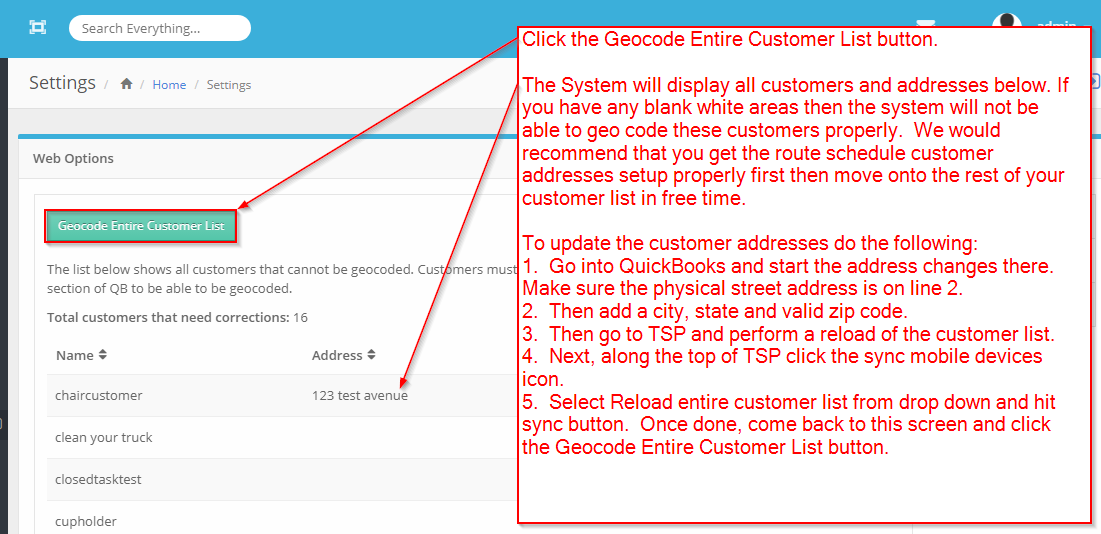
- You will now be shown a complete list of ALL customers that are on the mobile device side and available for mapping. You will notice that we also display the Address, City, State and Zip of each customer. This is an easy way to review your customer list to see which customers do not have properly formatting. To Geo-Code this customer list, click on the button that says, "Geocode Entire Customer List". The system will leave whatever customers it was not able to Geo-Code on this list once you are done.
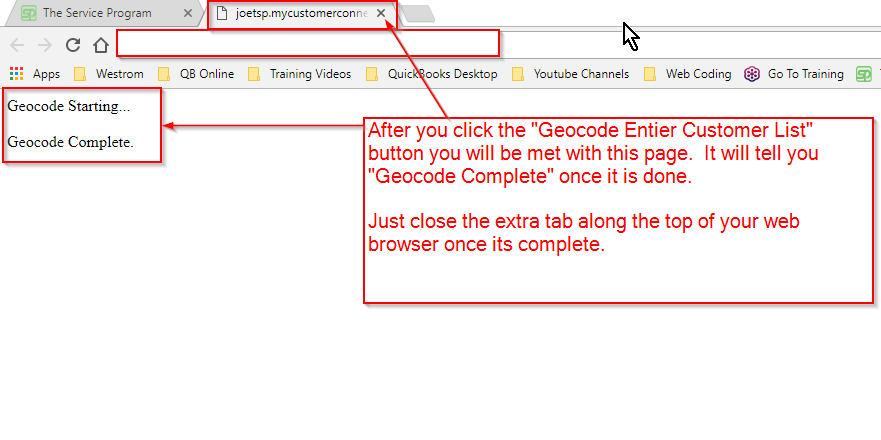
- Once you hit the "Geocode Entire Customer List" button you will be brought to another page, which will tell you its "Geo-coding" and then it was say "Geocode Complete", once it is done. You can simply close that page once its done.
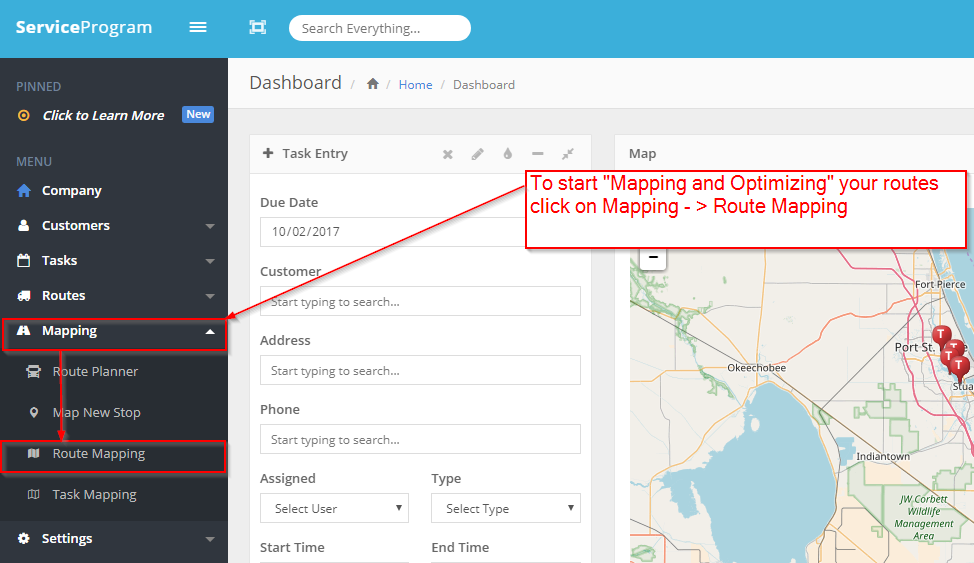
- Now that you have Geo-coded your customer list, you can Map and Optimize route stops. On the left side click on Mapping -> Route Mapping.
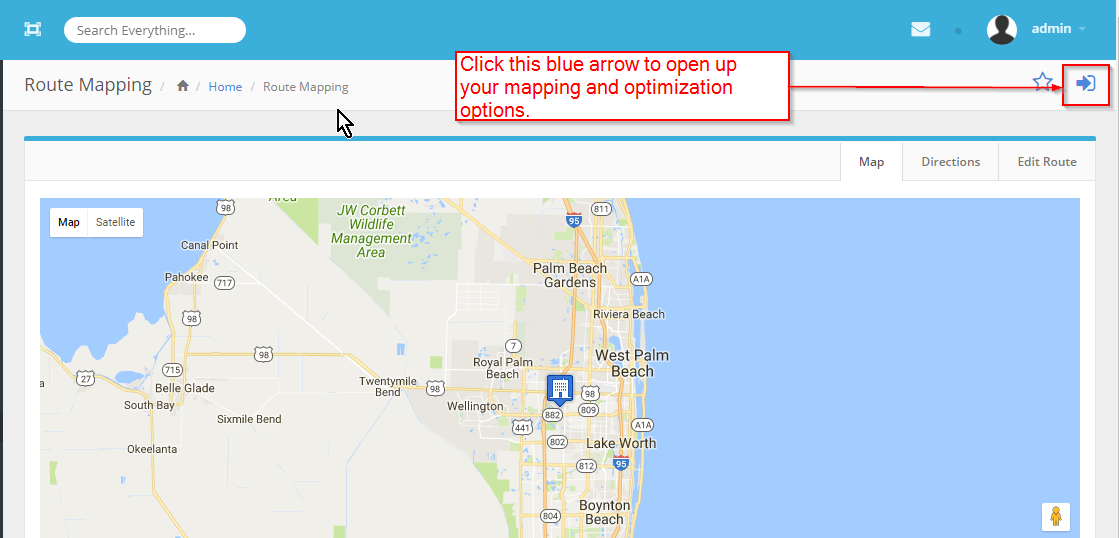
- You will be brought to the main web mapping screen. Click the "Blue Arrow" on the upper right hand side to expand the options you will use to map.
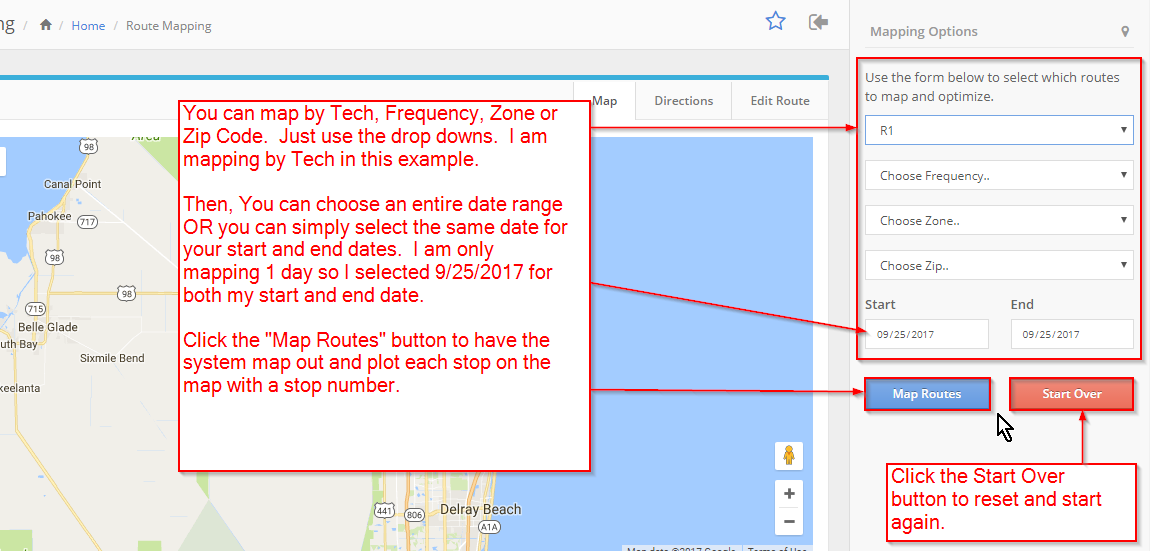
- Now, you can map using the Route Tech Name, Frequency, Zone or Zip Code. Additionally, you can map using a "Date Range" or just 1 day at a time. To use a Date Range you must enter a Start and End date and the system will map anything inbetween those dates. To use a single date (For Example, if you only wish to map the route from 9/25/2017) then select 9/25/2017 as both your Start and Stop date. Then Click on the "Map Routes" button.
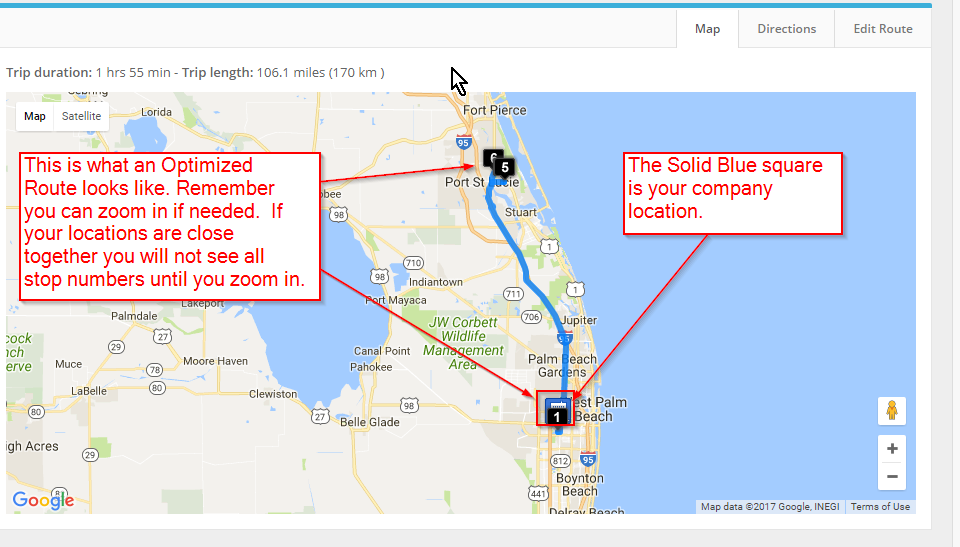
- The system will now display all stops on the map but we do not have anything connecting them yet. In order for the system to Optimize this route you MUST click the "Optimize" button.

- After the "Optimize" button is clicked on you will notice your routes are all connected via a blue line. If you dont see all stop numbers, you must zoom in using the scroll button on the mouse or the plus sign to zoom on the mapping screen.
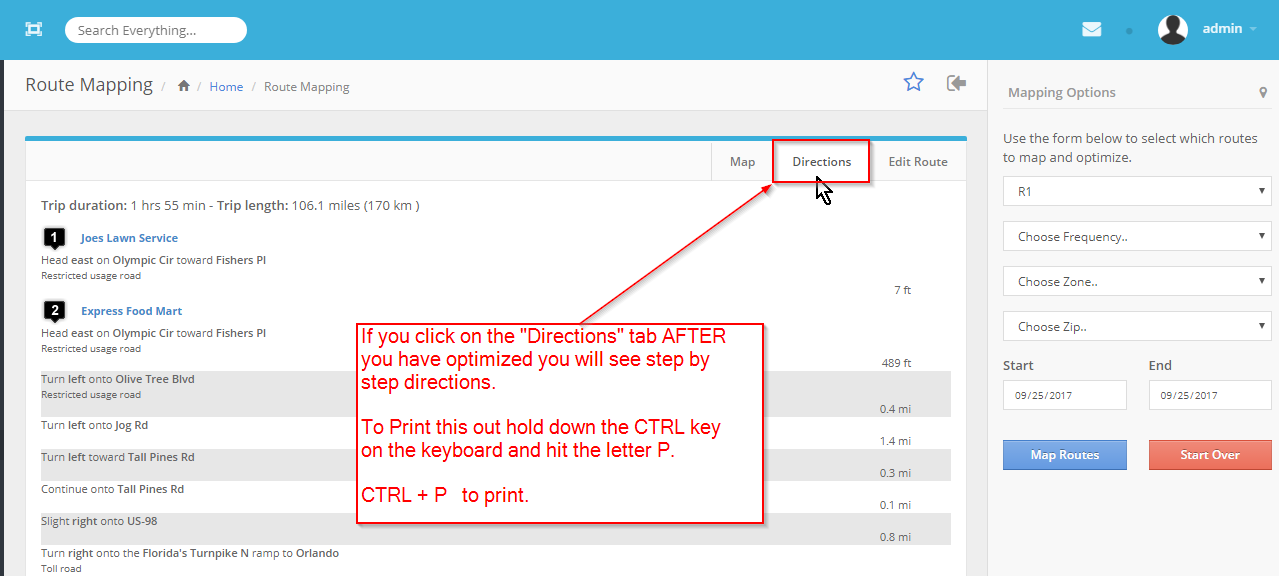
- Now, you are able to click on the tab that says "Directions" to get the directions for the entire route. In order to print those directions, hold down the CTRL key on the keyboard and hit the letter P. CTRL+ P .
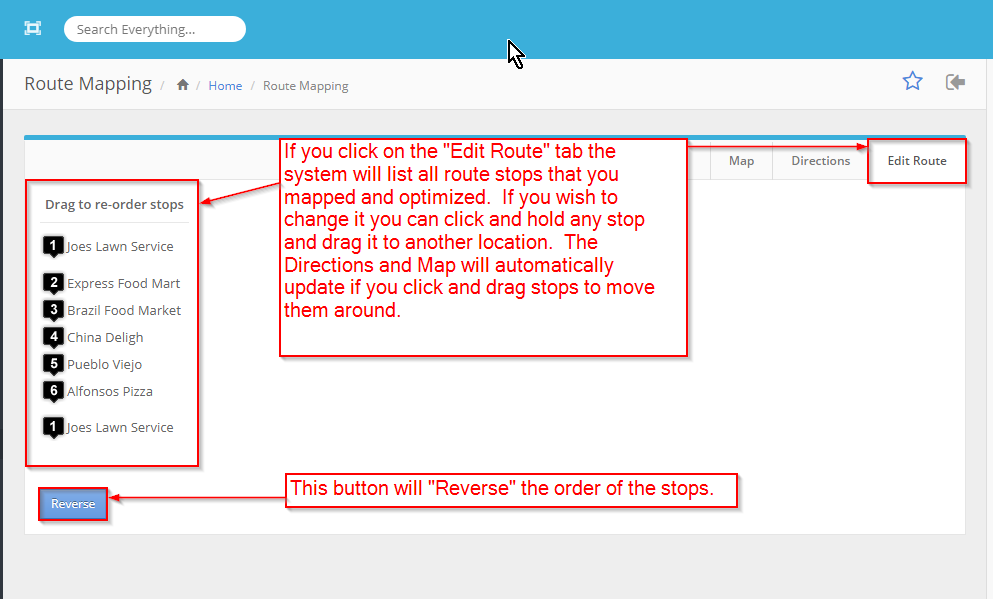
- After the stop is "Optimized" you are also able to click on the tab that says "Edit Route". If you do not like what Google believes is the best route, you can change the route yourself from this tab. Simply, click on a stop and hold down the mouse button, then drag and drop to move these routes around. Once you drag and drop a route, the "Map" and "Directions" tabs automatically update to reflect the changes.
HOW TO UPDATE THE DESKTOP ROUTE SCHEDULE WITH THE STOPS THAT YOU JUST "OPTIMIZED".
- Click Sync Mobile devices along the top of the desktop software.
- Select "Routes" from the top drop down.
- Click the sync button.
- Once the sync is complete, the desktop route schedule will update with whatever route order you selected on the Web Mapping and Optimization side.
IMPORTANT NOTE: - It is important to note that any changes you make on the google mapping web side, will sync back into the desktop the next time that you perform the steps listed above.