You will need to have some routes created in order to follow the steps below. You can find information about creating routes here.
Table of Contents
Step 1: Navigate to the RouteStar Online app login page
- E.g. examplecompany.routestar.online/app
Step 2: Login as the Route User that is assigned to the stops you need to complete
Step 3: Click on Route Schedule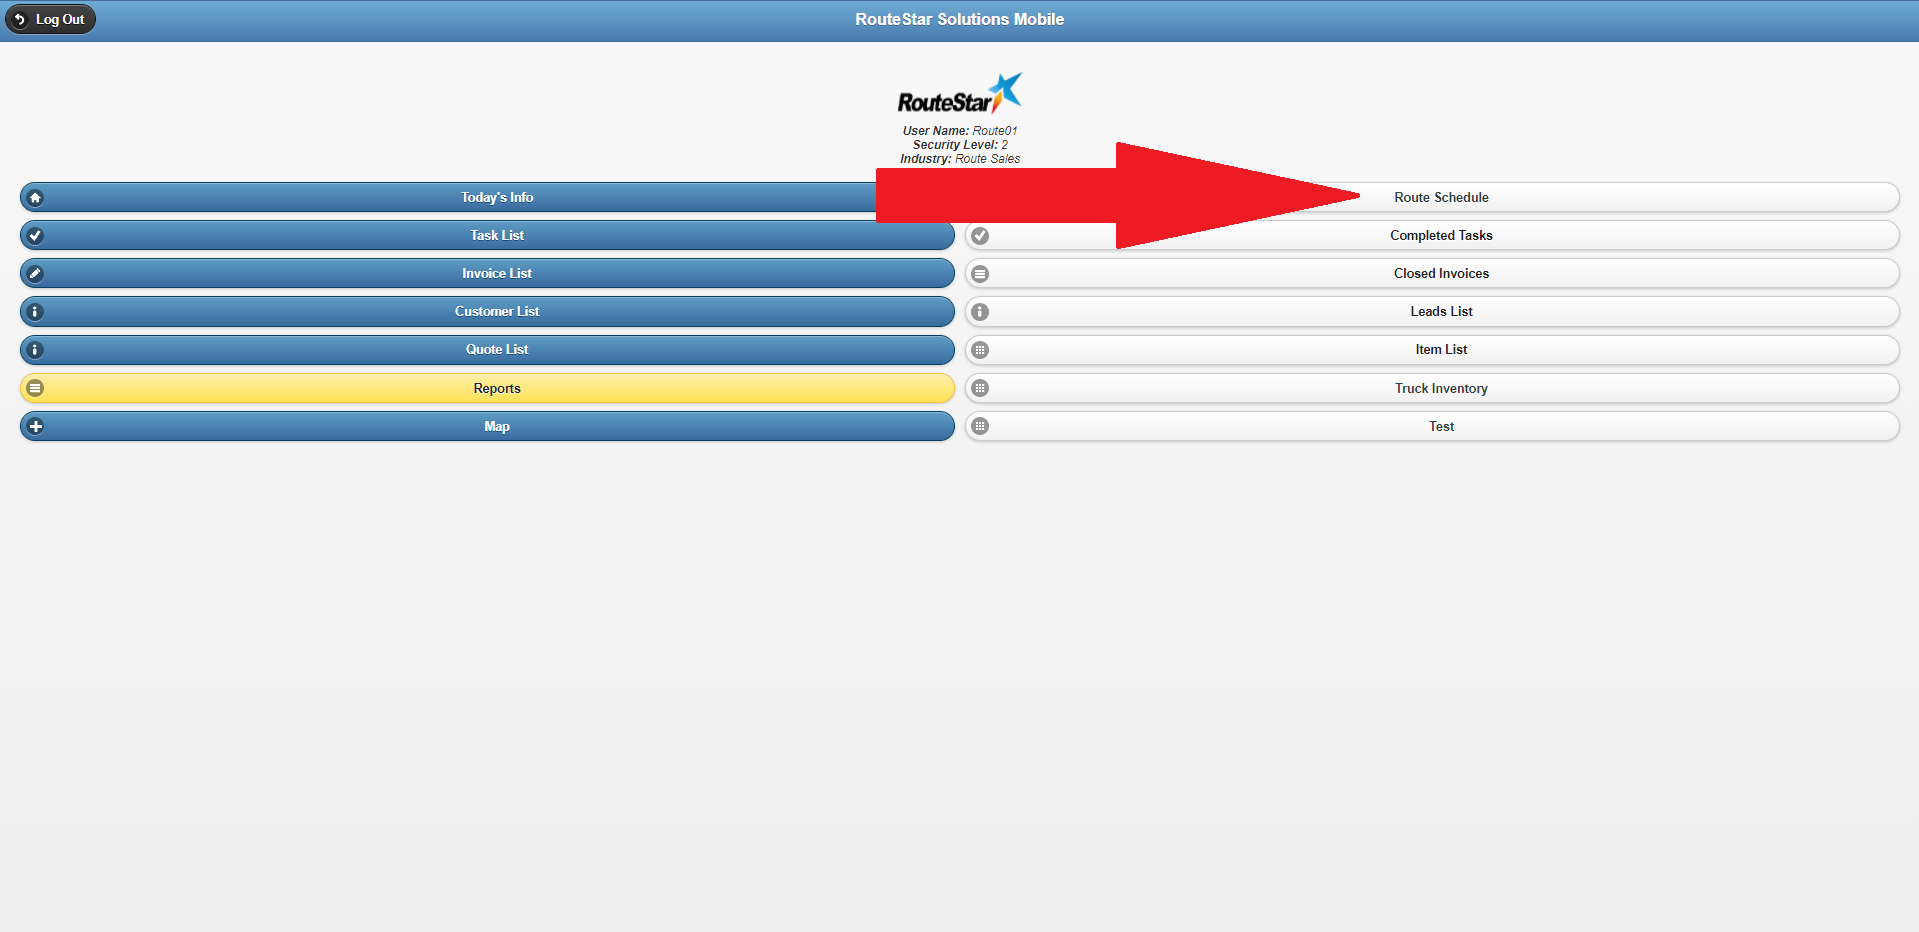
- Here you will see all stops assigned to this user in order by Date then Stop value.
- Note that we are able to see the notes from the 'Notes' column on the Route Schedule page on this list.
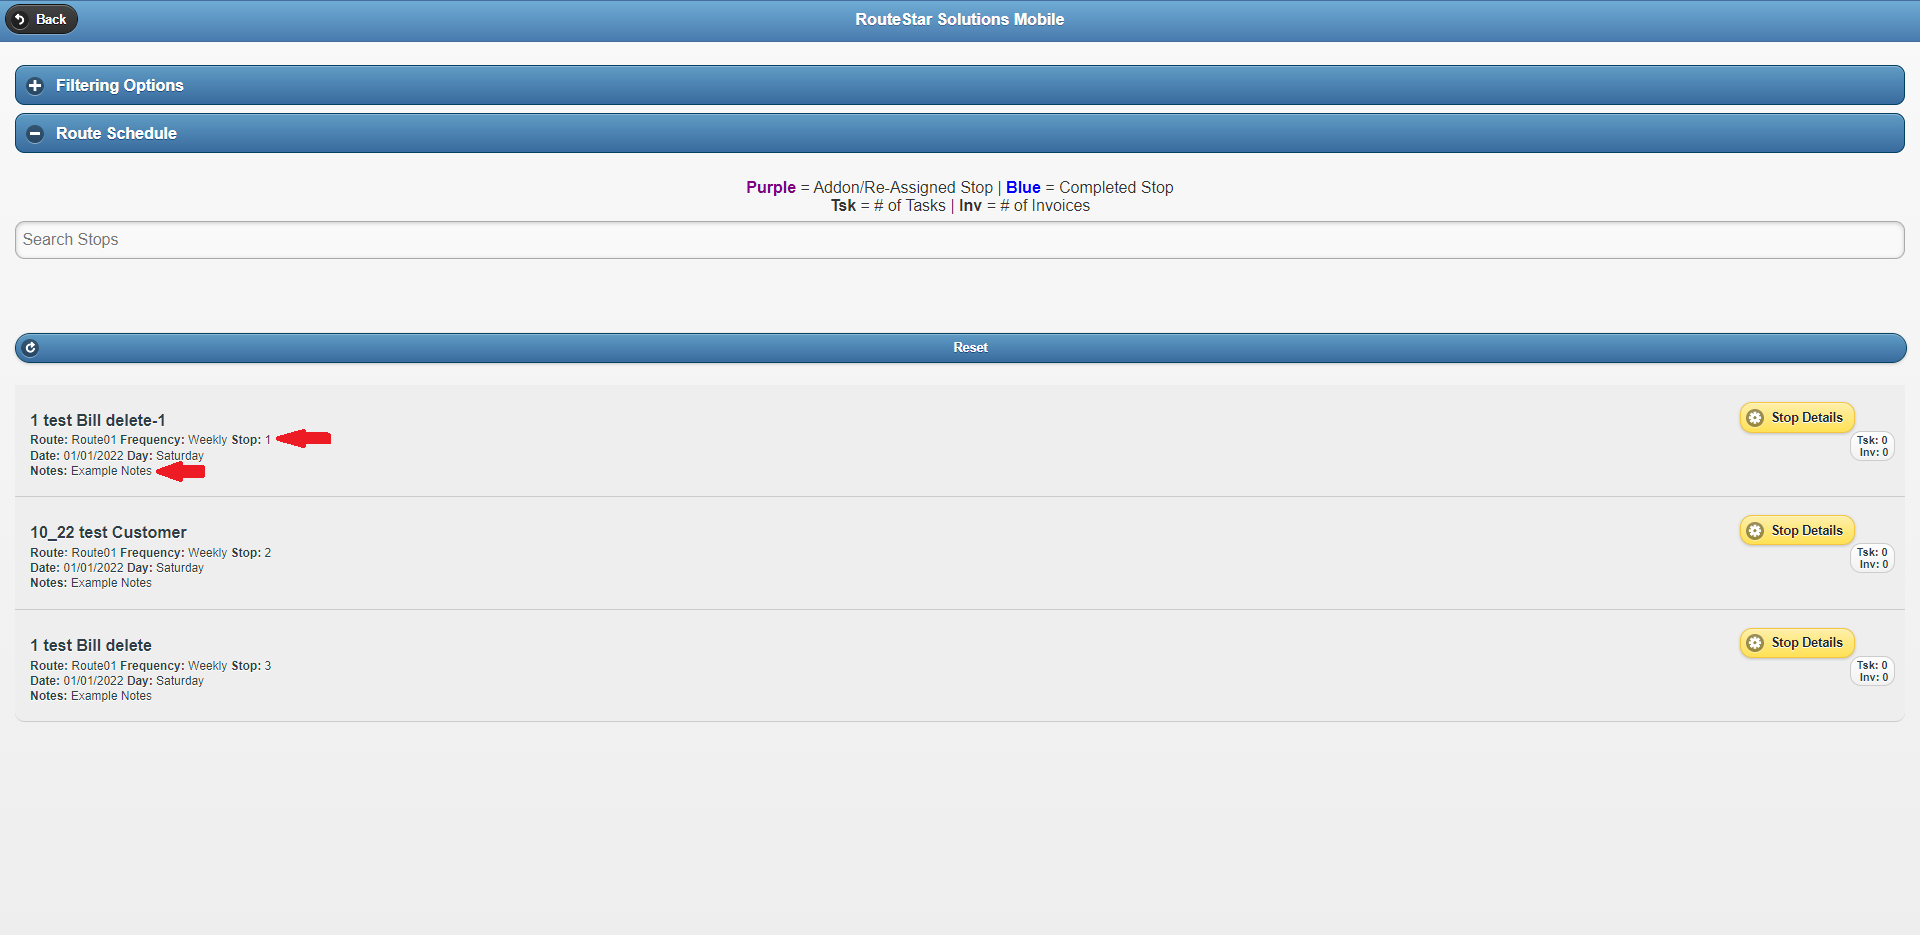
Step 4: Click on 'Stop Details'
- You can click on the 'Map' button here to launch Google maps and obtain turn-by-turn directions to the location.
- At the bottom of the screen we can see if there are any existing tasks or Invoices/Manifests already created and assigned to this user. (The naming convention of Invoices vs Manifests will depend on the industry you have set in System Settings)

Step 5: Click on 'Create Invoice' 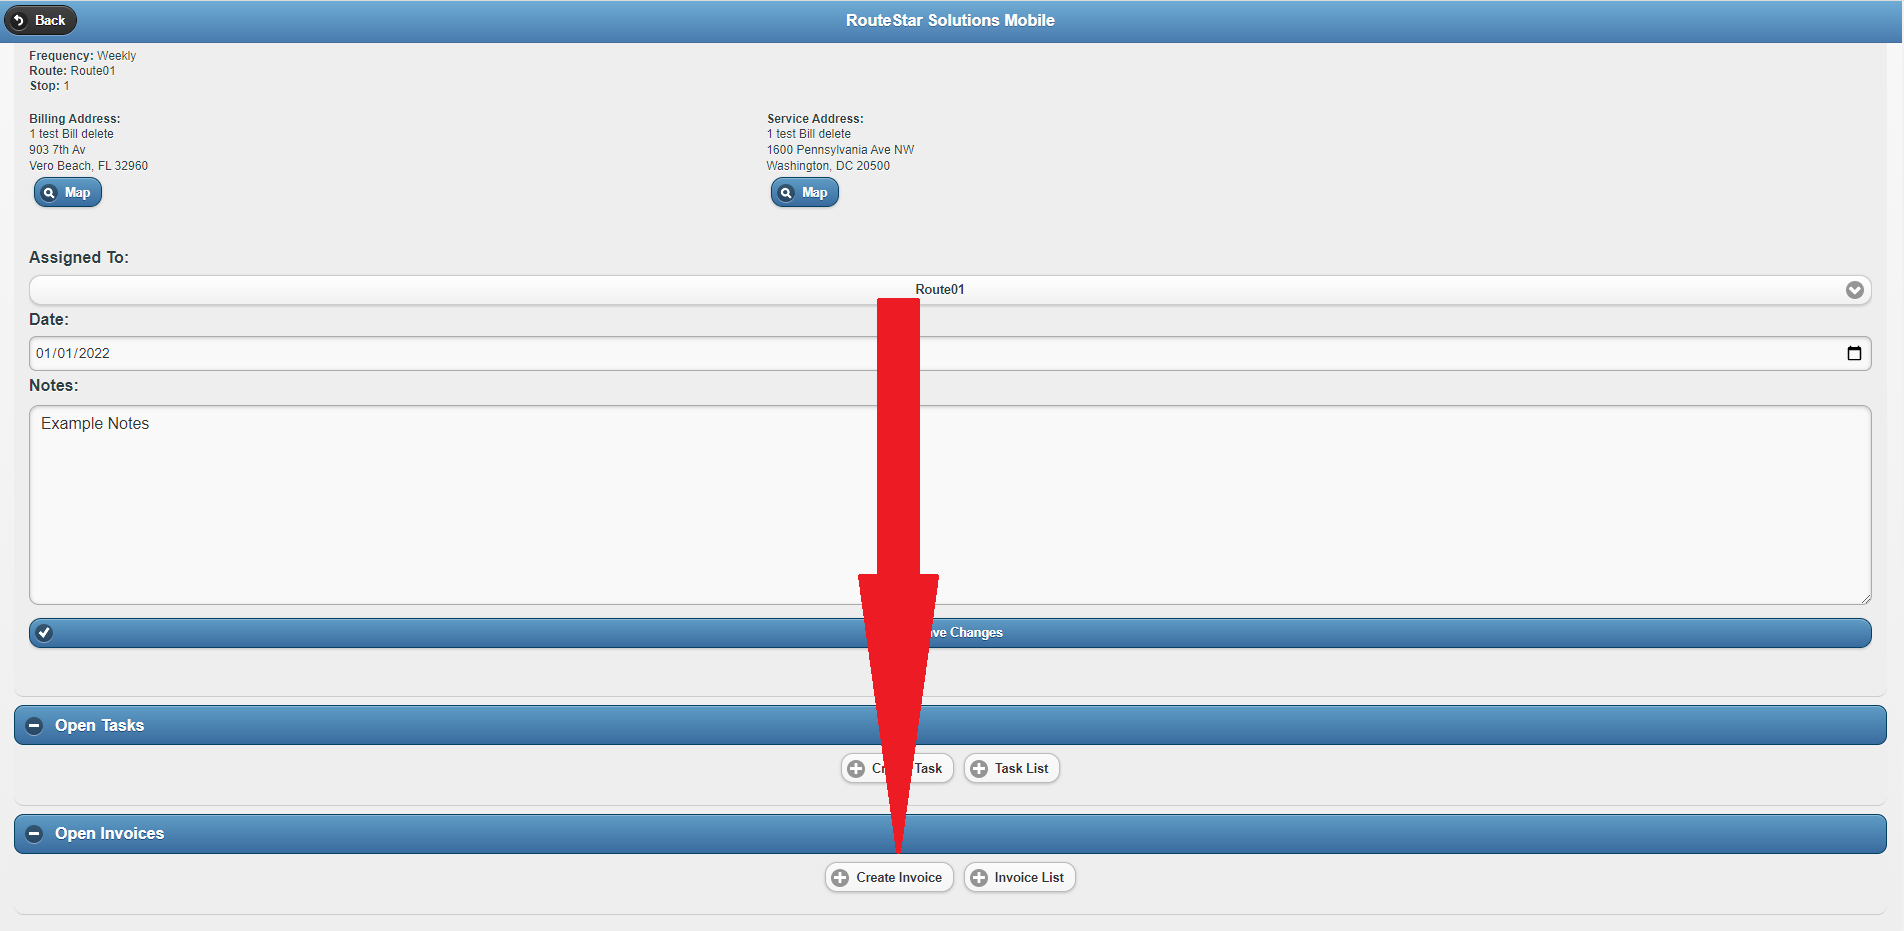
Step 6: Confirm that the customer's information is correct and click 'Save & Continue'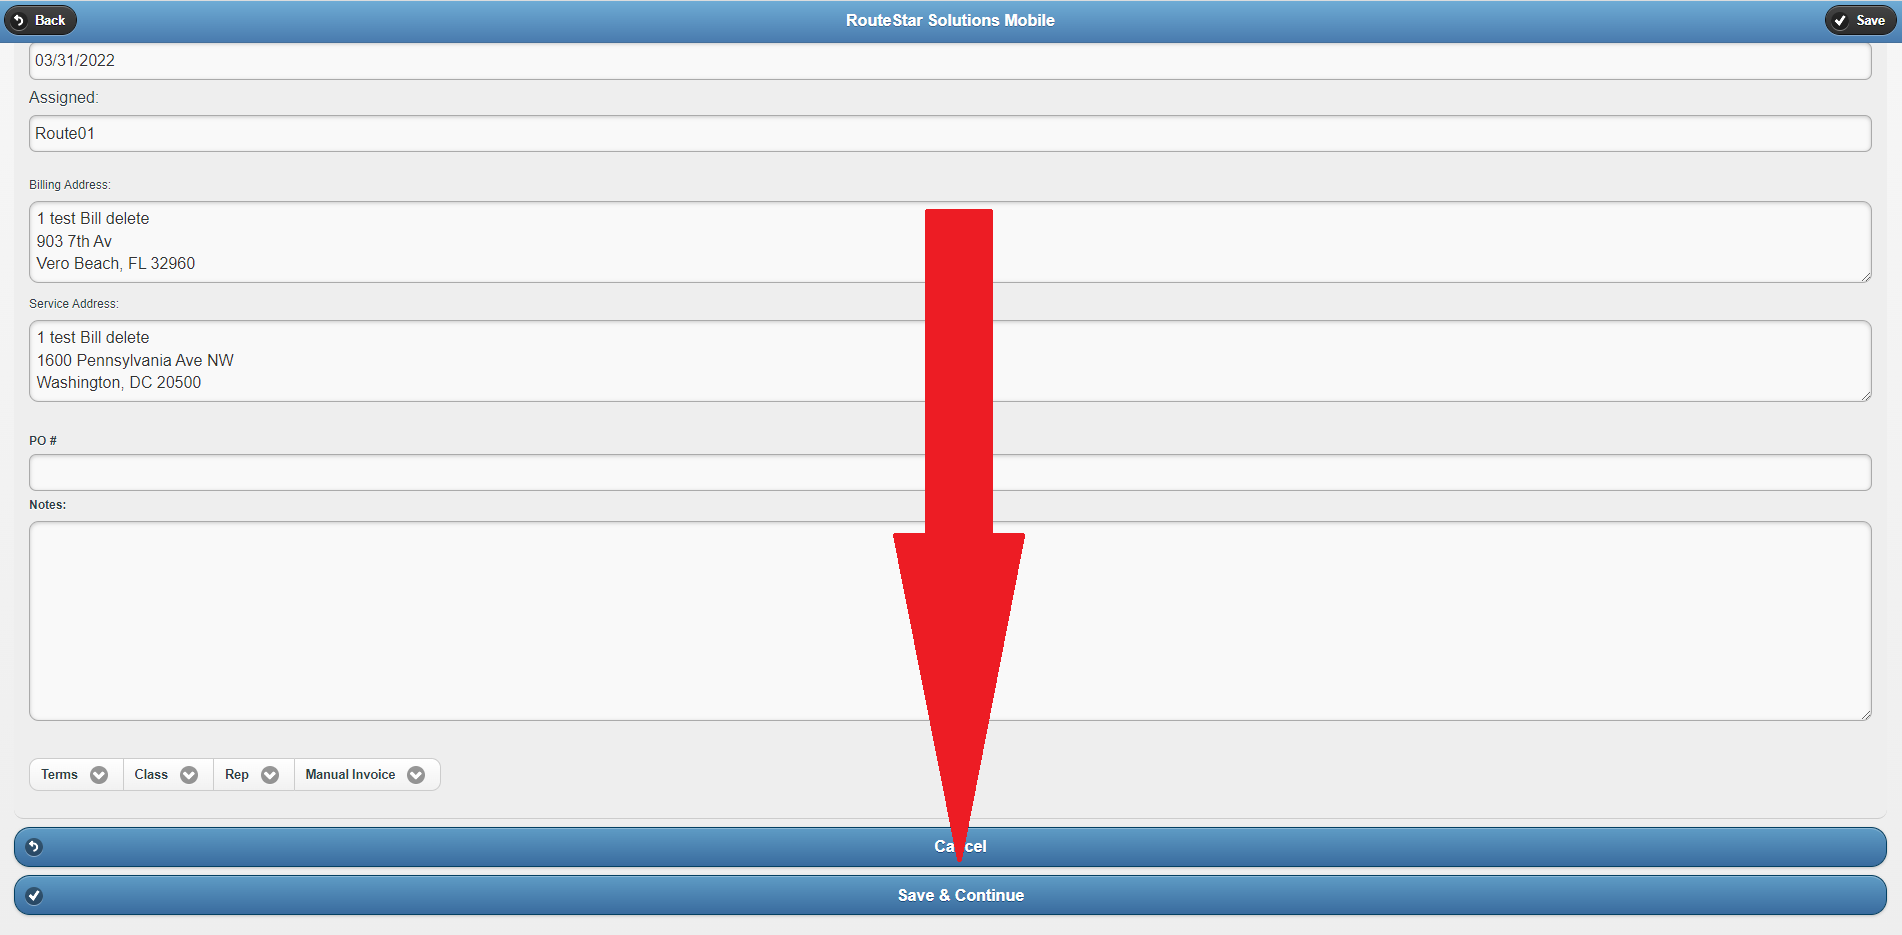
Step 7: Answer the pop-up prompt about whether you are on-site or not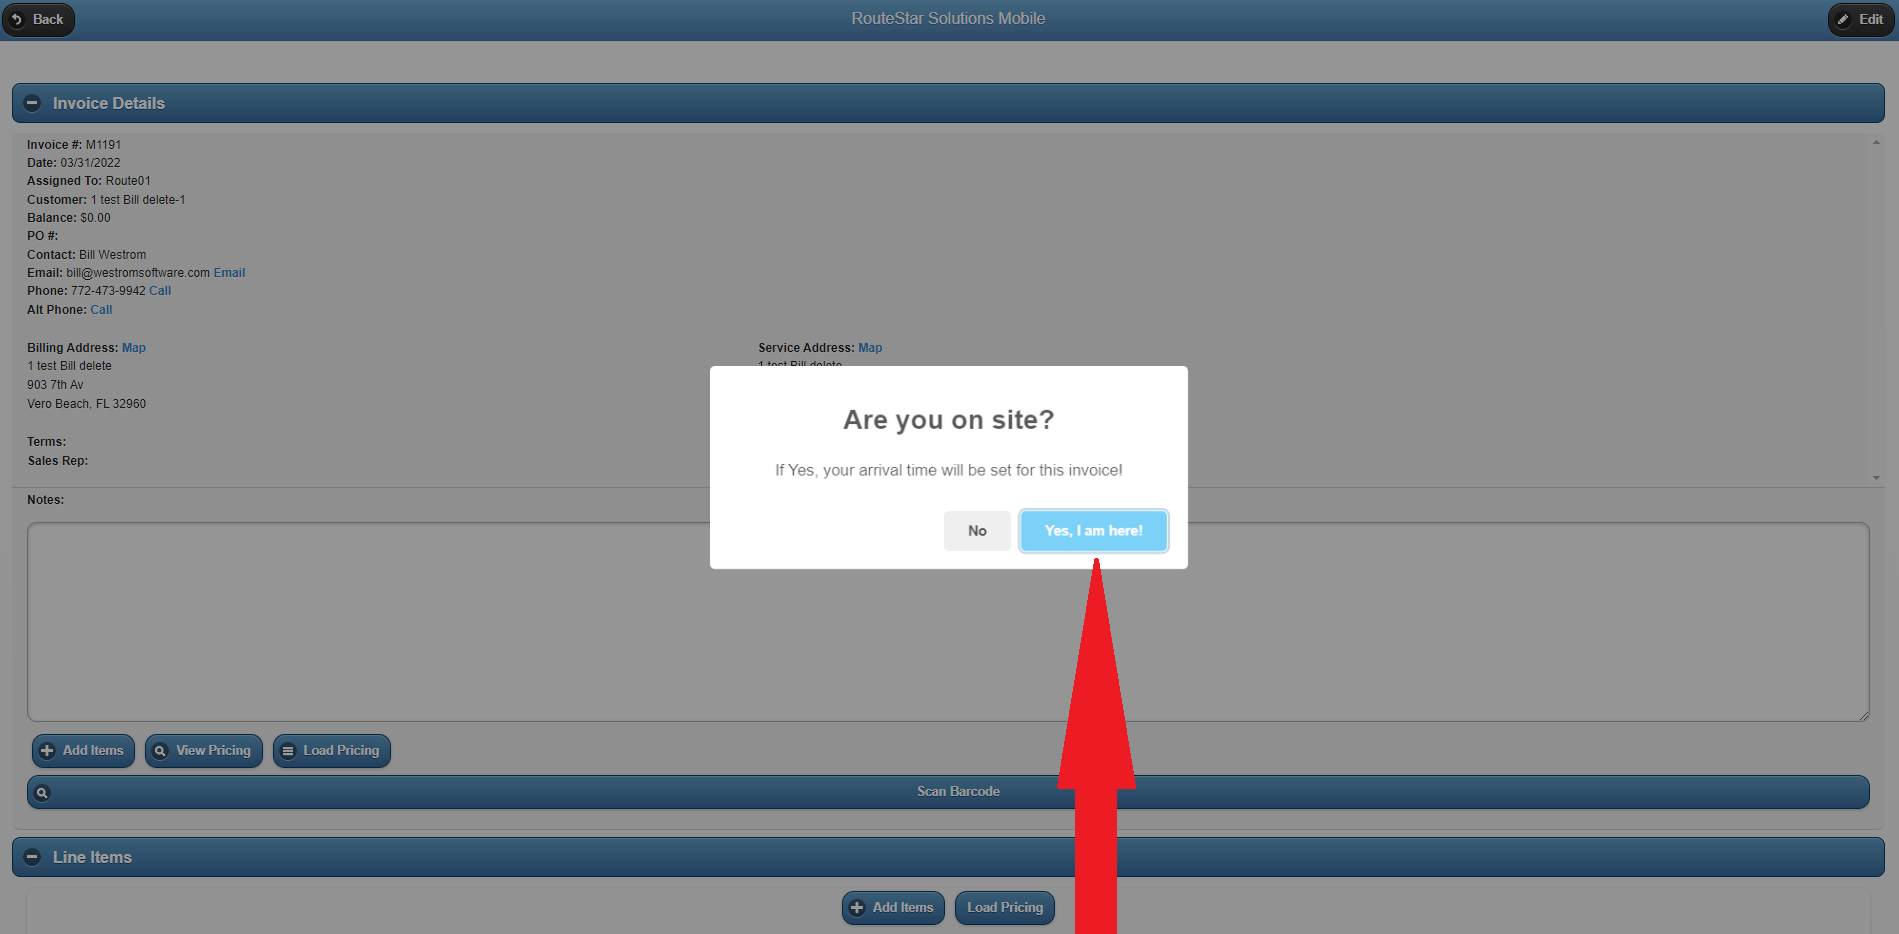
- The system will notate the time that you indicate you have arrived at the location
Step 8: Enter Line Items on the Invoice/Manifest by expanding the 'Line Items' section and clicking on 'Add Items'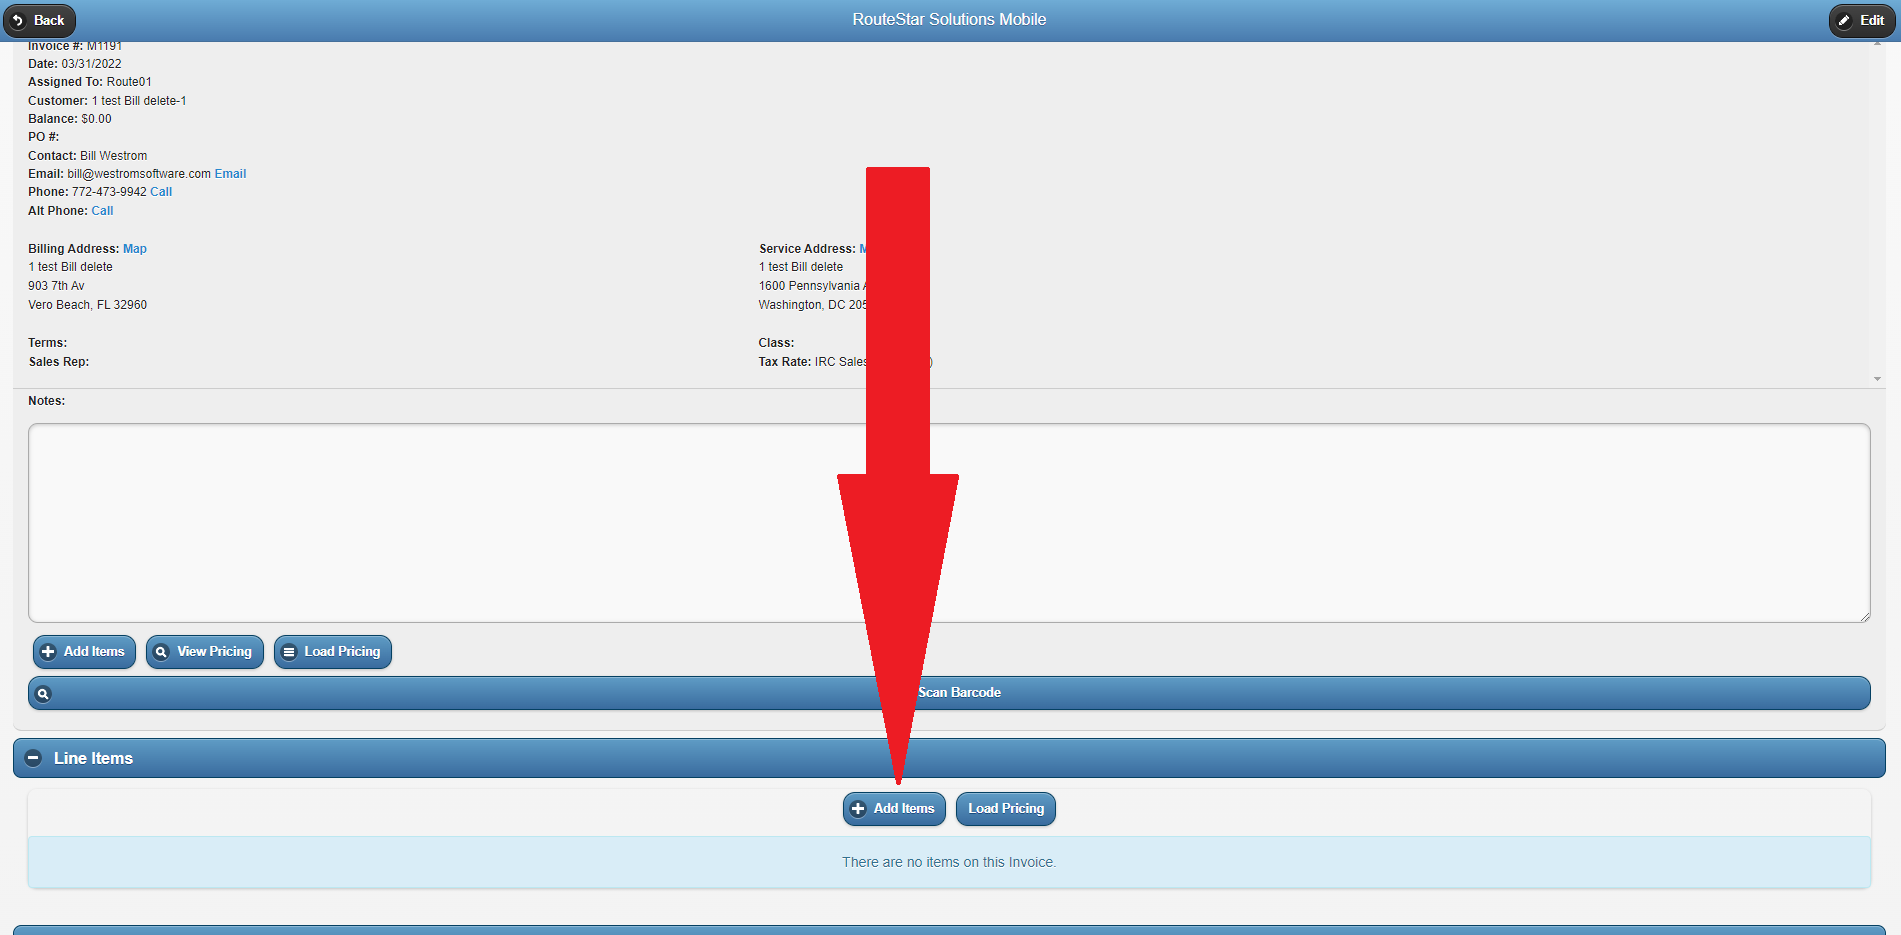
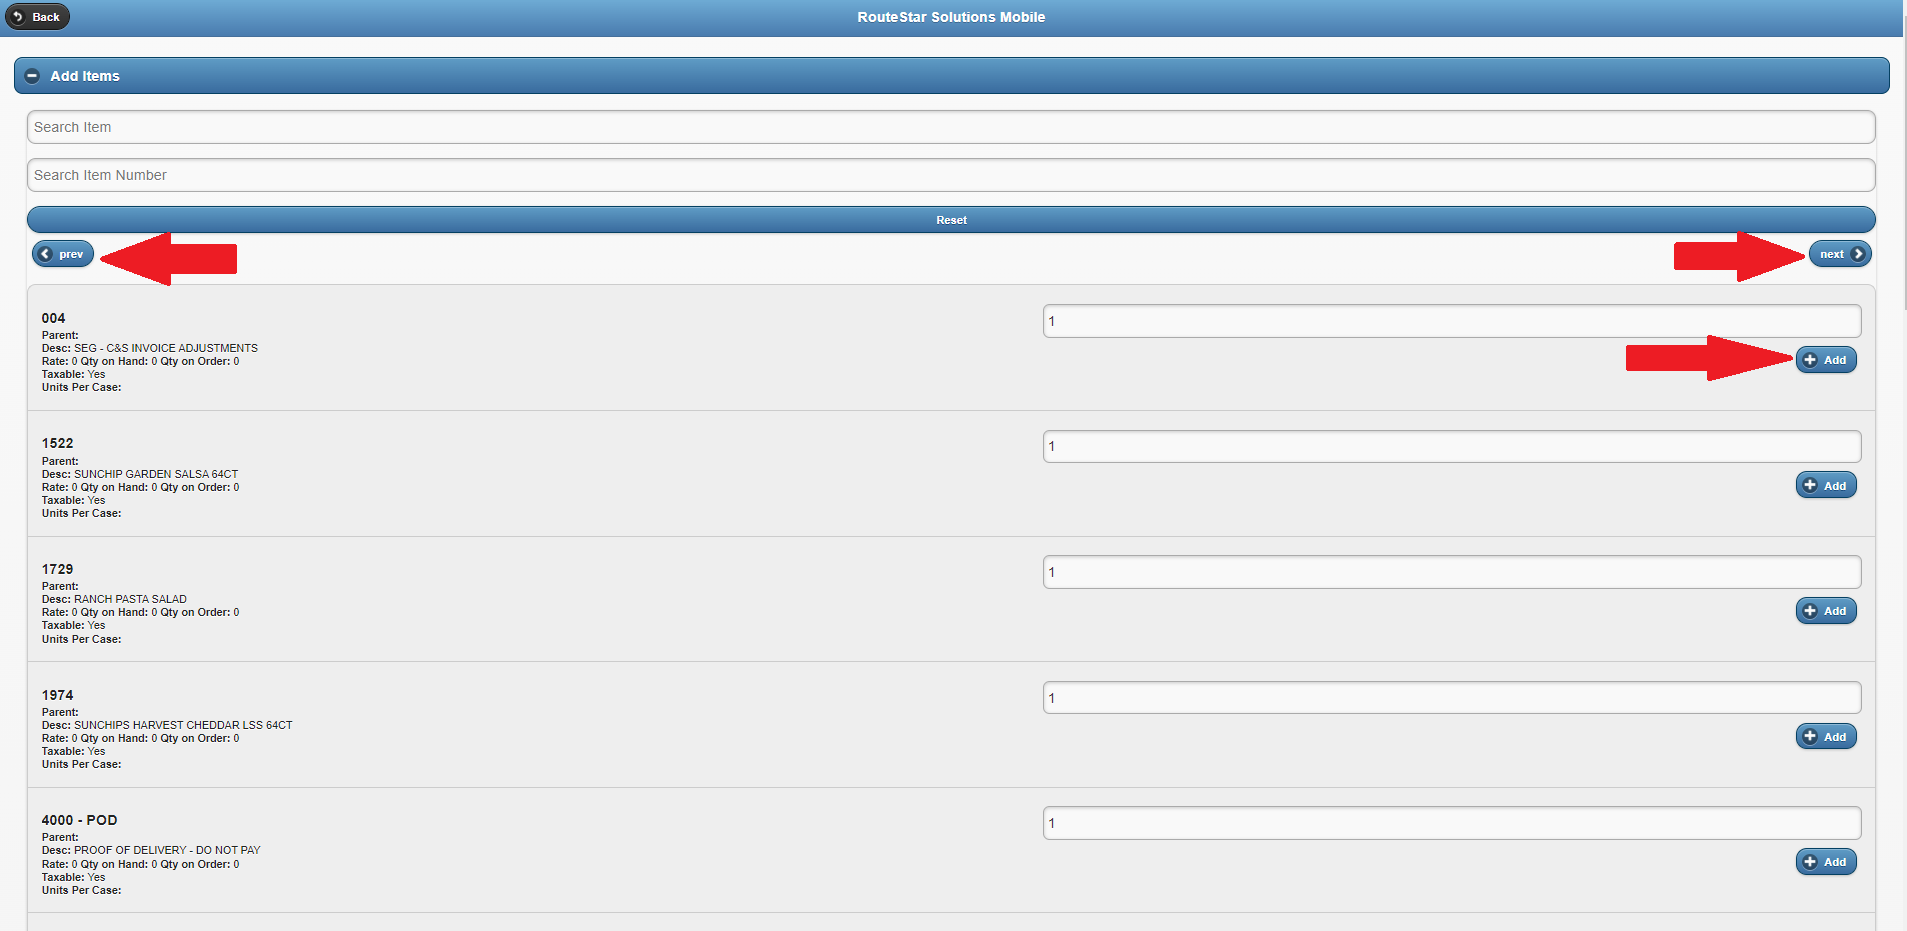
- You can use the 'prev' and 'next' buttons to navigate through the pages of your QuickBooks item list.
- You can add an item to the Invoice/Manifest by indicating the desired quantity and then clicking 'Add'.
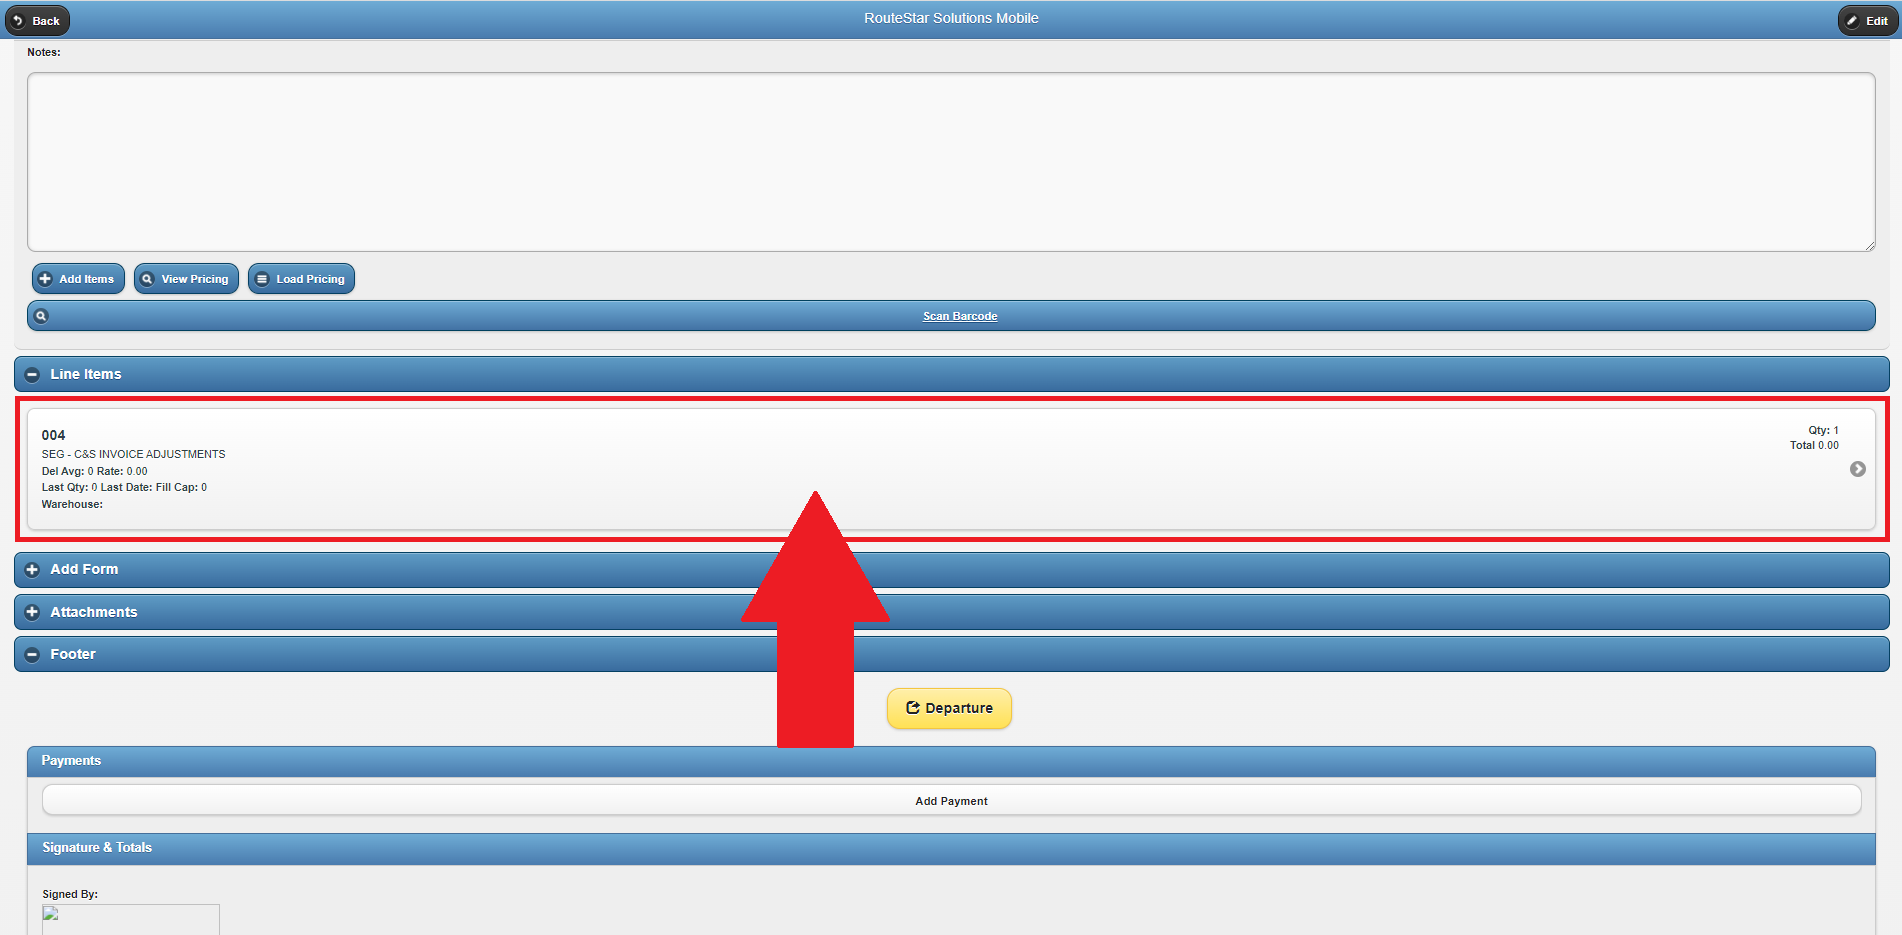
- After adding your items hit the back button in the top left corner to return to the invoice/manifest.
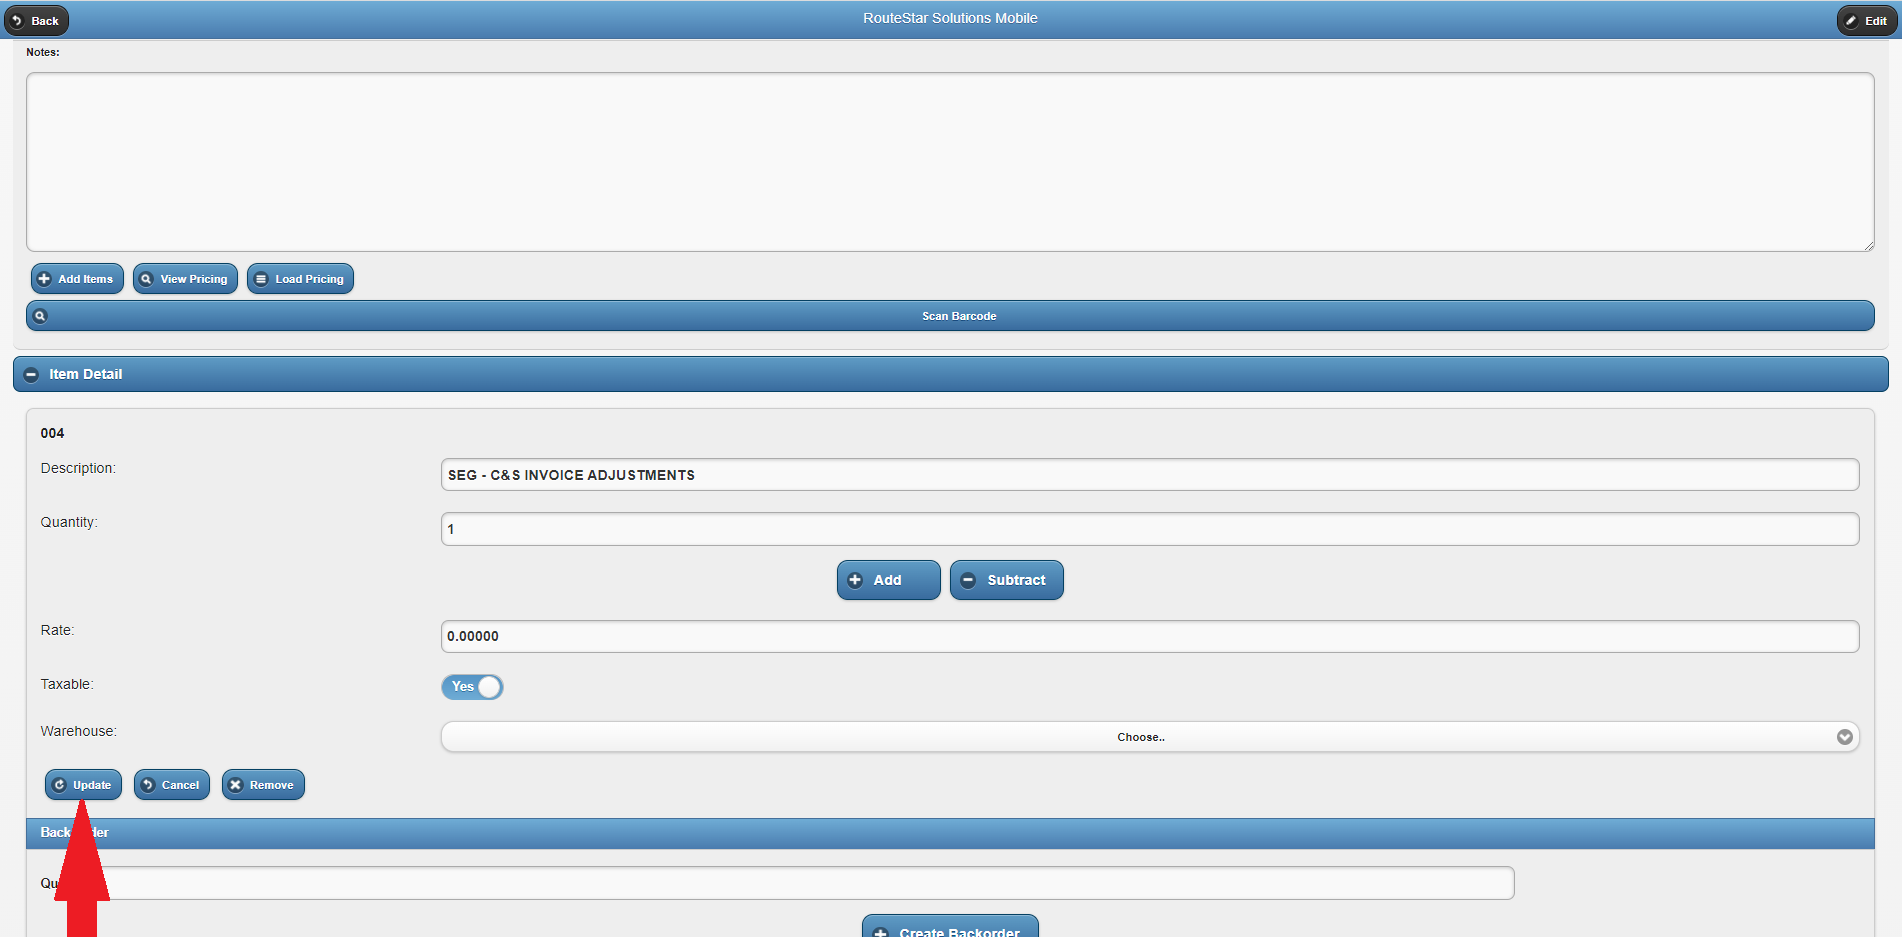
- You can make additional edits to the Line Items once they are added to the Invoice/Manifest by clicking on them. Once you have made your changes be sure to click 'Update'.
- Alternatively, you can add a preset list of items by clicking on 'Load Pricing'. Customer Pricing will be covered in a separate article in the future.
Step 9: Attach any Forms needed by first expanding the 'Add Forms' section
Step 9a: Select the Form you want to attach from the list of available forms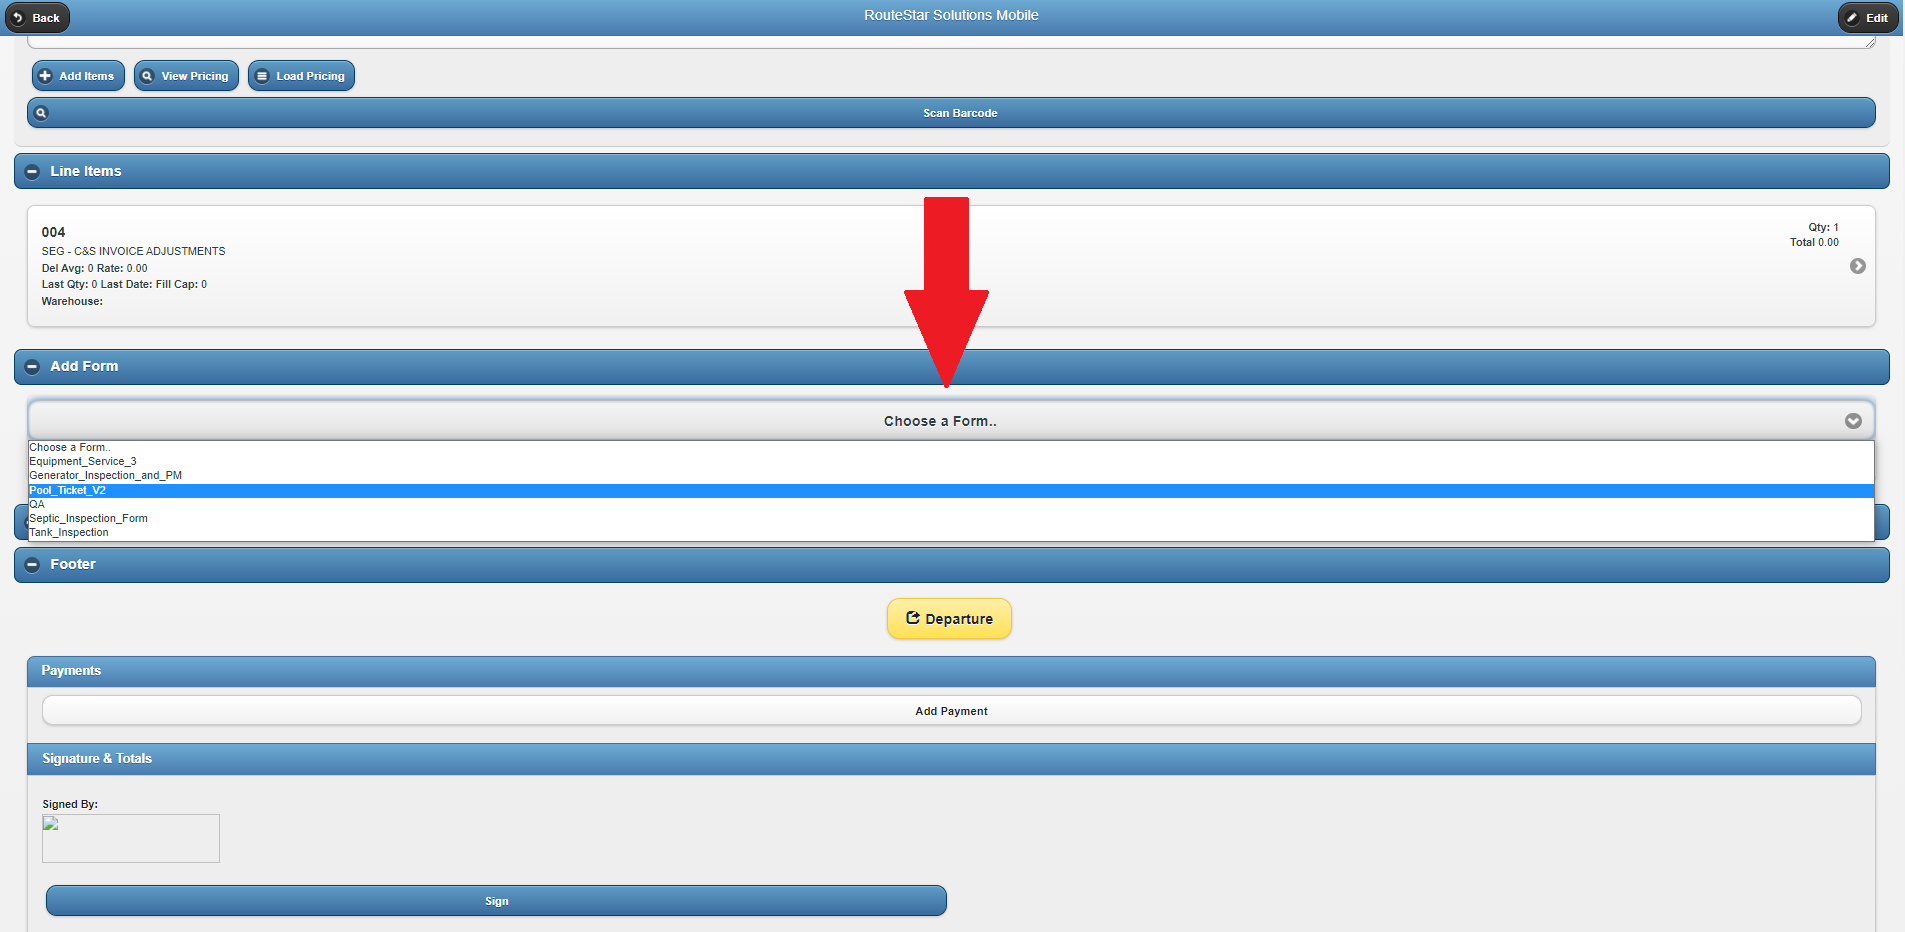
Step 9b: Click 'Add Form'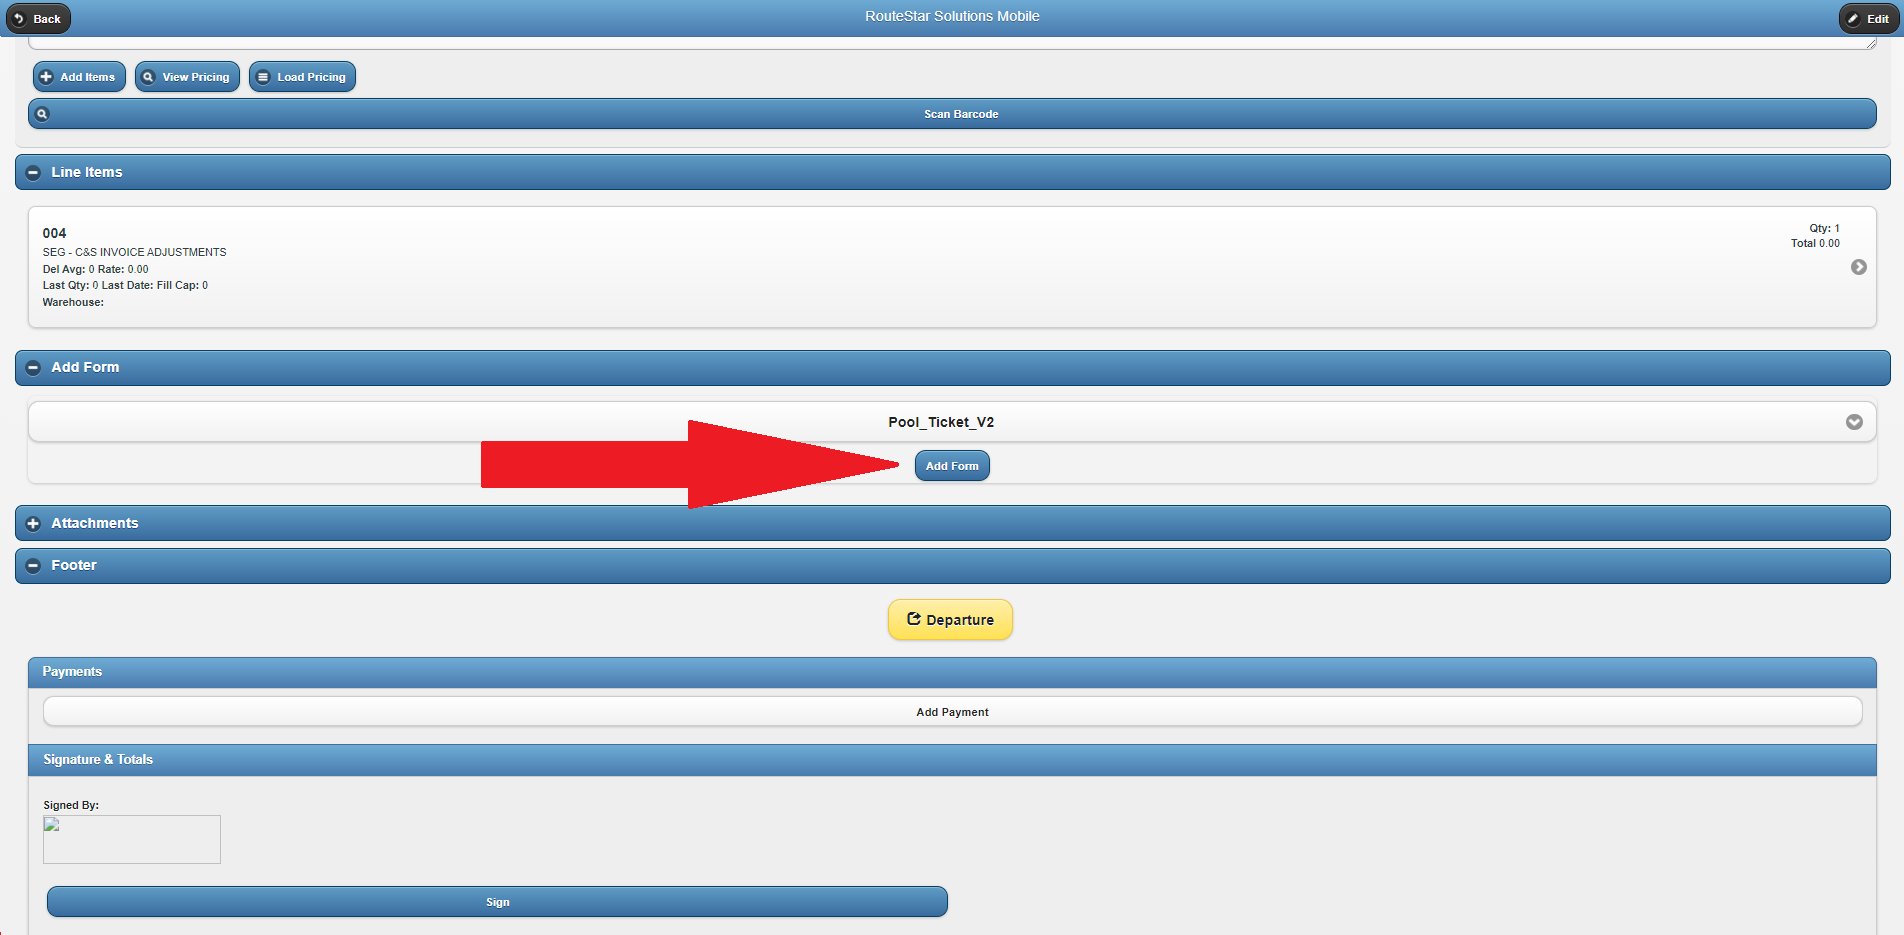
- Your screen will refresh and you will now see a new section of the Invoice/Manifest with the Form name.
Step 9c: Click on the new section title to expand the Form and fill out the fields as needed.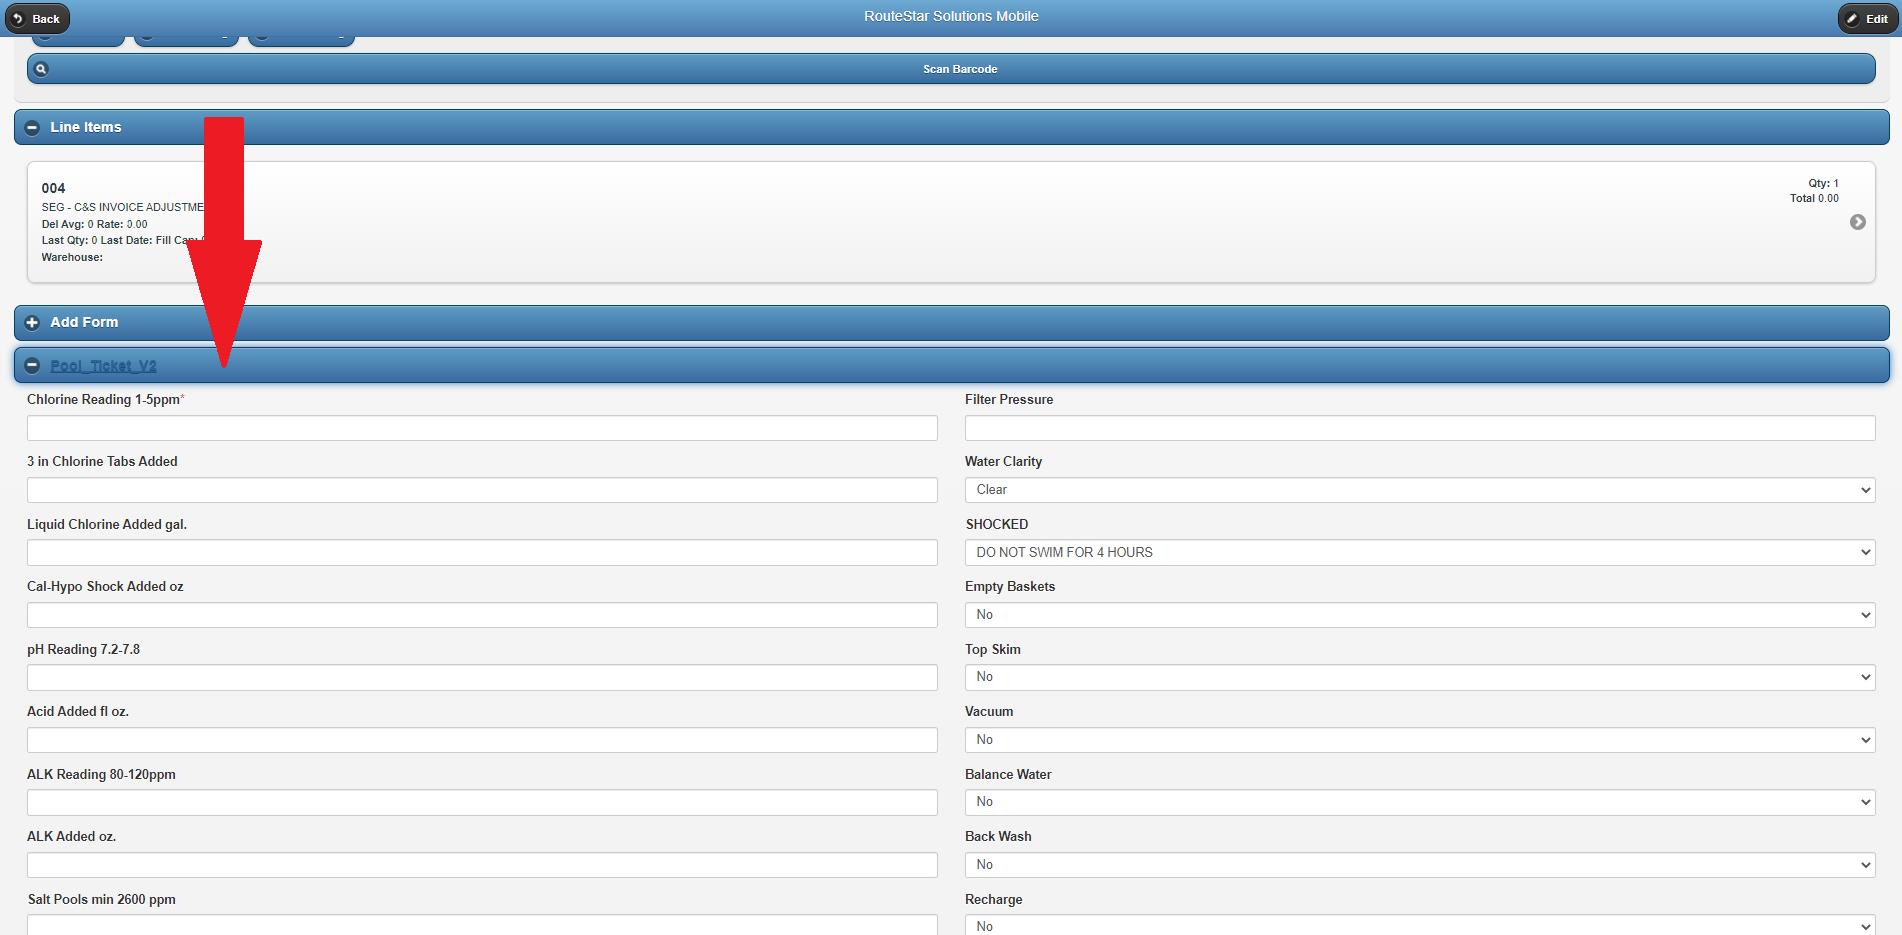
Step 10: Attach a photo to the Invoice/Manifest by expanding the 'Attachments' section
Step 10a: Click 'Choose File' and then select the photo you wish to attach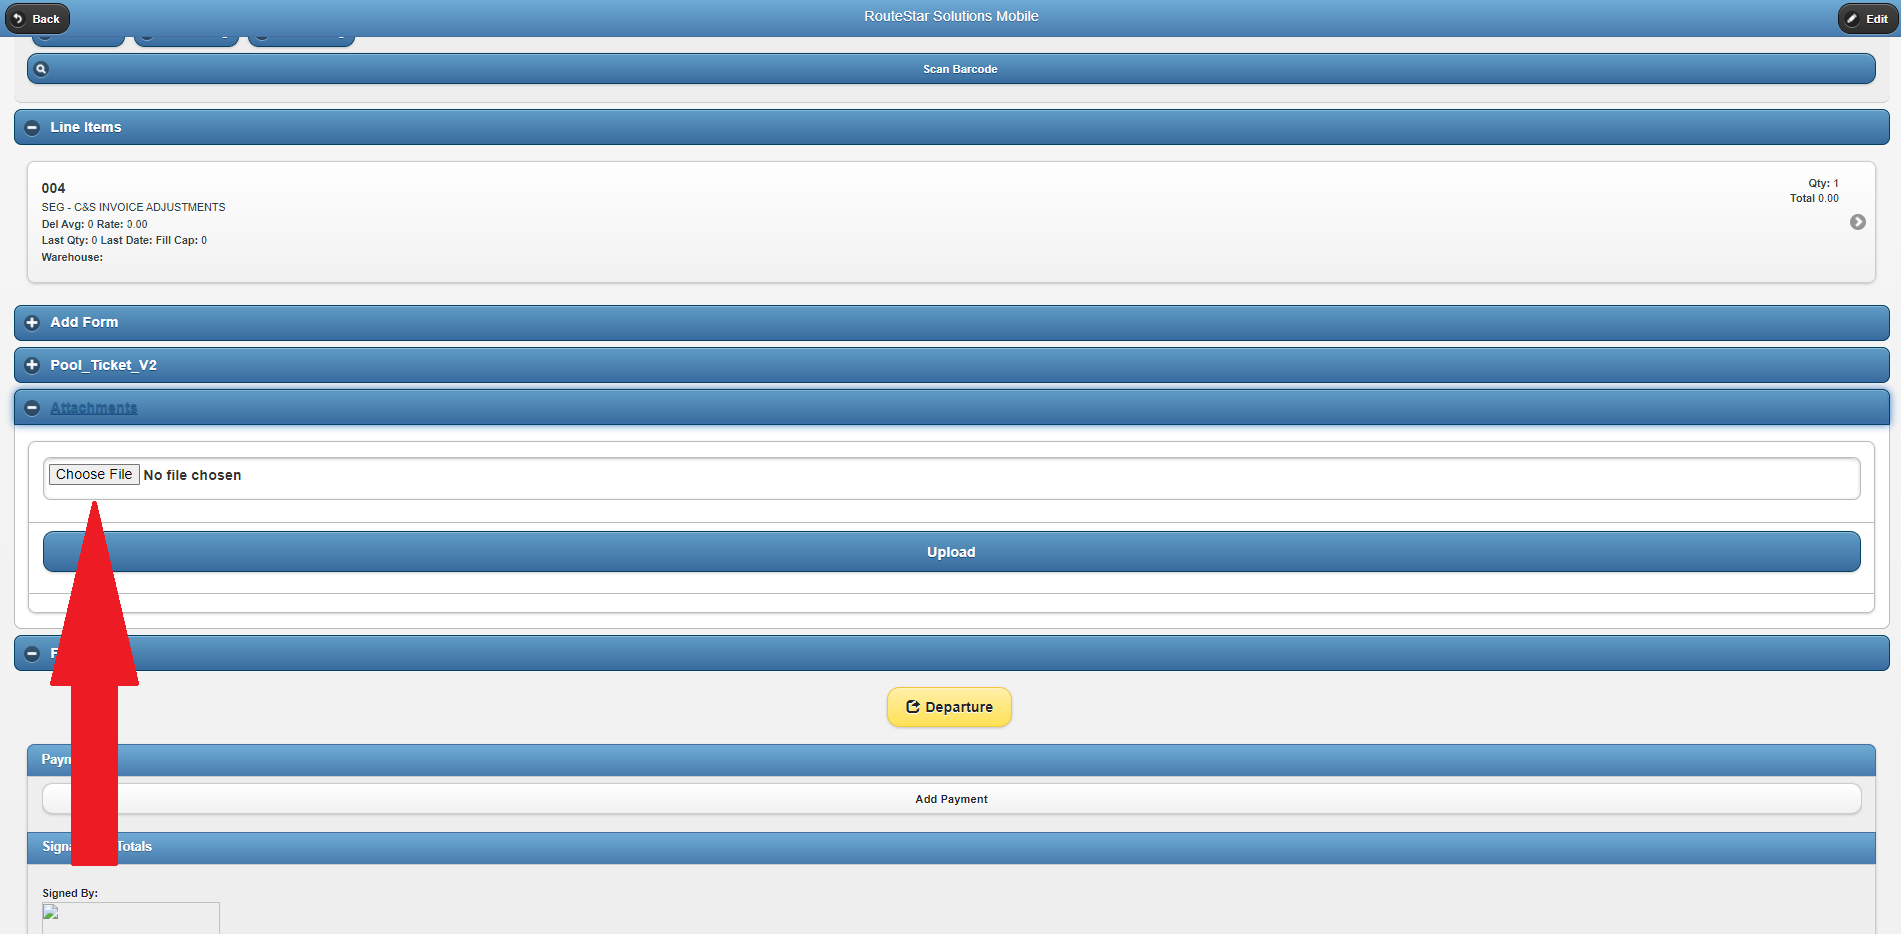
- You can continue to add as many files as you with to upload by clicking the next 'Choose File' button.
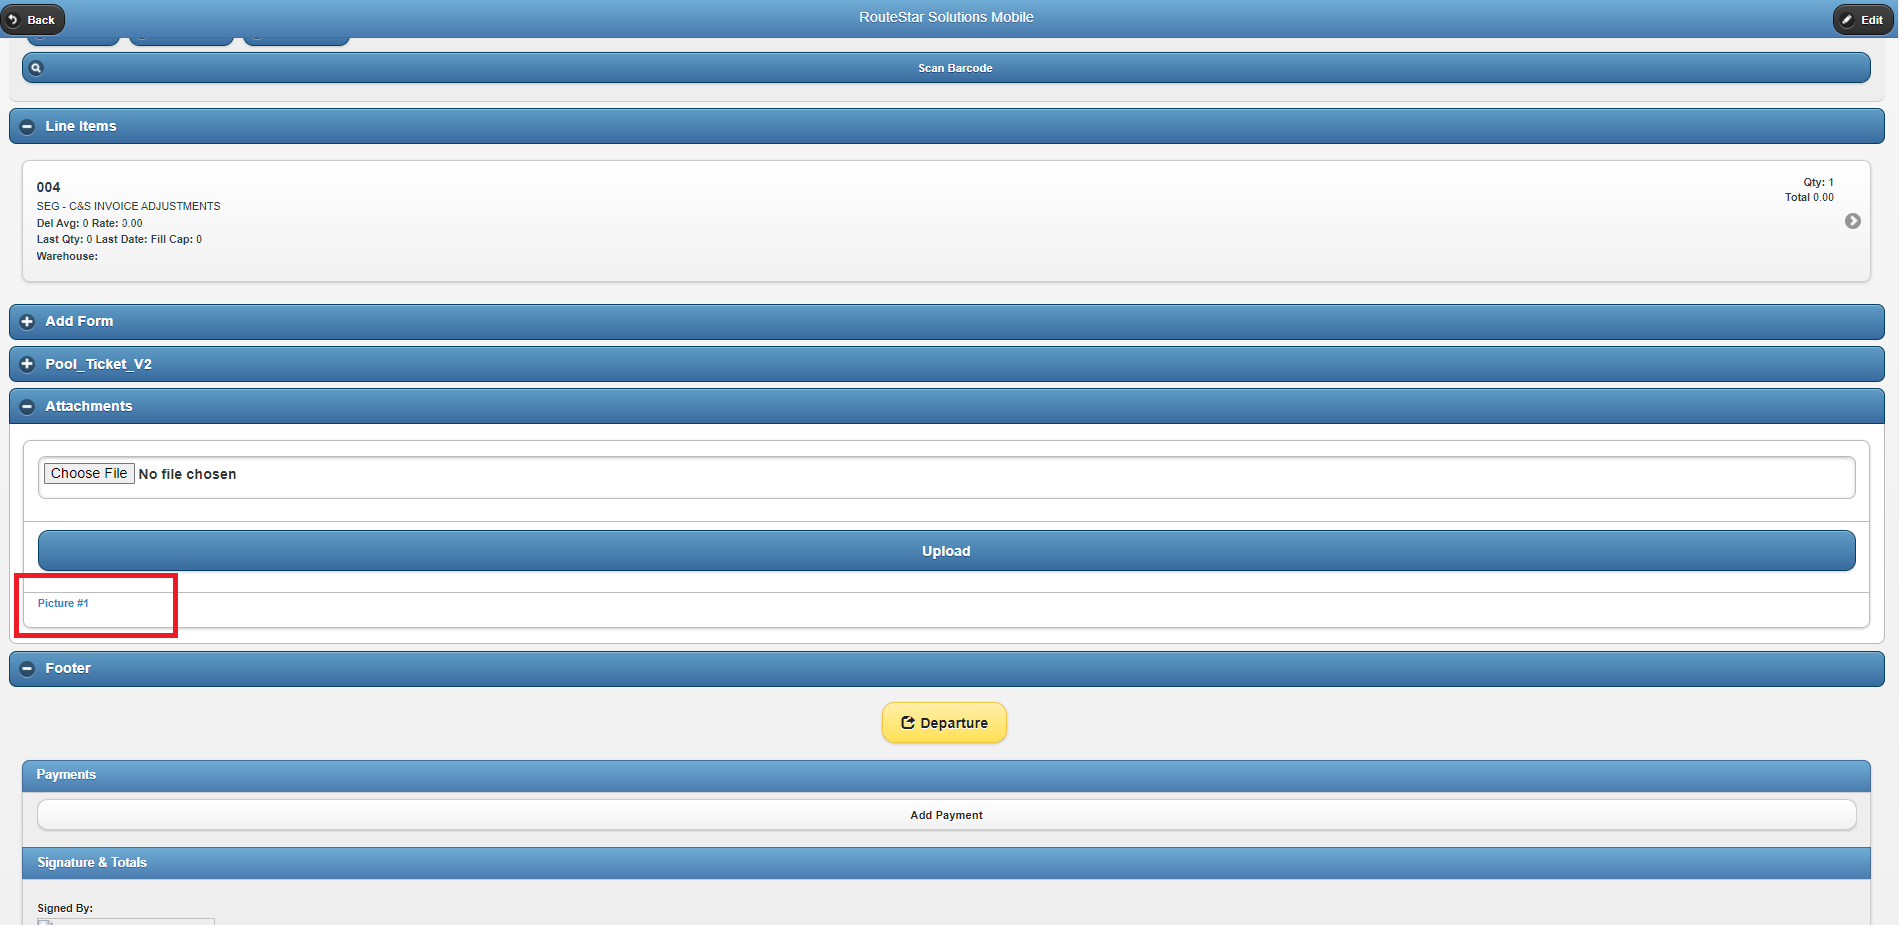
Step 10b: Click 'Upload'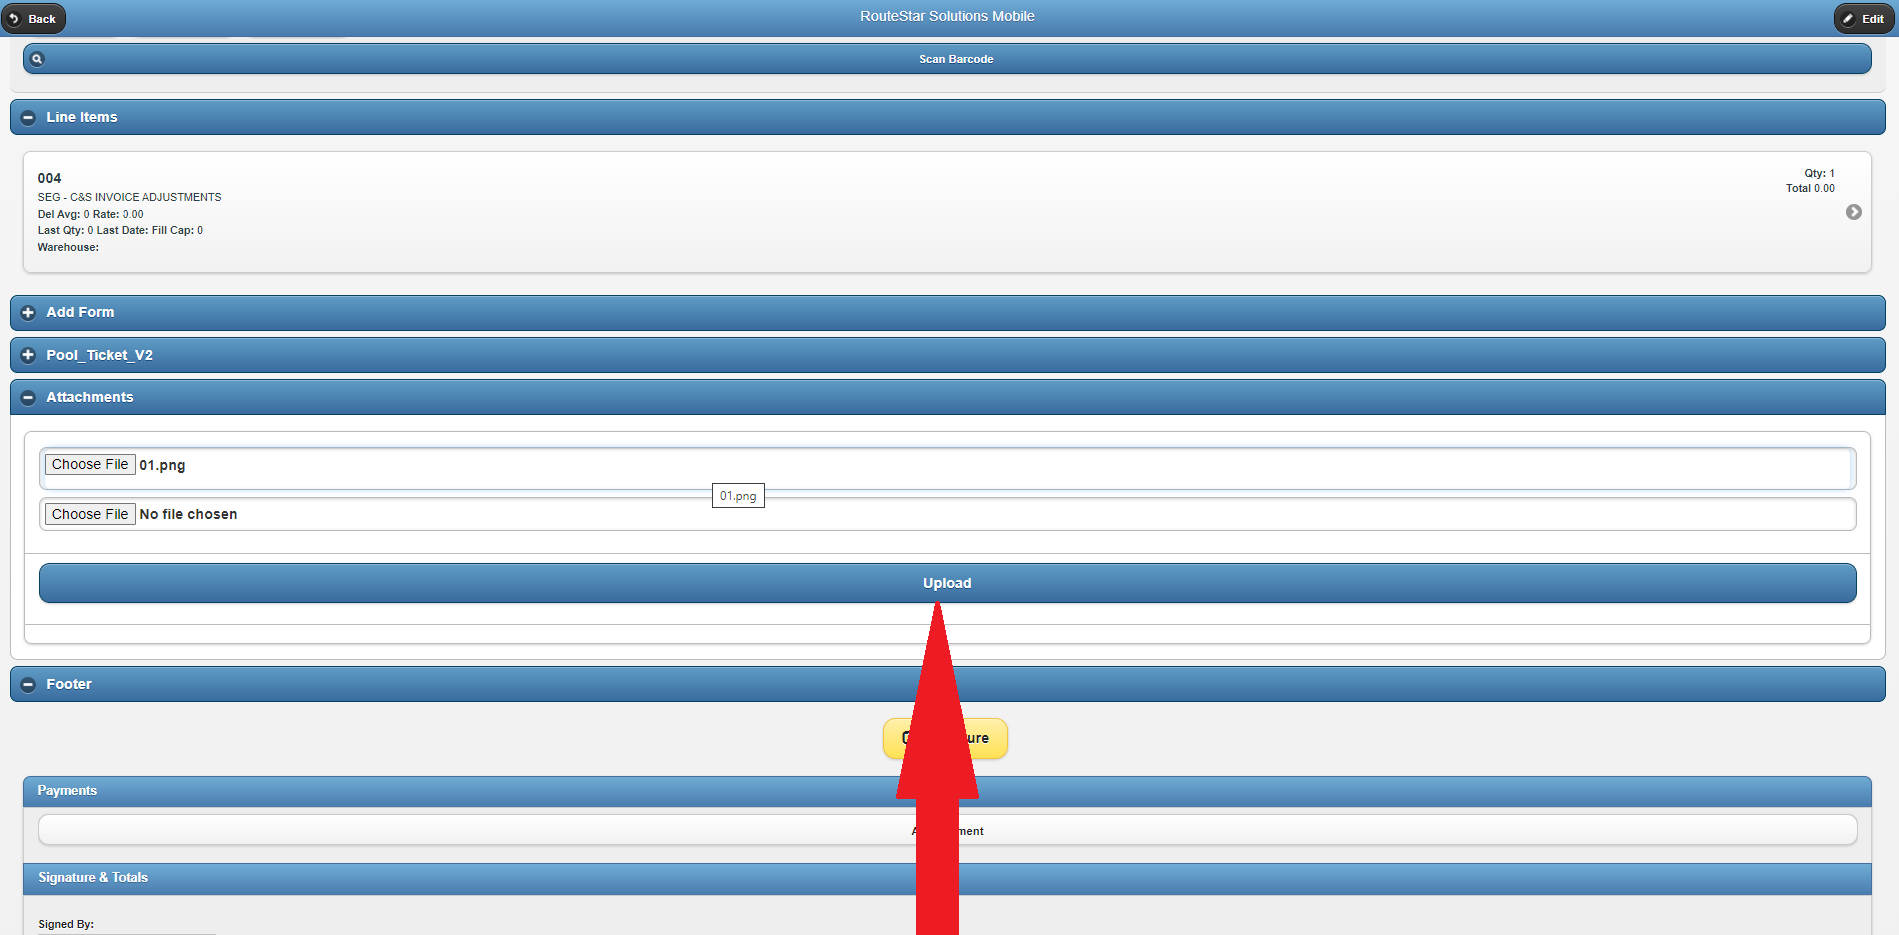
- You will now see the photo(s) listed in the attachments section.
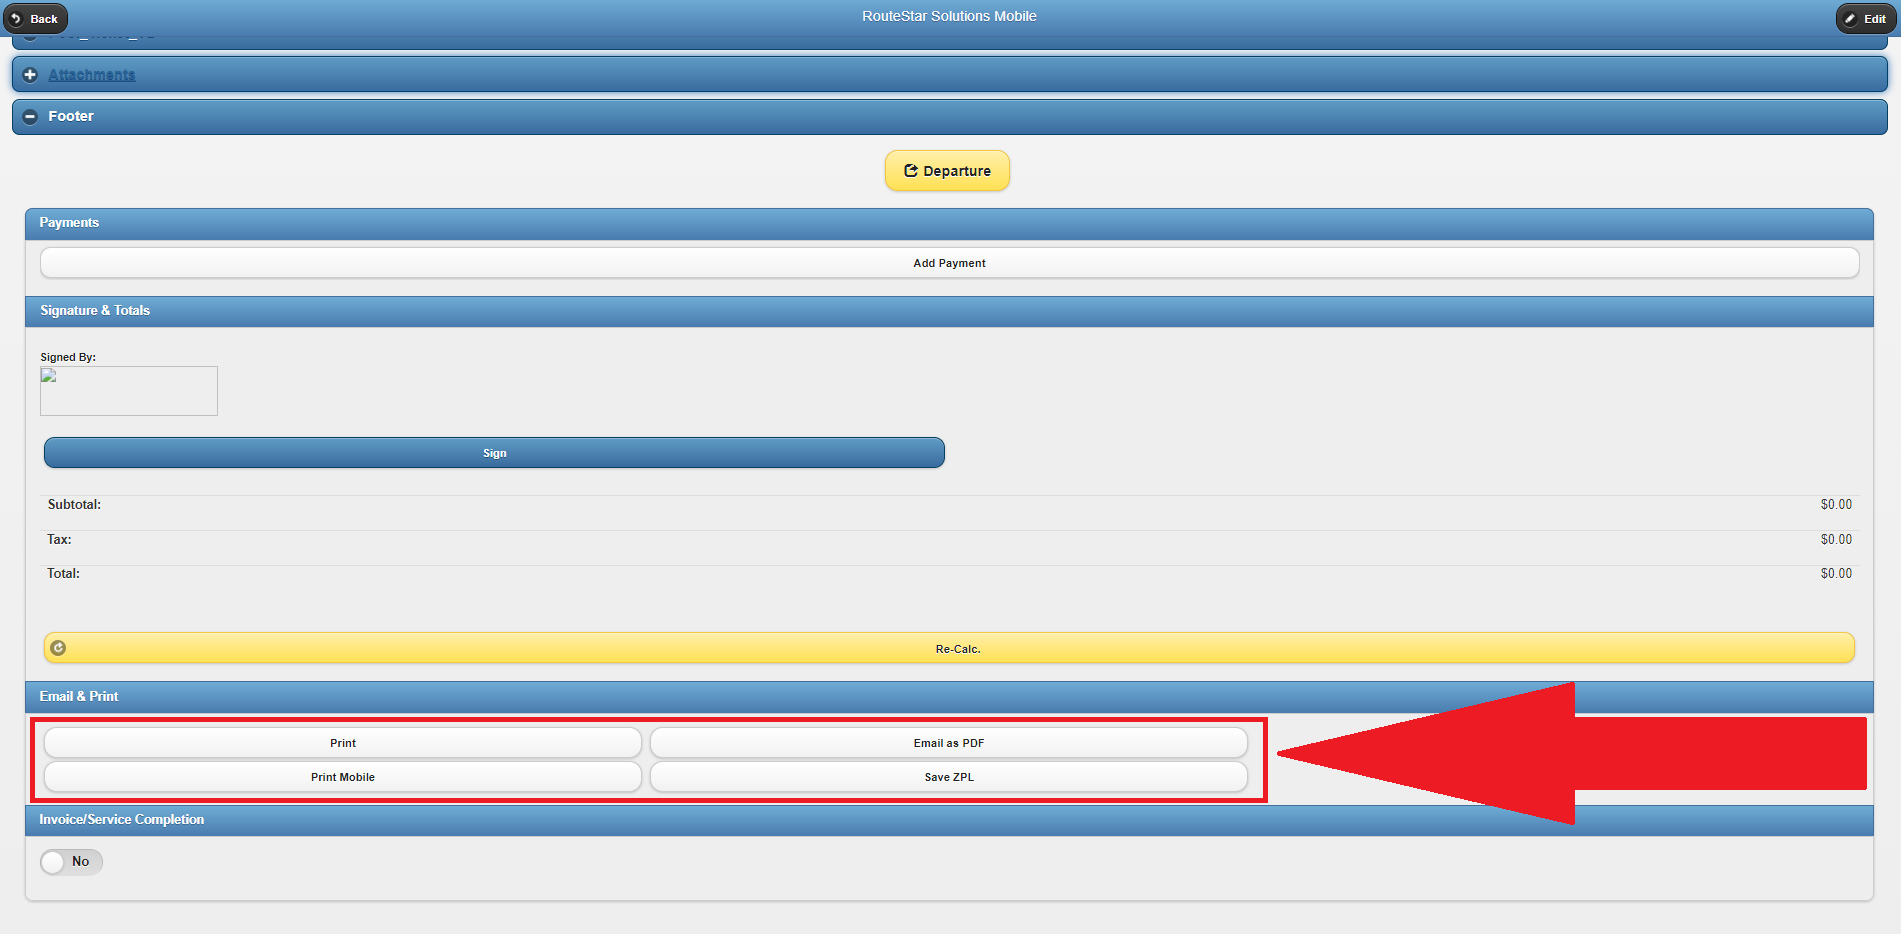
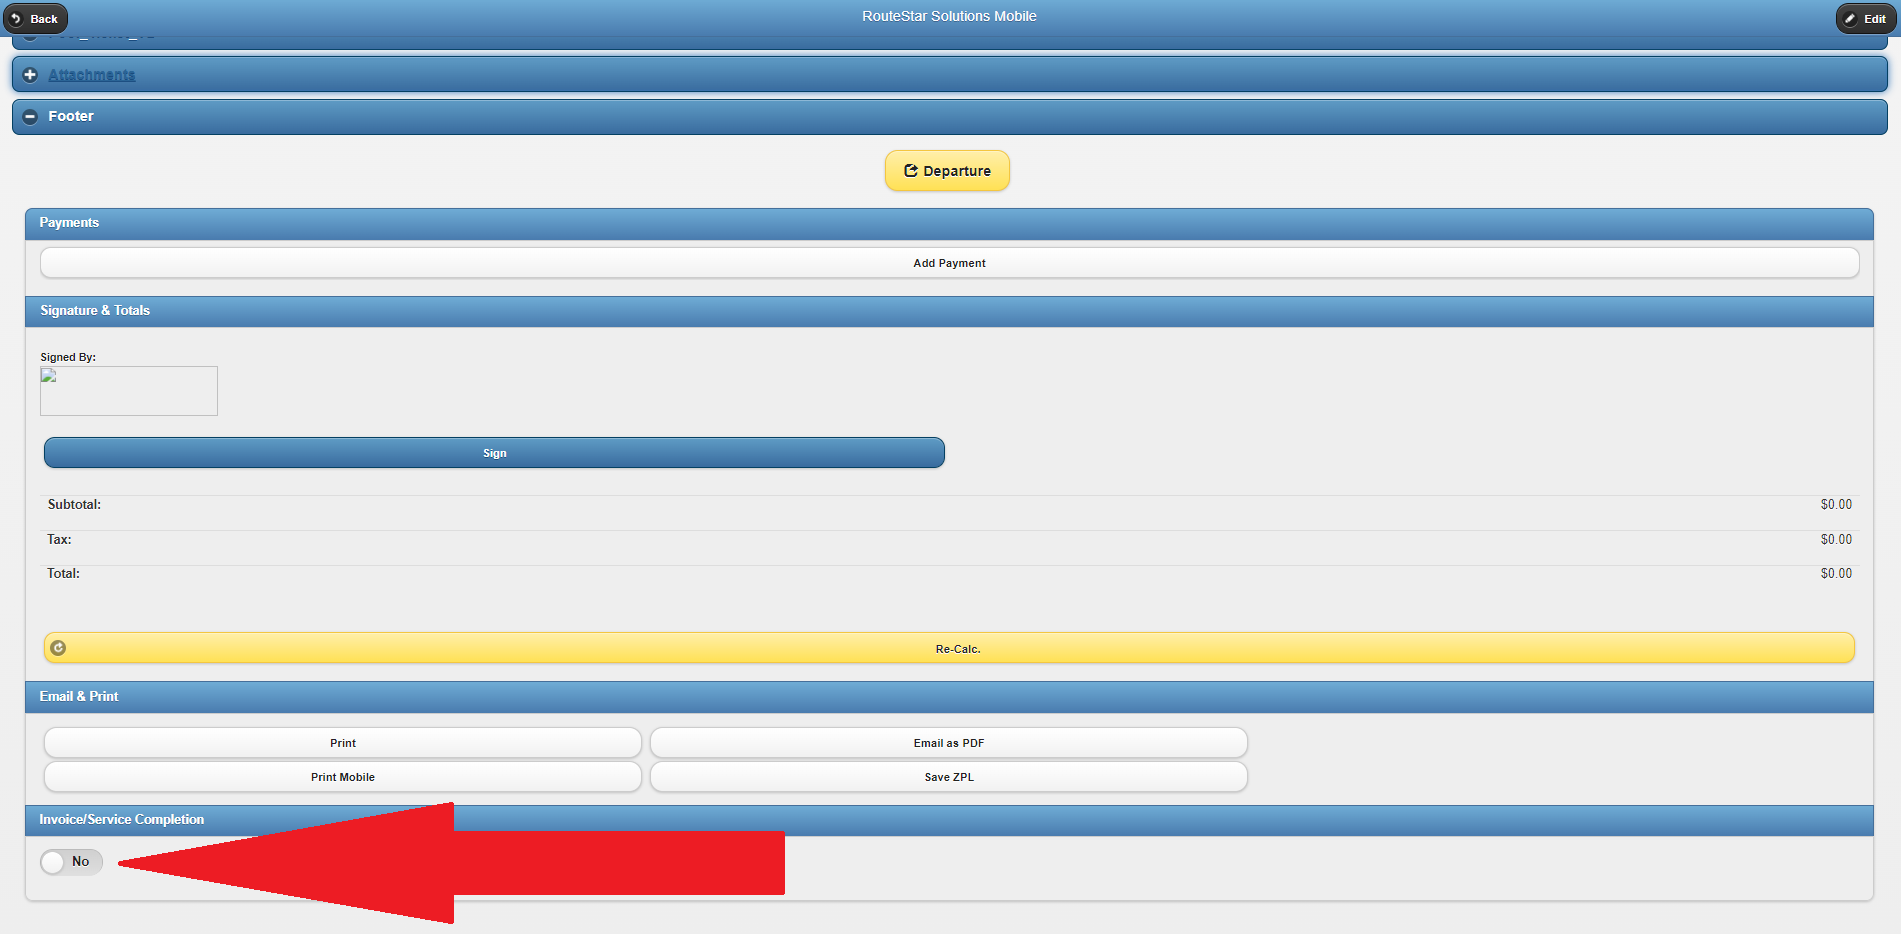
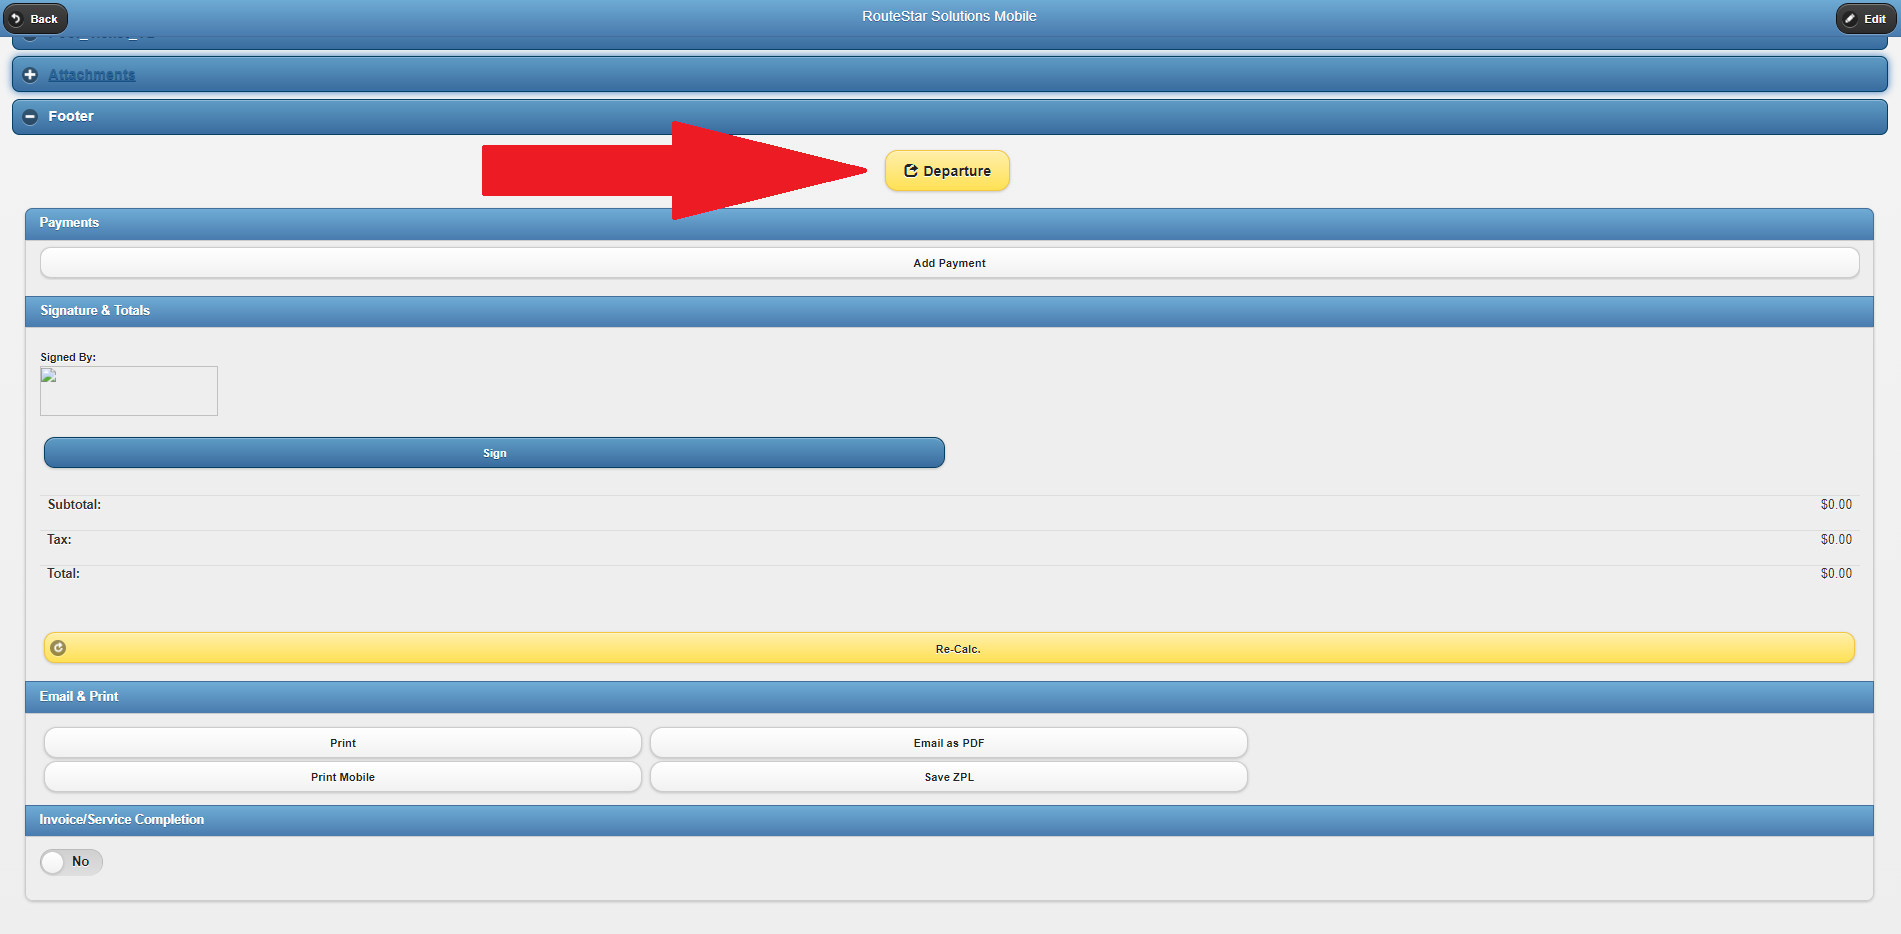
Step 11: Complete final steps and mark Route Stop complete by opening the 'Footer' section
- The departure button at the top of the Footer section can be used to notate a departure time WITHOUT marking the Stop complete.
- You can include the notation of a payment by clicking 'Add Payment' and filling out the following screen.
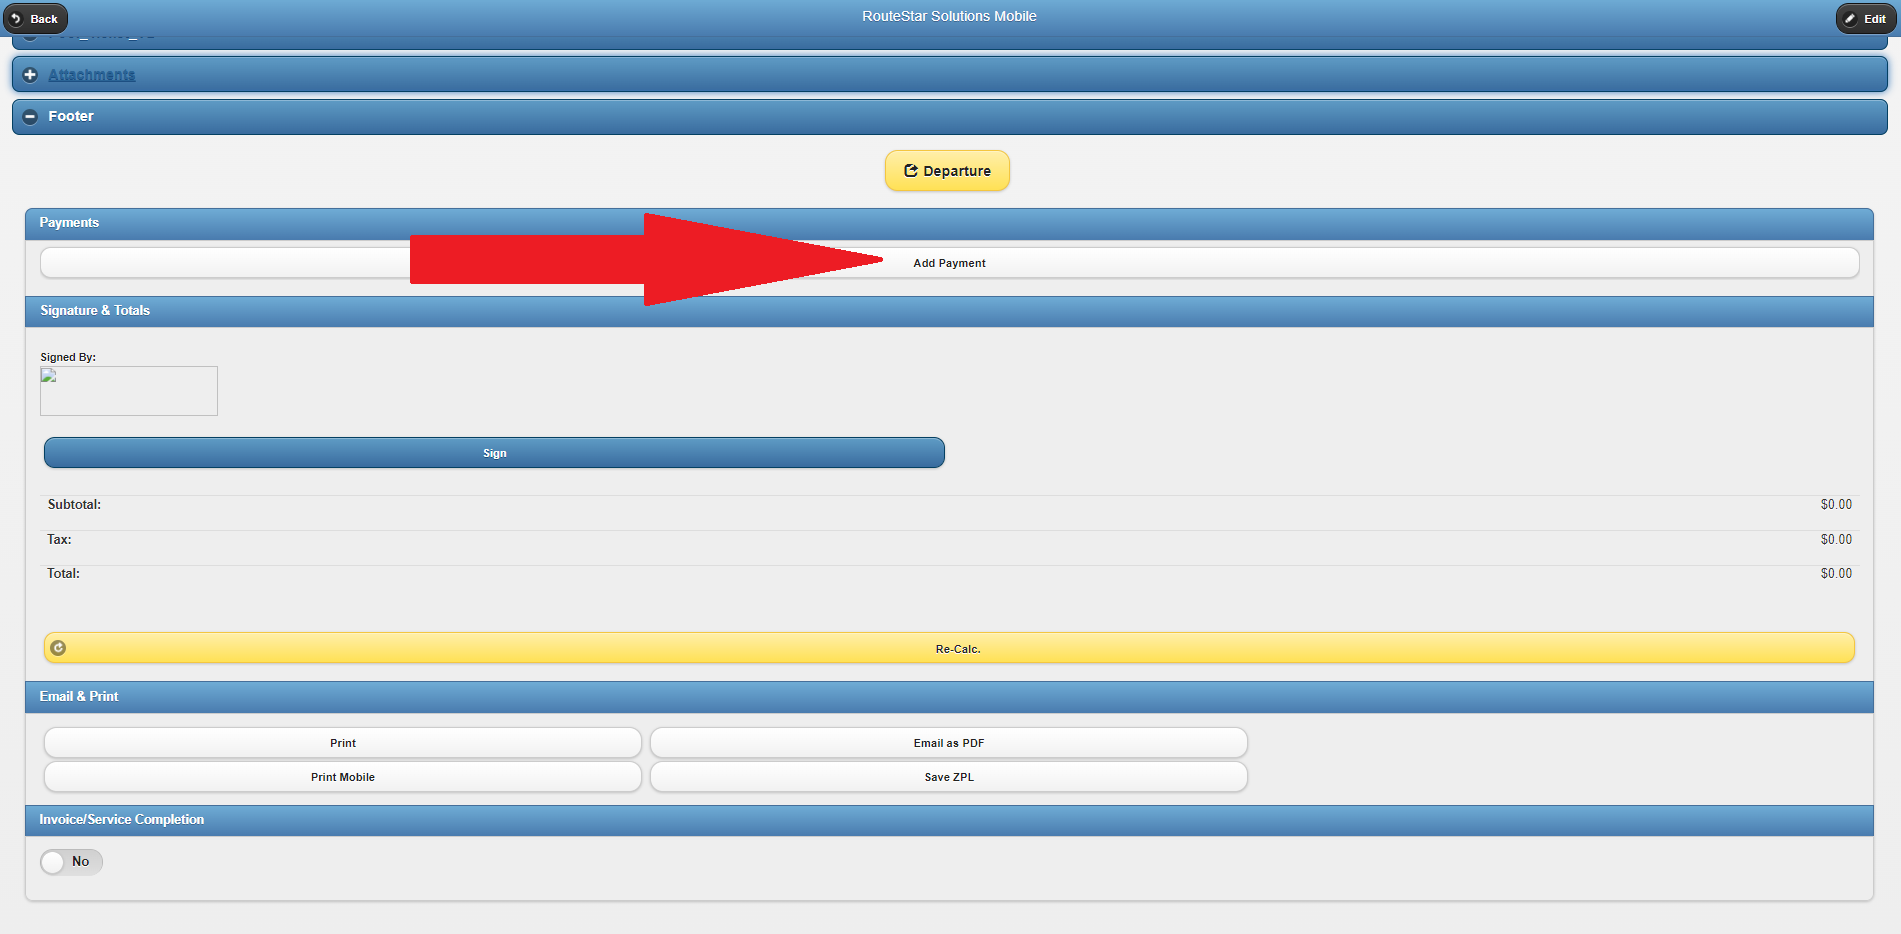
- You can click 'Sign' in order to obtain a signature. Note that the system will ask you if you want to mark the Invoice/Manifest 'Complete' after signing. If you still need to work Invoice/Manifest simply decline this prompt
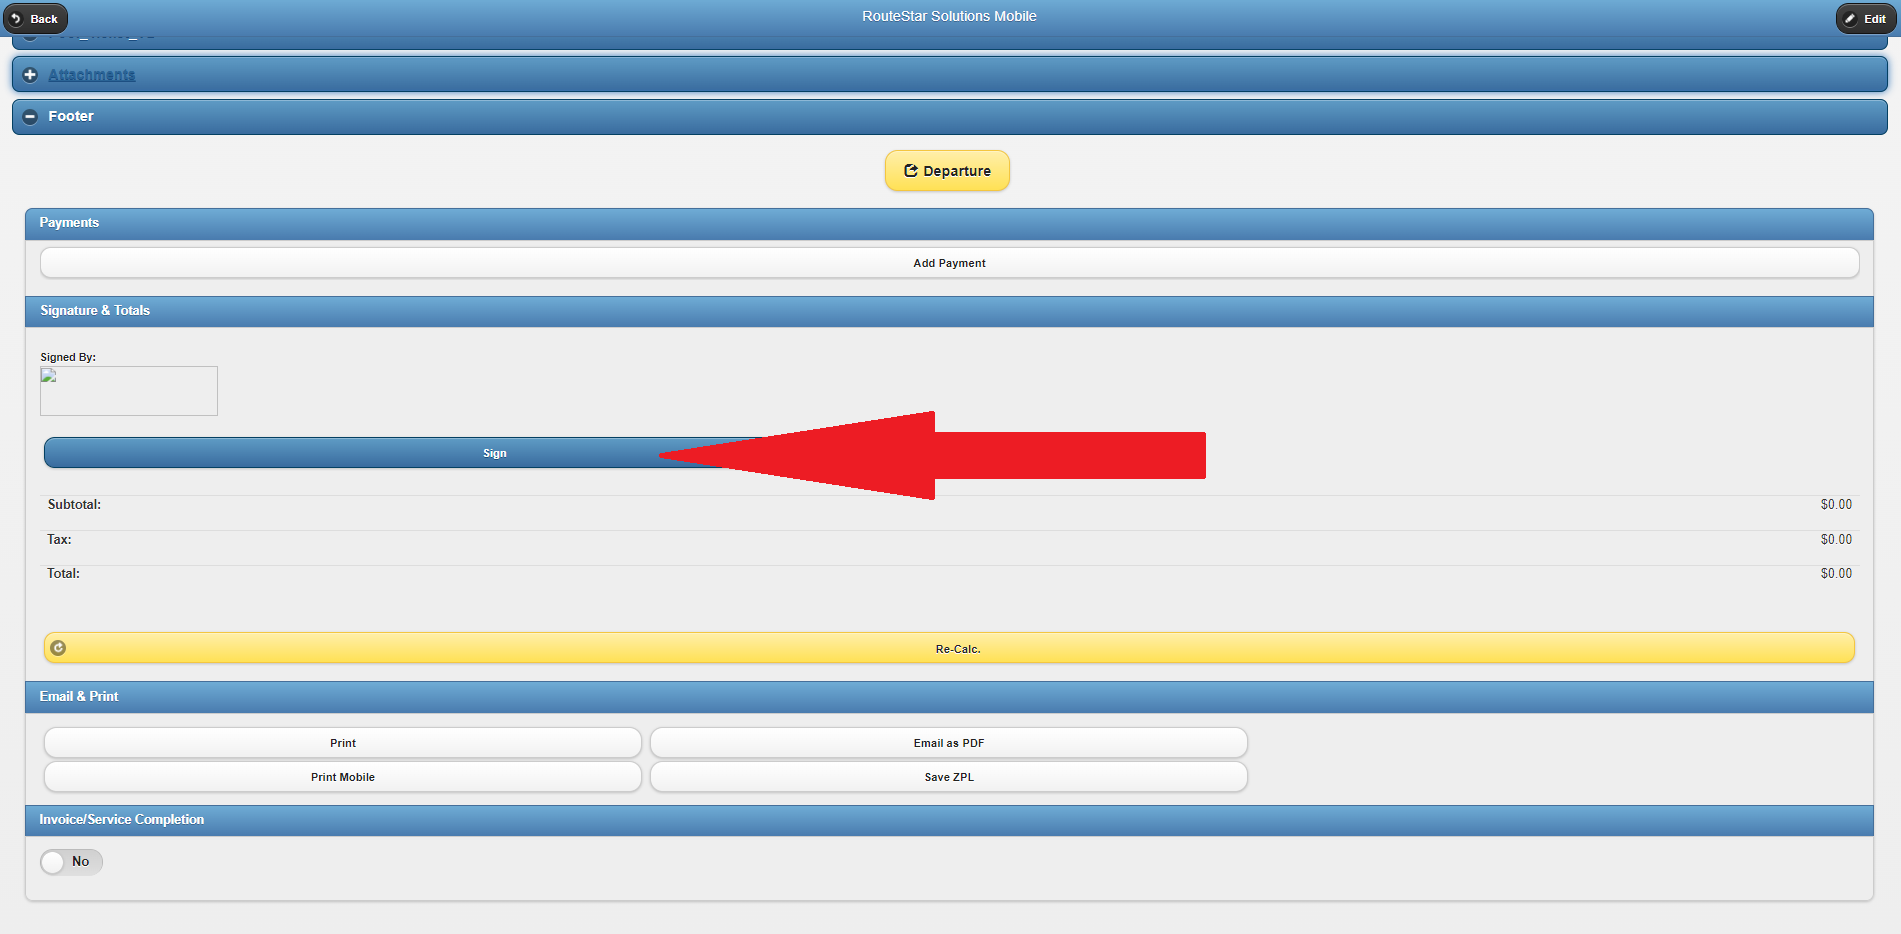
- You are also able to print and/or email the Invoice/Manifest directly from the app as well. More information about printing from mobile can be found here.