Description:
The following document will cover the setup and operation of the RouteStar Online Warehouse Inventory Tracking module. This feature will allow the tracking of inventory by location/warehouse from loading to sales.
Requirements & Notes:
- Mobile component for drivers to manage their inventory on their trucks.
- Compatible with QuickBooks Advanced Inventory (Not Required)
- Works for either QuickBooks Desktop or QuickBooks Online
- Documentation Based on Version 1.7.1.21
Sections:
Maintaining Inventory (Load/Transfer/Return)
Warehouse Setup
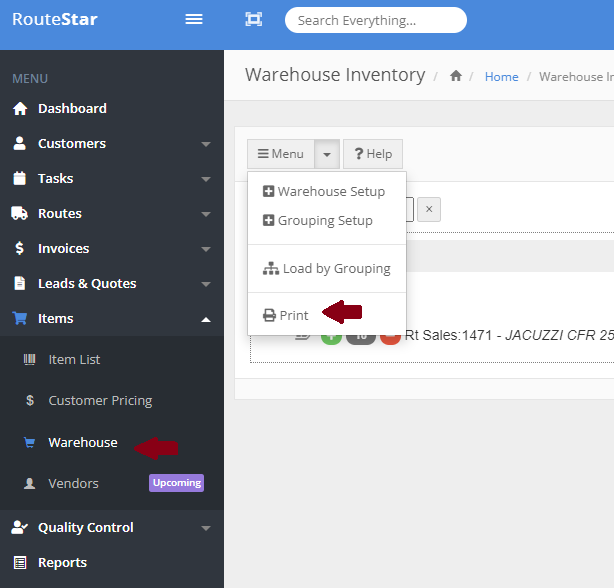
First we need to create our warehouses. From the main left navigation, expand the Items menu and then select Warehouse.

Next use the arrow next to the Menu button and then select Warehouse Setup.

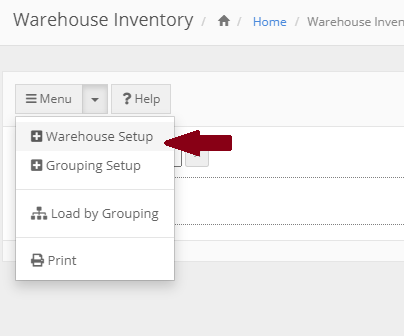
Type in the name of the warehouse and select a starting date for the system to use when tracking inventory followed by pressing the Create button.

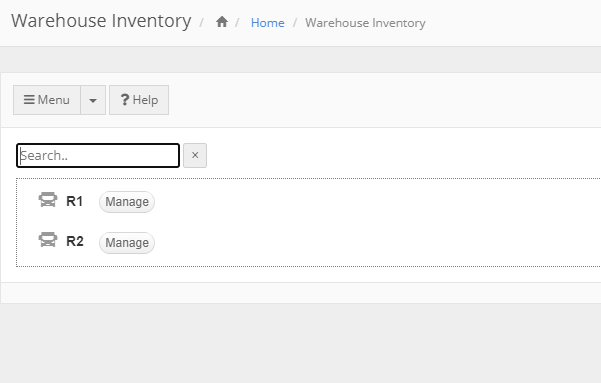
You should now see your warehouse listed, now we are ready to assign the warehouse to a user.
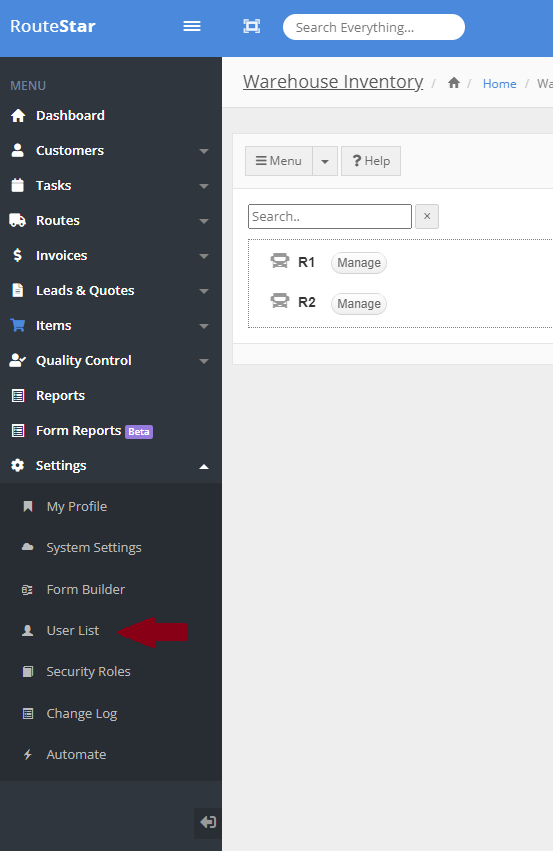
Use the main left navigation to locate the Settings menu and expand it to select User List.
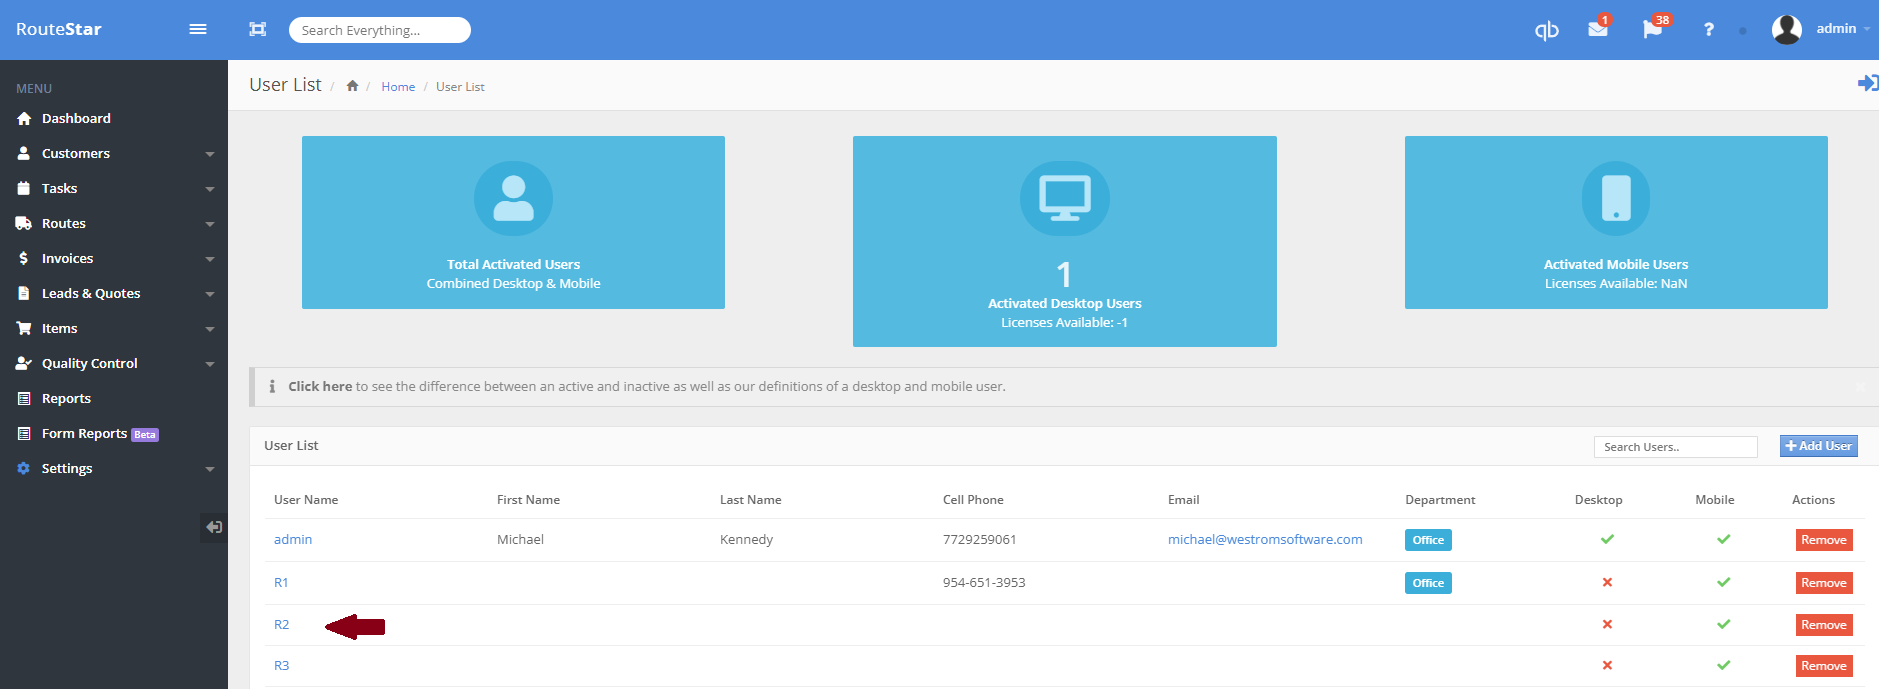
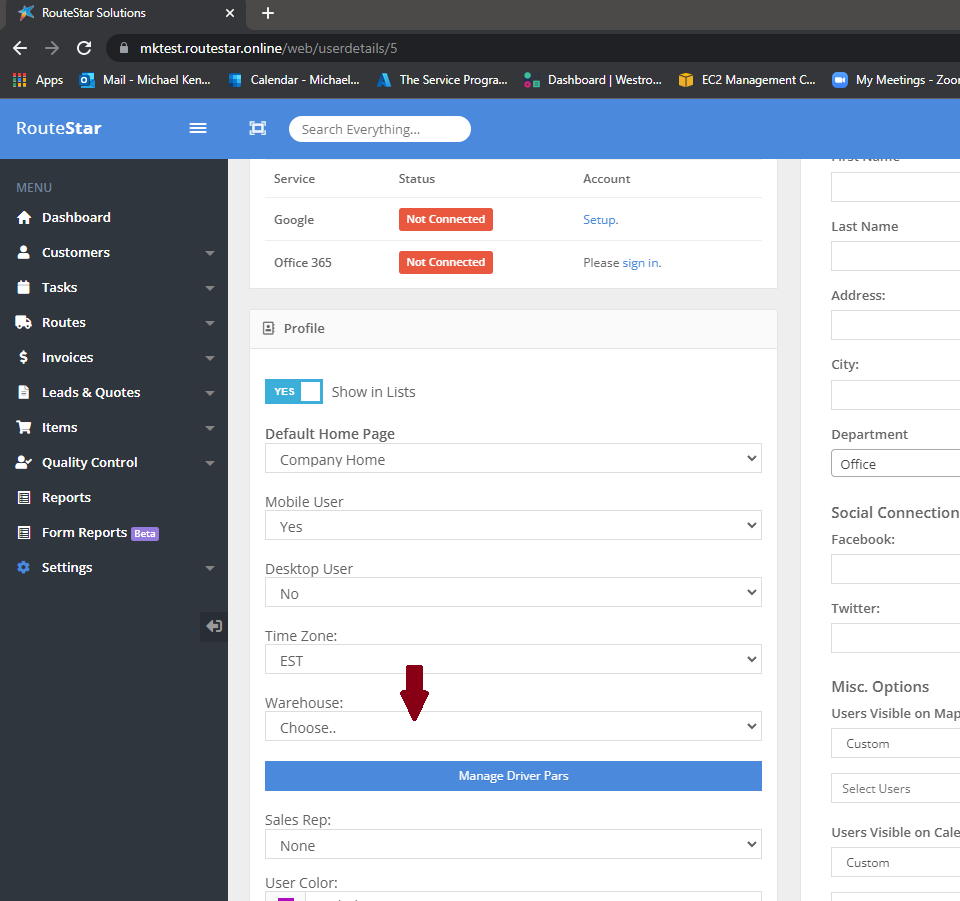
From the User List, click on the username you want to assign a warehouse to.
Scroll down and on the left hand side you will see a dropdown where you can assign a warehouse to this user right above the blue "Manage Driver Pars" button.
--- End of Section (Go to Top) ---
Warehouse Item Groups
While we are setting up our warehouses, we can also setup groups and assign products/items to multiple groups. This is optional but it can provide a quick way for a driver to load a specific set of items onto his truck.
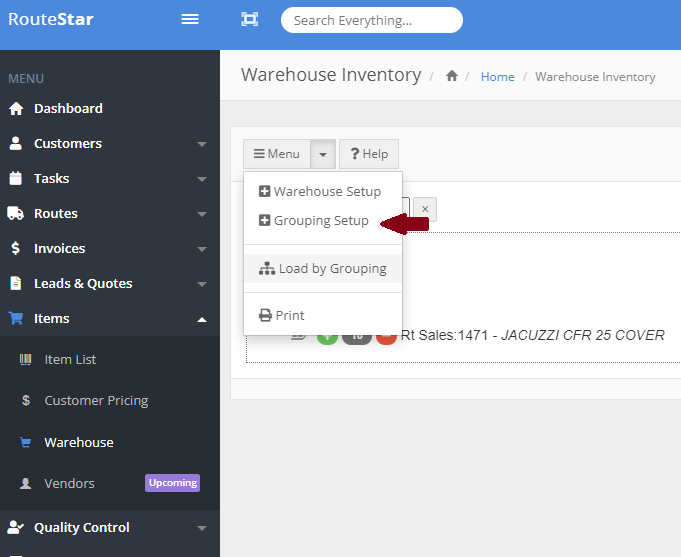
To setup warehouse groups, navigate to the Warehouse page under the Items menu option on the left navigation. Use the menu button and select Grouping Setup.
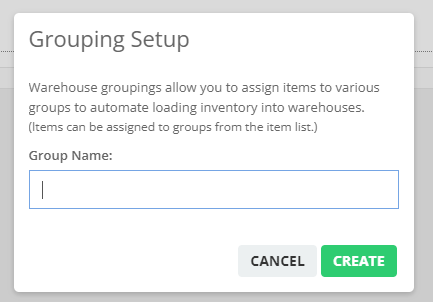
Type in a new group name and then press the green Create button.
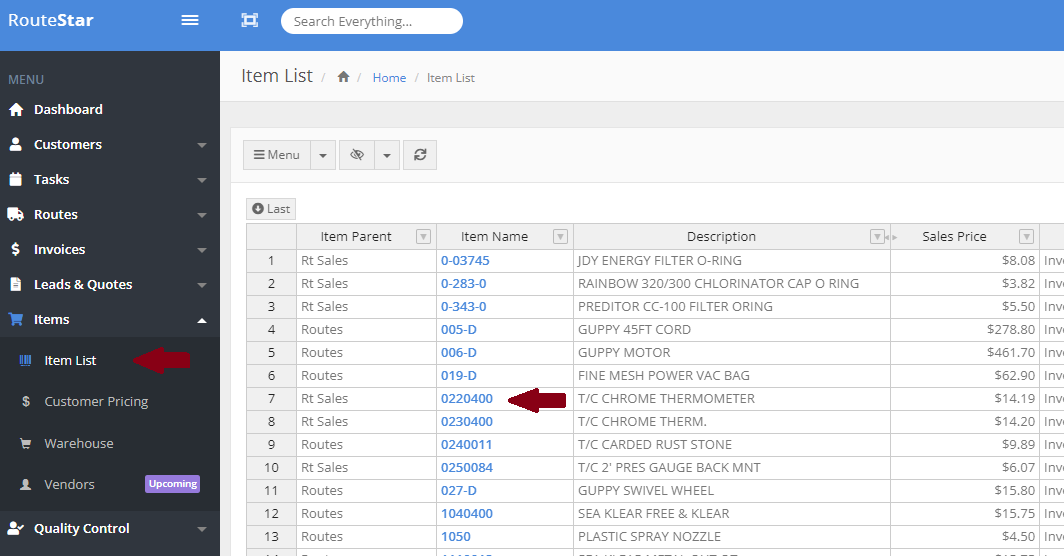
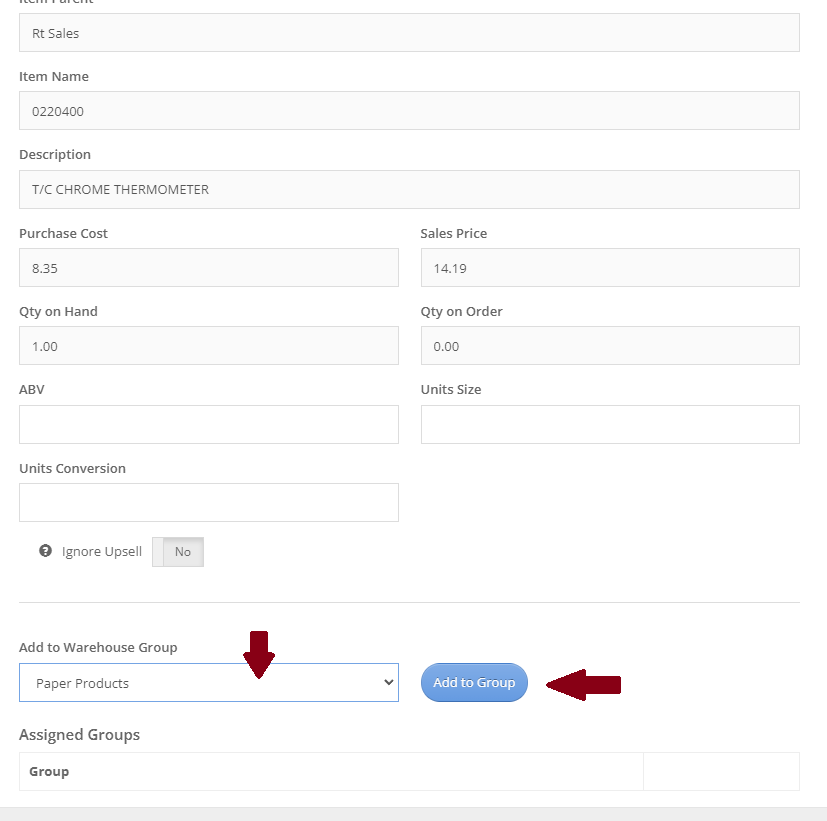
Now lets go to our main item list in RouteStar Online. Click on any product/item from the list to assign it to a warehouse group. (Items can be in more than 1 group).
In the lower left of the Item Details page, select the grouping and then press the blue Add to Group button.
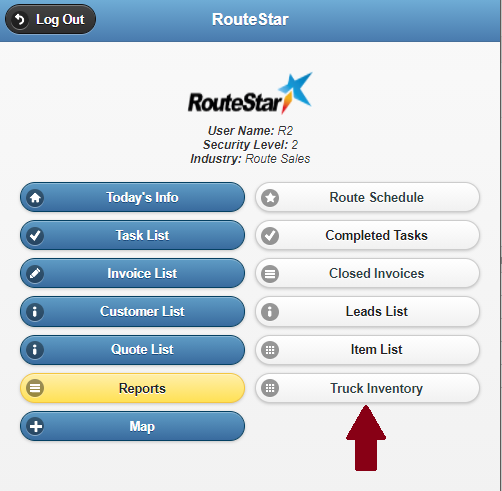
If we now go to our mobile device and navigate back to the Truck Inventory page and press the blue Load button we can select Warehouse Groups.
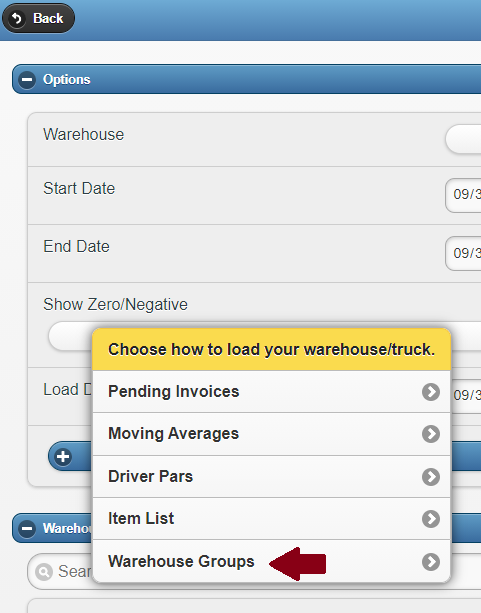
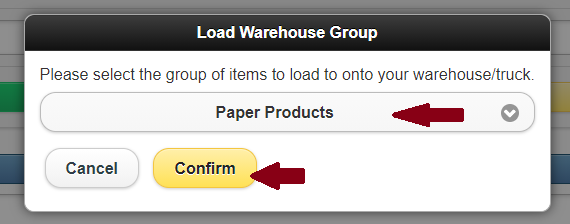
In the popup window select the grouping and then press confirm. All the products/items from that group will be loaded onto the truck. The driver can then adjust the quantities of the loaded items.
--- End of Section (Go to Top) ---
Using The Driver Par List
RouteStar Online has the ability for you to define a set list of products/items for a driver to load his truck with each day of the week. We call this feature the Driver Par List and it can be managed within User Details from RouteStar Online.
From the User List click on the user whom you want to setup the par list for.
Next click the blue button on the left side labeled Manage Driver Pars right below the warehouse option from the previous warehouse setup.

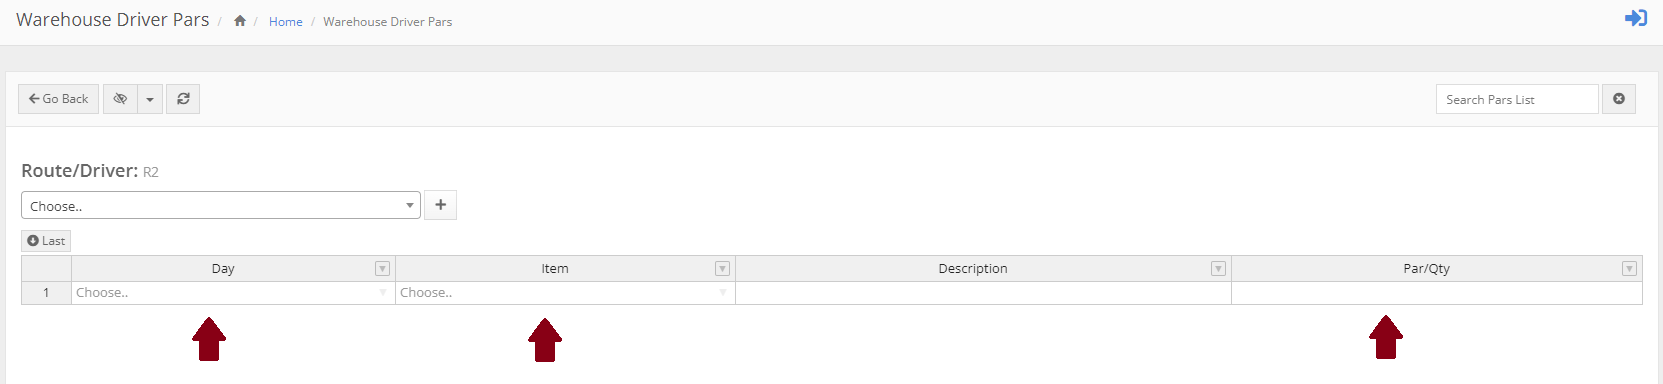
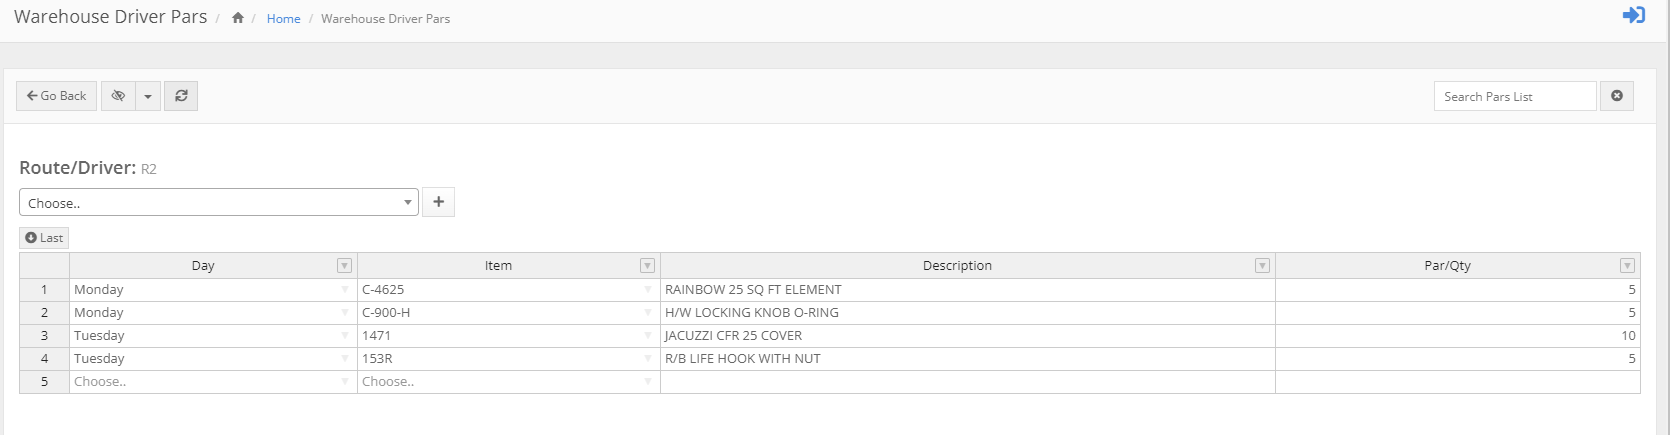
We can now select a day of the week (Mon, Tues..etc), pick an item and then set the par/stock level for that item. From the mobile device, a driver can now see this list for each day you setup and use it to load his truck by having the system compare what is on his truck vs what the par is for each item and suggest the quantity to load.
If we now login to the mobile app as a driver and tap on the Truck Inventory button we can load our truck using the par list we just setup.

Now we have a few options at the top of this page that we will ignore for now as it will be explained in the Maintaining Inventory section below; go ahead and press the blue Load button followed by tapping on Driver Pars.


Next, pick which day you want to view the par list for and the screen will refresh showing you the products setup for that day.

We can now either press Load All or press the individual Load button for any product we want to add to our truck. You can see the system is tracking what the par is, what is currently on the truck and what quantity is on any open orders for that driver for that day. The system then suggests the quantity to load and the driver can edit this if necessary.
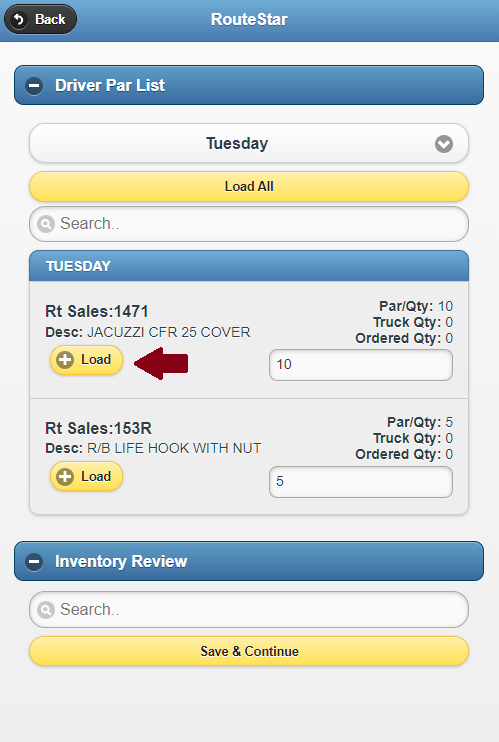
Once inventory has been chosen to load you will see it will be colored in green and also appear in the Inventory Review section, if the driver is finished he should now press Save & Continue to load the inventory onto his truck.
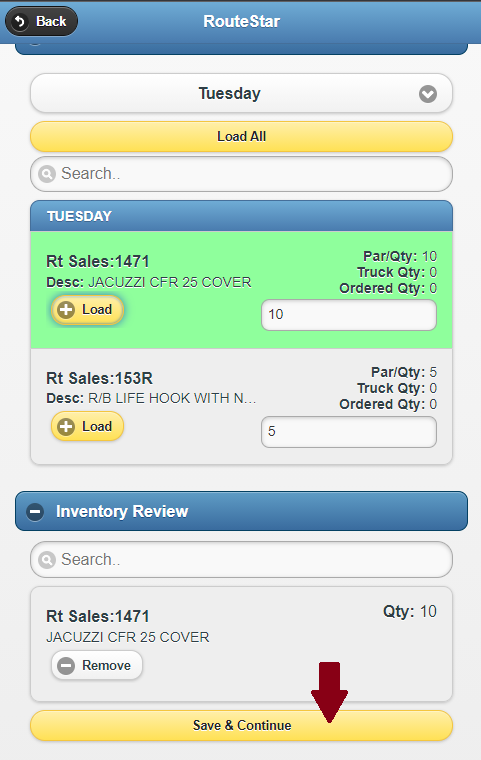
You will now be returned to the main truck inventory screen showing you what is currently loaded onto the truck. The driver can further manipulate the quantity loaded if necessary by pressing the (+) or (-) buttons for any product listed in the Warehouse/Truck Summary section.
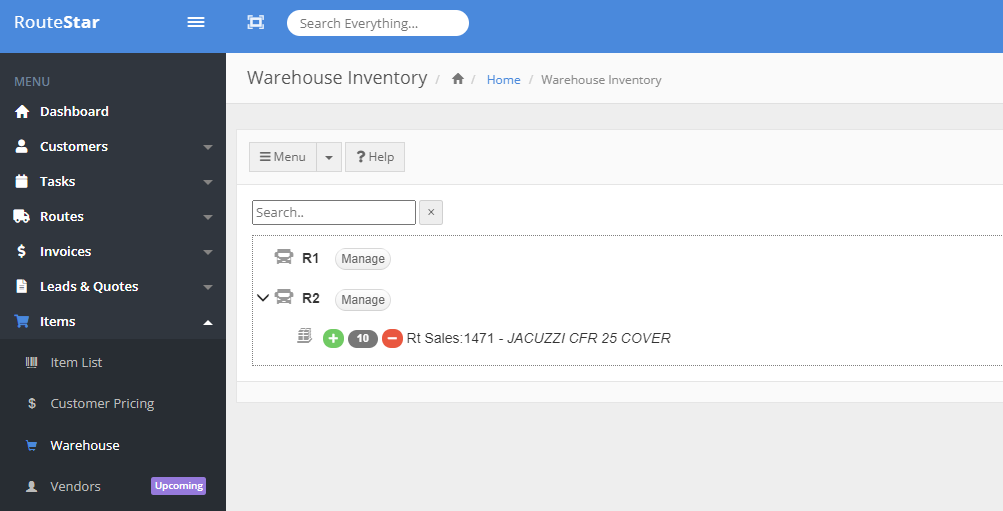
If you were to return to the office version of RouteStar Online and go back and expand Items from the left navigation and pick Warehouse, you will see the current quantity on hand allocated to each truck/warehouse.
--- End of Section (Go to Top) ---
Maintaining Inventory (Load/Transfer/Return)
Almost all of the inventory management is done from the RouteStar Online Mobile component. Go ahead and login to the mobile app as a driver and select Truck Inventory from the main menu.
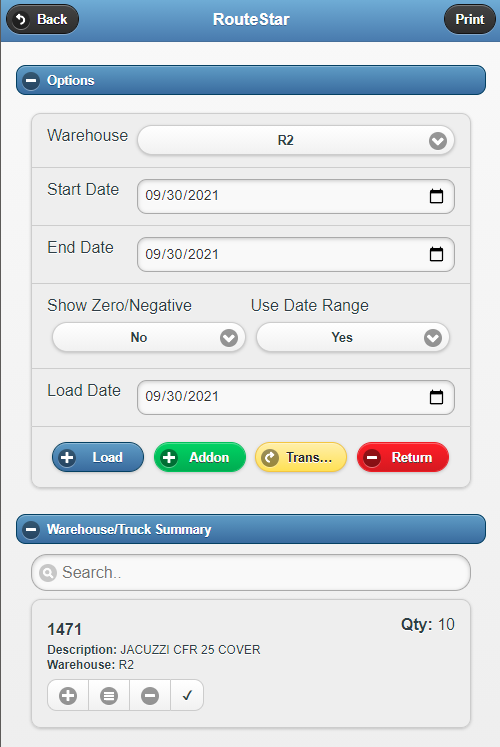
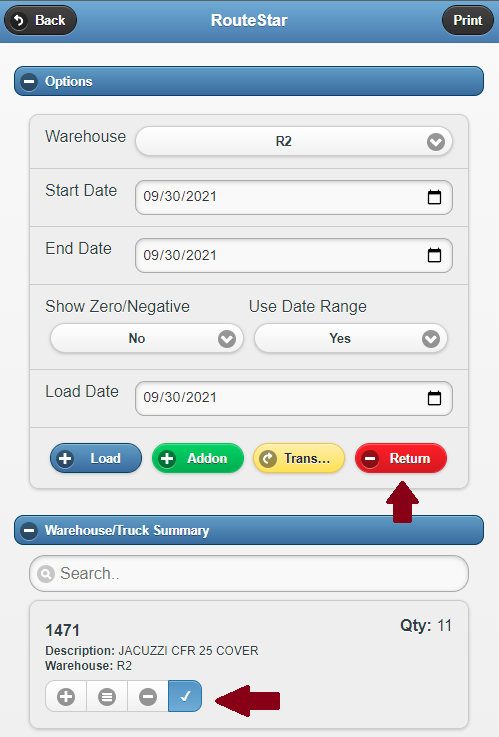
From this screen the driver will be able to perform all the necessary actions to maintain accurate inventory counts on his truck from loading inventory, transferring inventory between warehouses/trucks to returning inventory at the end of the day. Lets start by first going over the options section at the top of the Truck Inventory page.
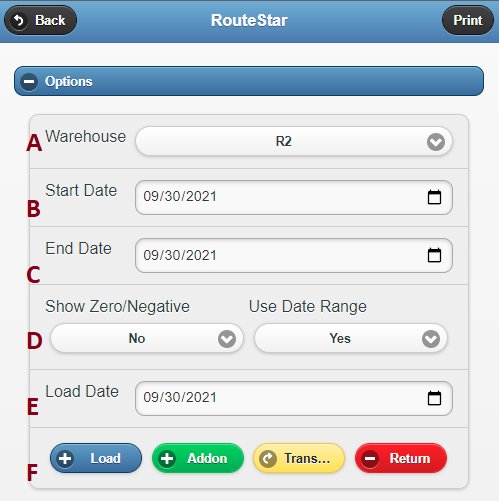
A. Operating Warehouse (Defaults to users assigned warehouse)
B/C. Inventory Start/End Date Filter allows you to control the display of inventory in the Warehouse/Truck Summary section i.e. allows driver to see quantity on hand for a single day or for the entire week.
D. Show Zero/Negative toggles the display of products on the truck with a negative or 0 quantity on hand.
E. Load Date allows drivers to control the date the system tracks when used to load inventory onto the truck. This is useful for drivers that load their trucks the night before for the next day.
F. Action Buttons allow the driver to perform the various actions against his inventory. (Load, Addon, Transfer, Return)
Loading Inventory
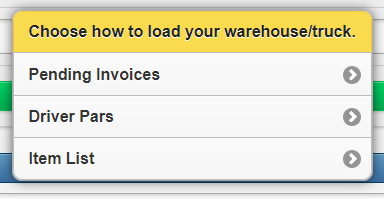
To load inventory onto the truck press the blue Load button. The driver will be given a list of options on how he would like to load his truck.
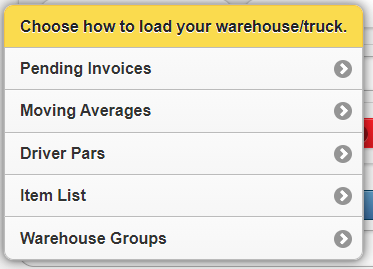
- Pending Invoices
- This option will look for open invoices assigned to that driver for that day and load the truck based on the items on those invoices.
- Moving Averages
- This option will look for any customers on the drivers route schedule for that day and load items setup within customer pricing using the 60 day moving average for the quantity to load.
- Driver Pars - Go to Section
- Item List
- This option will show the entire item list to the driver and allow him to search for a specific product to load.
- Warehouse Groups - Go to Section
What are Addons?
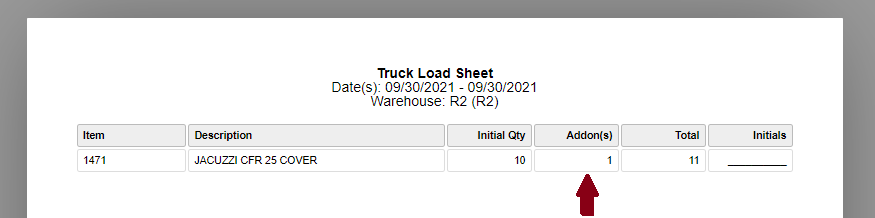
Addons are an optional step that provides a way for the office/warehouse manager to track additional products that need to be loaded after the initial load has been completed. For example a driver may load is truck the night before for the next day. When he gets in the next morning there are a few additional items that he needs to pull. This feature will allow him to track the additional inventory pulled against the inventory already loaded for the current day. When you choose the Addon button you will be presented with a similar set of options of how to load the addons onto the truck.
Once any Addons are loaded onto the truck, various reports (Go to Section) will show the initial load quantity plus any addons.
Transferring Inventory
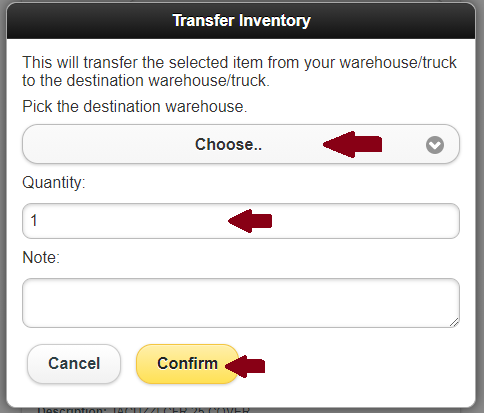
To transfer inventory between your warehouse and any other warehouse setup within RouteStar Online, first select the products you want to transfer from the Warehouse/Truck Summary list followed by pressing the yellow Transfer button.

Next select the warehouse you are going to transfer to and fill in the quantity of the product to transfer and type in a note (optional) followed by pressing Confirm.
Returning Inventory
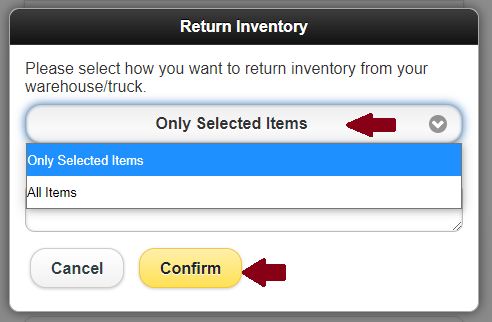
To return inventory, start off similar to transferring inventory, select the products to return and then press the red Return button.
Now we can either pick Only Selected Items or All Items and press Confirm. This will release the inventory from the drivers truck.
--- End of Section (Go to Top) ---
Warehouse Reporting
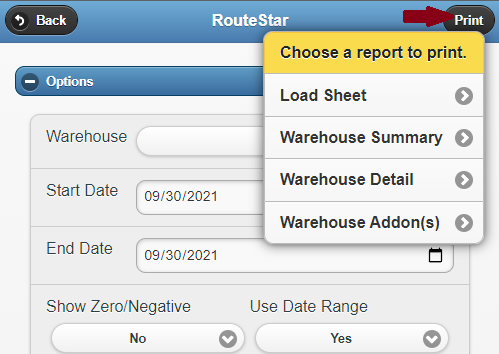
We offer 4 different reports that can either be accessed from the mobile device or the office version of RouteStar Online.
The reports offered currently are: (Go to Samples)
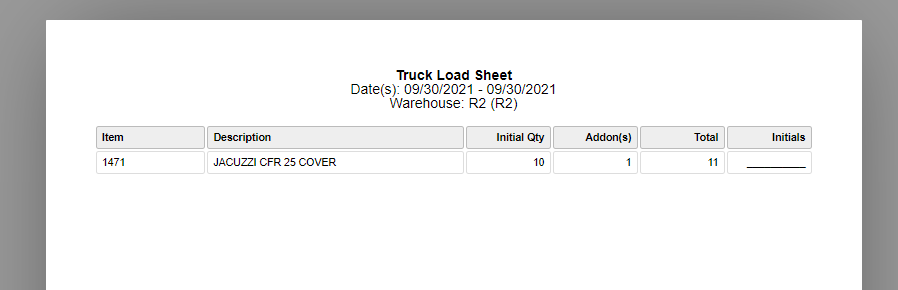
- Load Sheet
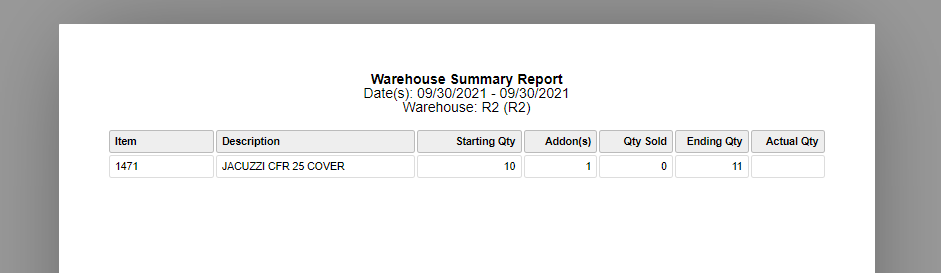
- Warehouse/Truck Summary
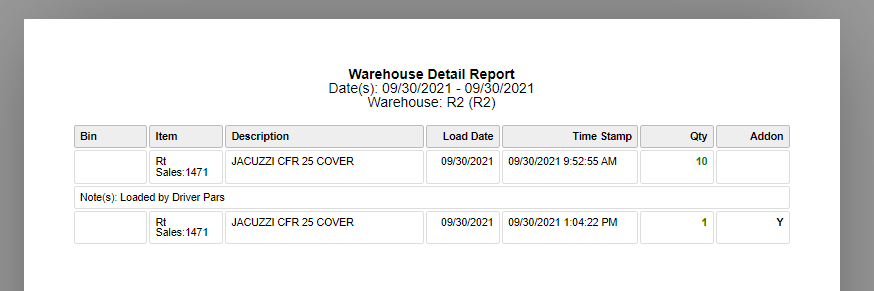
- Warehouse/Truck Detail
- Warehouse/Truck Addon(s)
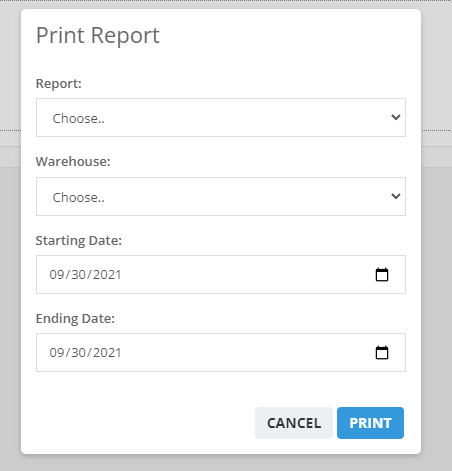
In the office version use the Menu button on the Warehouse page and then select Print, you will then have a popup to put in some criteria and then choose a report to run.
From the mobile device, tap on Truck Inventory from the main menu and then press Print in the top right.
Warehouse/Truck Report Samples
Warehouse Addons

Warehouse Detail
Warehouse Summary
Truck Load Sheet
--- End of Section (Go to Top) ---