In this article we will show you how to post your rental billing batch into QuickBooks Online.
First, Your trainer should have already outlined your billing process within the software. If you are not 100% sure of your process, please refer back to the training videos or write up information that the trainer has sent to you. If you still are not able to track this down please click the Chat Now button along the upper right hand corner of the software. When the web page opens up, Scroll down and click the big, green button that says, "Live Chat Training". Fill out the form and jump into chat.
Before you proceed, you should have already run your "Rental Billing Batch", "Returned Rentals one by one" OR performed a combination of Both. As stated earlier, your trainer would have shown your company this process in a previous training.
1. To get to the Rental Billing Batch screen click on Rental Info -> Billing -> View Pending Transactions.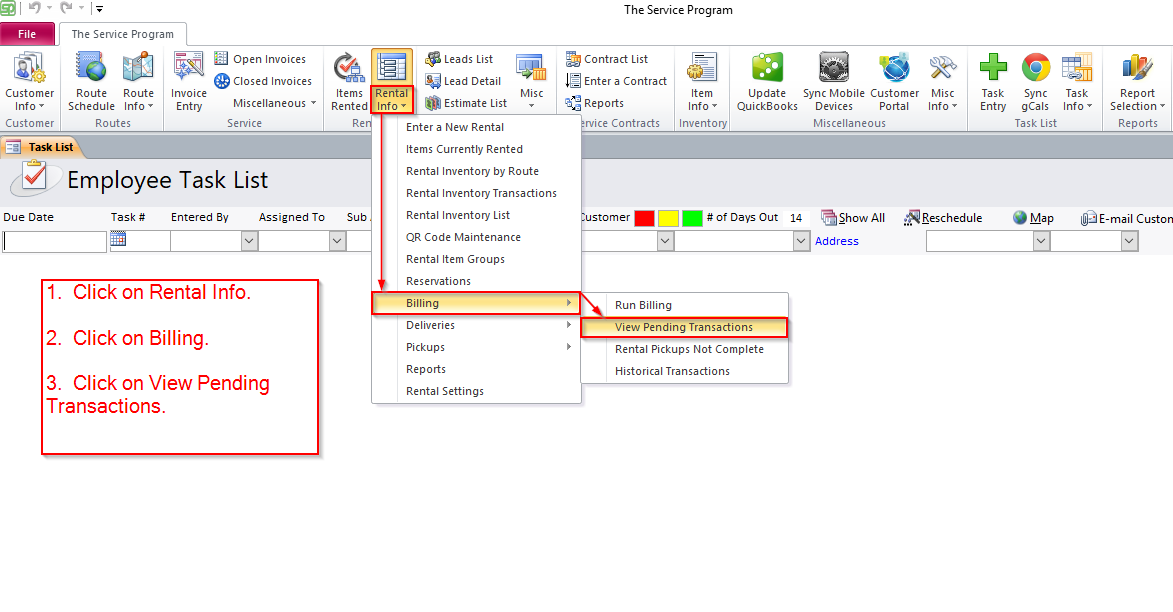
2. Review the transactions that you see on this screen. Please review this information to verify it is correct before proceeding. Once you are done reviewing the charges, input the "Billing Date".The Billing Date is the date that these invoices will be marked with when they are pushed into QuickBooks Online. Next, Click the "Post to QuickBooks" button and click YES on the popup.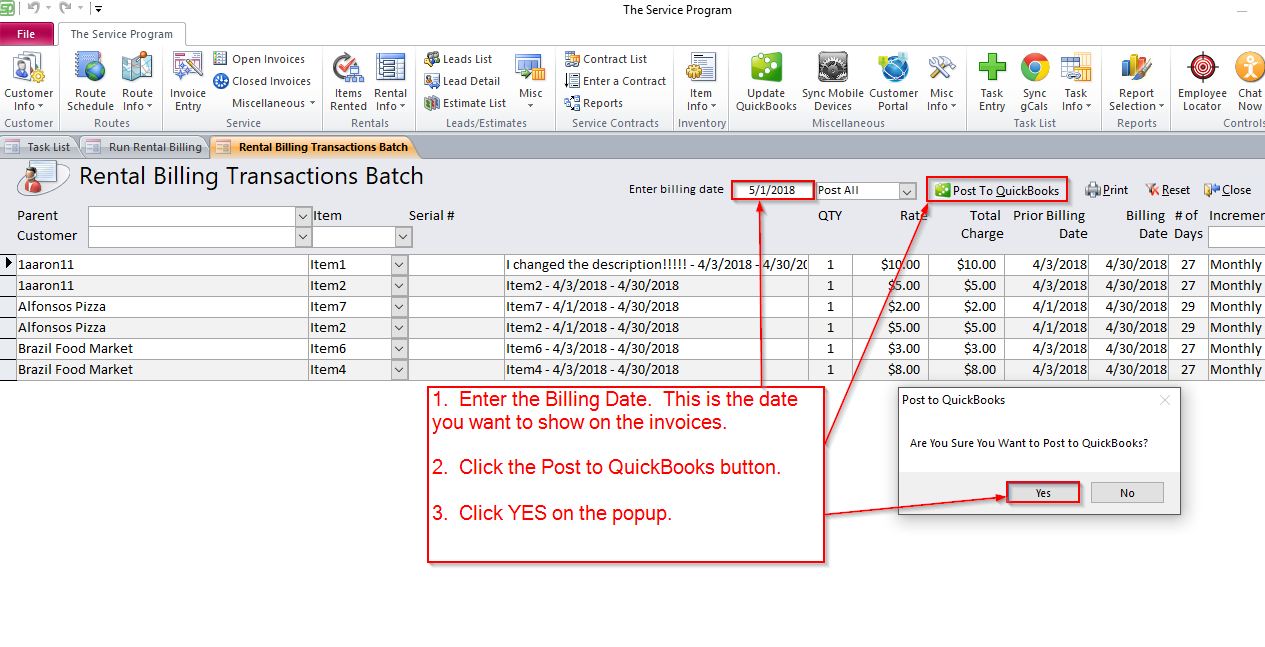
3. A web page will open up on your screen. Click the button that says "Rentals". Verify the Posting Date and the information that is about to be pushed into QuickBooks Online. When you are ready, Click the "Post to QB" button.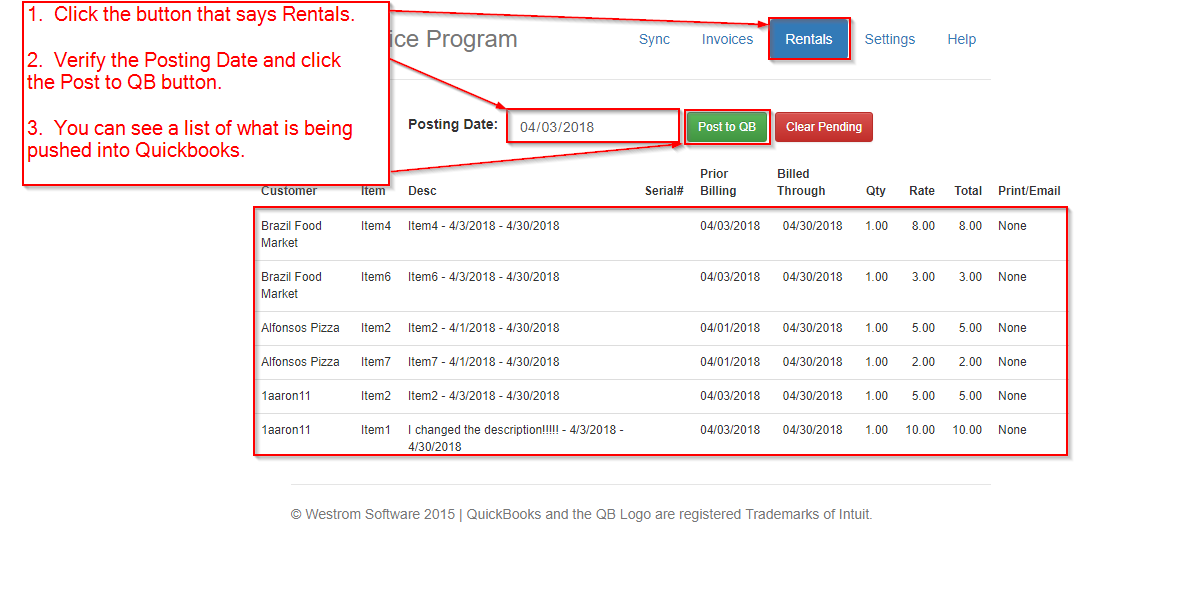
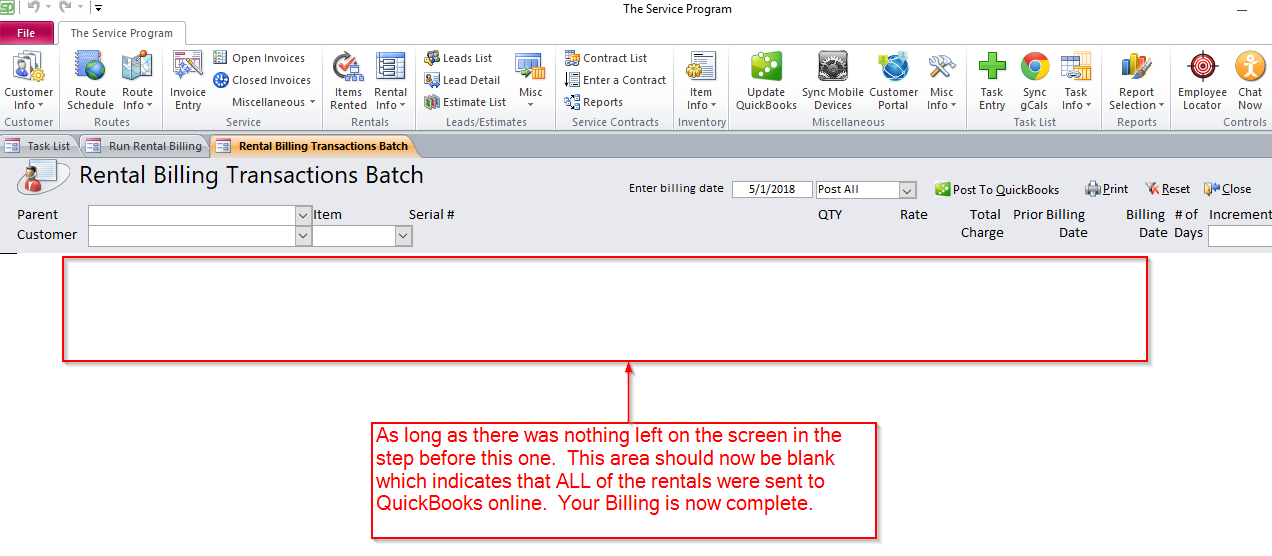
4. After a moment, you should see a message that says, "No Data to Post". That is an indication that all of your charges have been pushed into QuickBooks online and you should see invoices for the Customers in QuickBooks Online.
IMPORTANT: If you still have information left on this screen, then STOP immediately. Please verify that the Customers and the Items sitting on this screen still exist in QuickBooks Online. Also, Verify that they are not set as "In-Active" inside of QuickBooks Online. If they are still valid and active customers/items then please contact tech support by going to www.ws-support.com. Once on that site, scroll down and click the big green button, on the right hand side that says "Live Chat Technical". Fill out the form and jump into chat.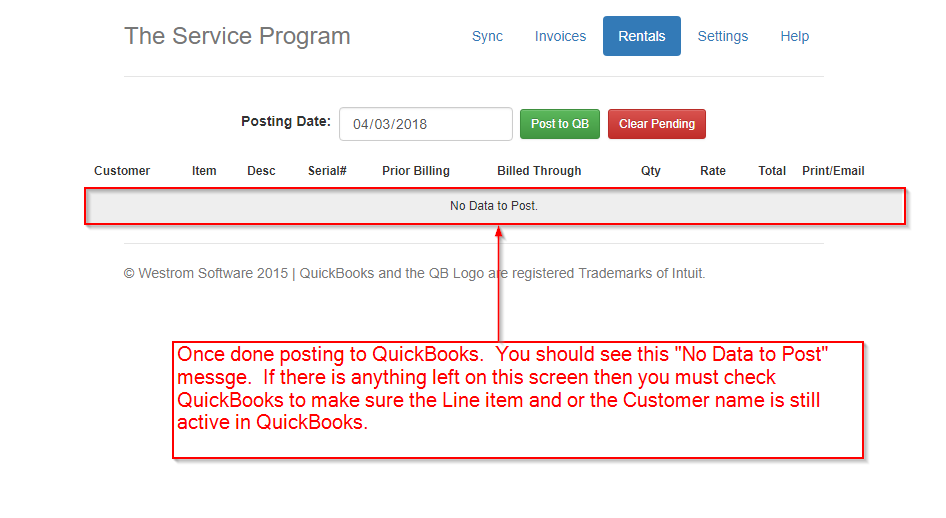
5. If Step 4 was a success you will need to go back into the desktop and click the "Post to QuickBooks" button one more time. Click Yes on the popup. When you do this, the system is verifying the data on the web side against the data within the desktop and performing updates.
6. After a moment you will notice that the "Rental Billing Transactions Batch" screen no longer displays any charges "waiting to go to QuickBooks". If this is what you see, then your Billing has been a success!