Please Note:
You must use QuickBooks Enterprise and have Advanced Inventory enabled to use. Below is a list of steps in order to successfully start using Advanced Inventory with RouteStar.
Step 1
Make sure QuickBooks Advanced Inventory is enabled
How to Turn on Advanced Inventory in Quick Books
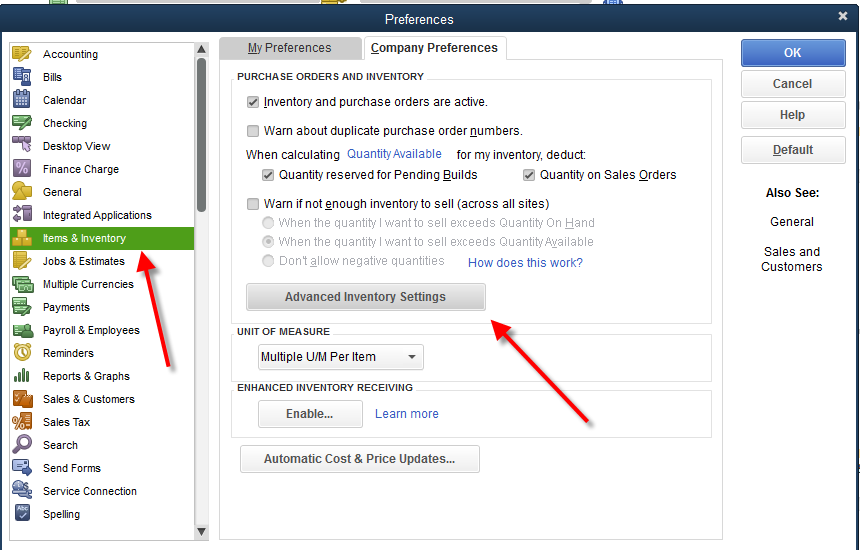
Click on Edit > Preferences > Items & Inventory. Then click on the Company Preferences tab and then select Advanced Inventory Settings.
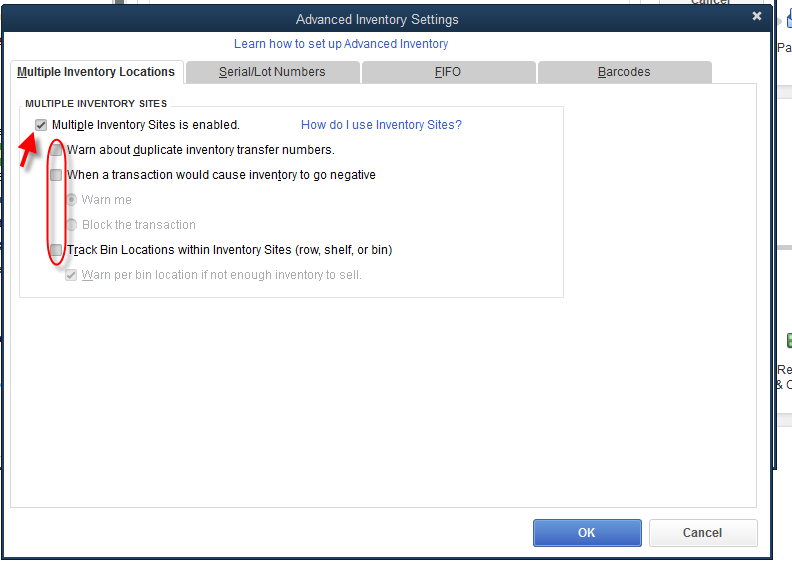
Under the Advanced Inventory Settings make sure Multiple Inventory Sites is enabled. Shut off all options below that.
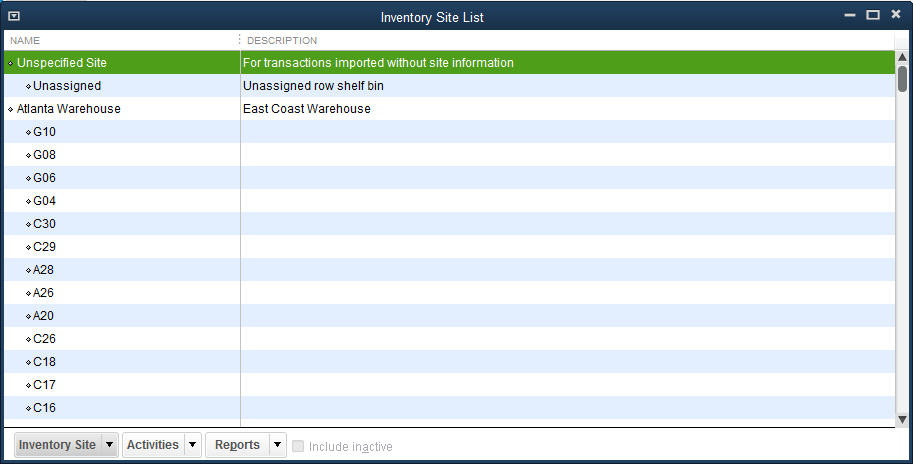
Finally, Click on Lists > Inventory Site List to ensure you setup your warehouse locations.
Step 2 – RouteStar Settings
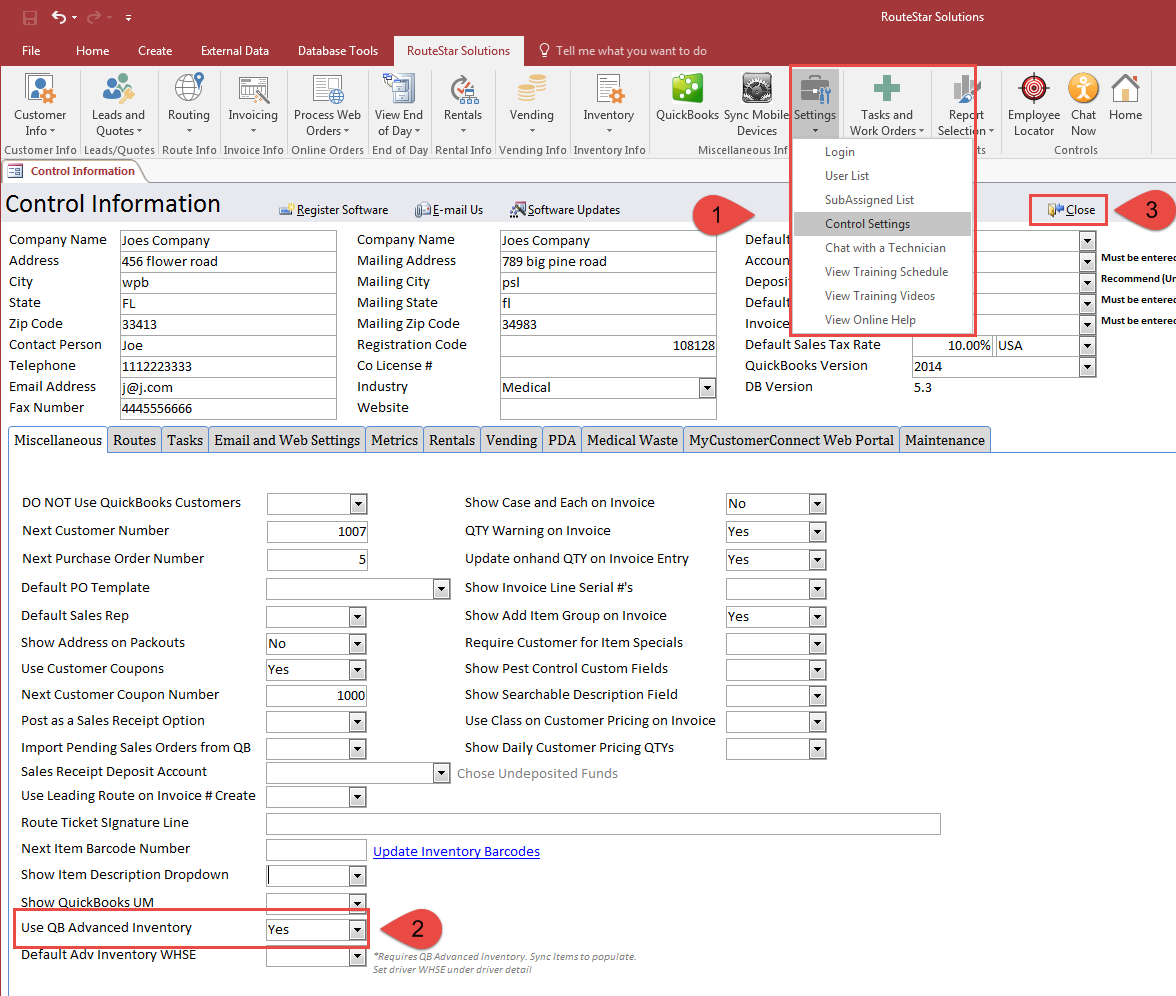
Access Control Settings by clicking on Settings > Control Settings.
Enable “Use QB Advanced Inventory” to Yes
Press Close
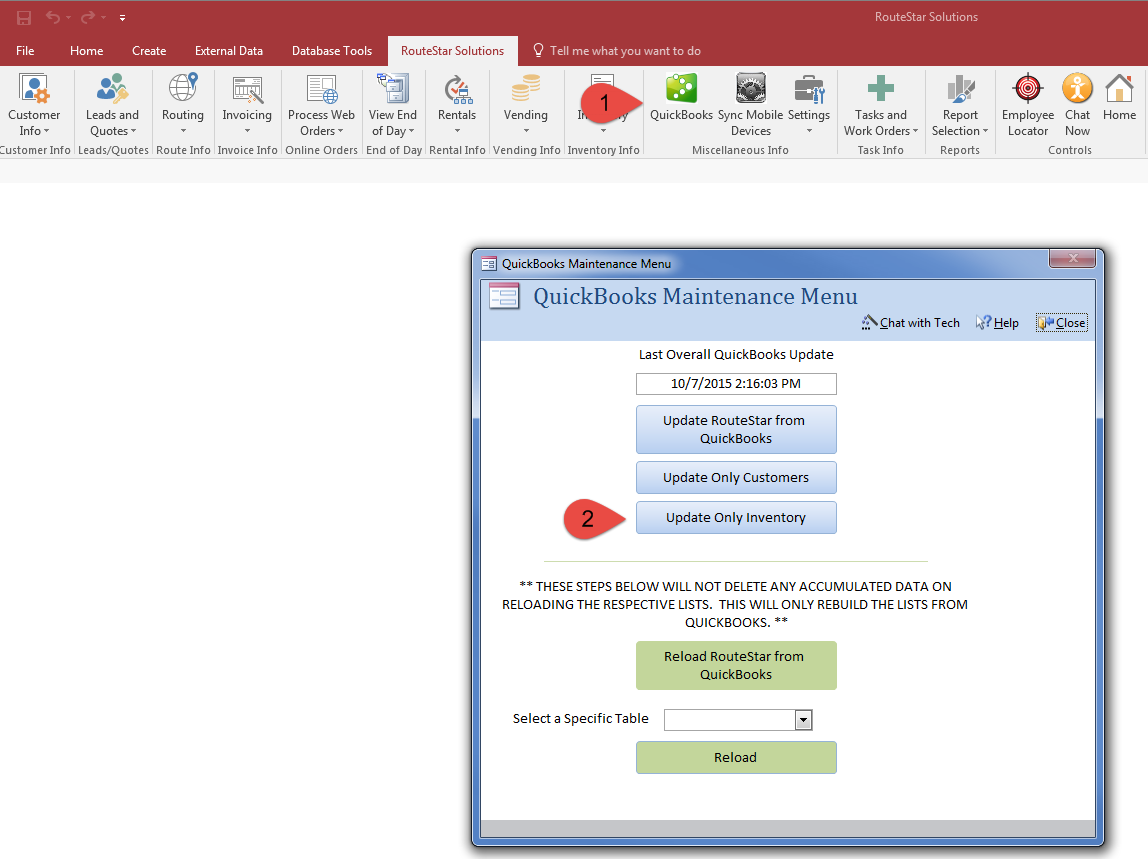
Click on the QuickBooks Icon found on the ribbon bar and click on Update Only Inventory. This will load all the warehouse locations into RouteStar.
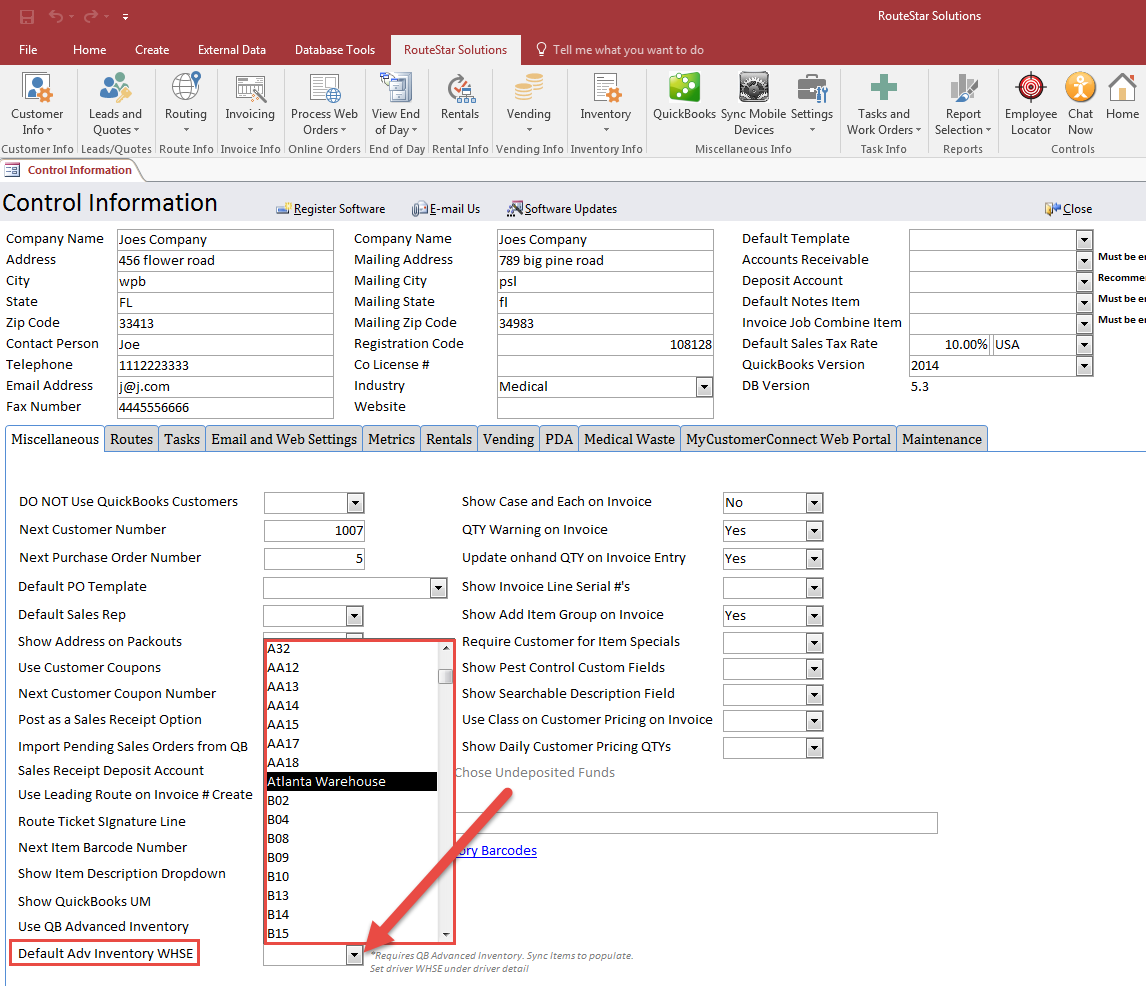
Next open Control Information again and select a Default Adv Inventory WHSE.
PLEASE NOTE: If you click the drop down and there are no options, then you either do not have the warehouses setup in QuickBooks or you have not Synced with QuickBooks after you enabled “Use QB Advanced Inventory”
Step 3
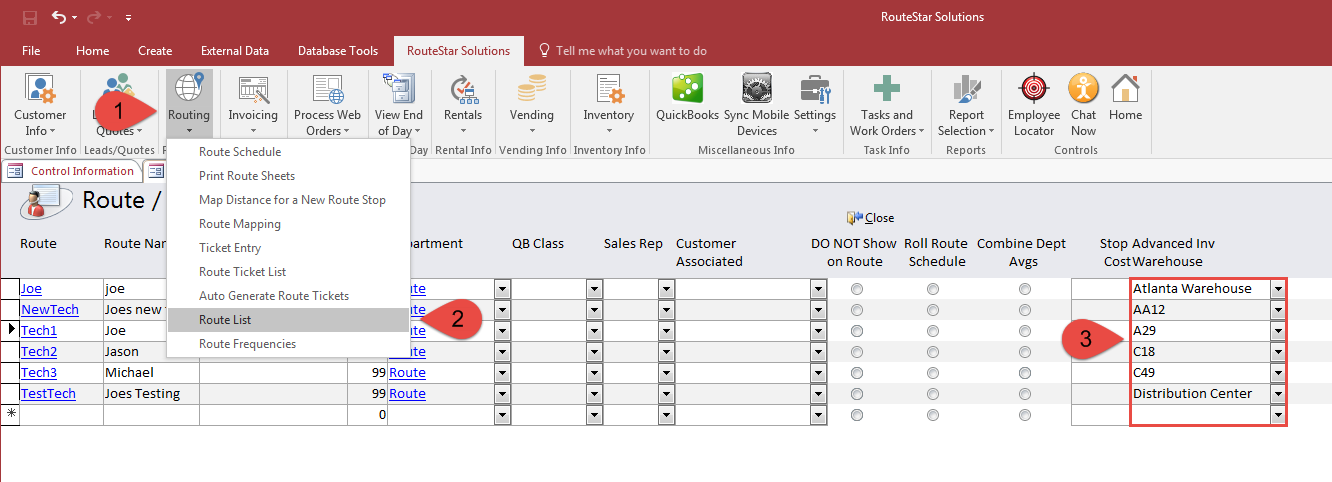
Associate a warehouse to a Driver / Route
Click on Routing > Route List
On the far right select the Advanced Inventory Warehouse for each person. If you do not see the warehouse in the list then verify that it is in QuickBooks and re-sync with RouteStar and try again.
Step 4
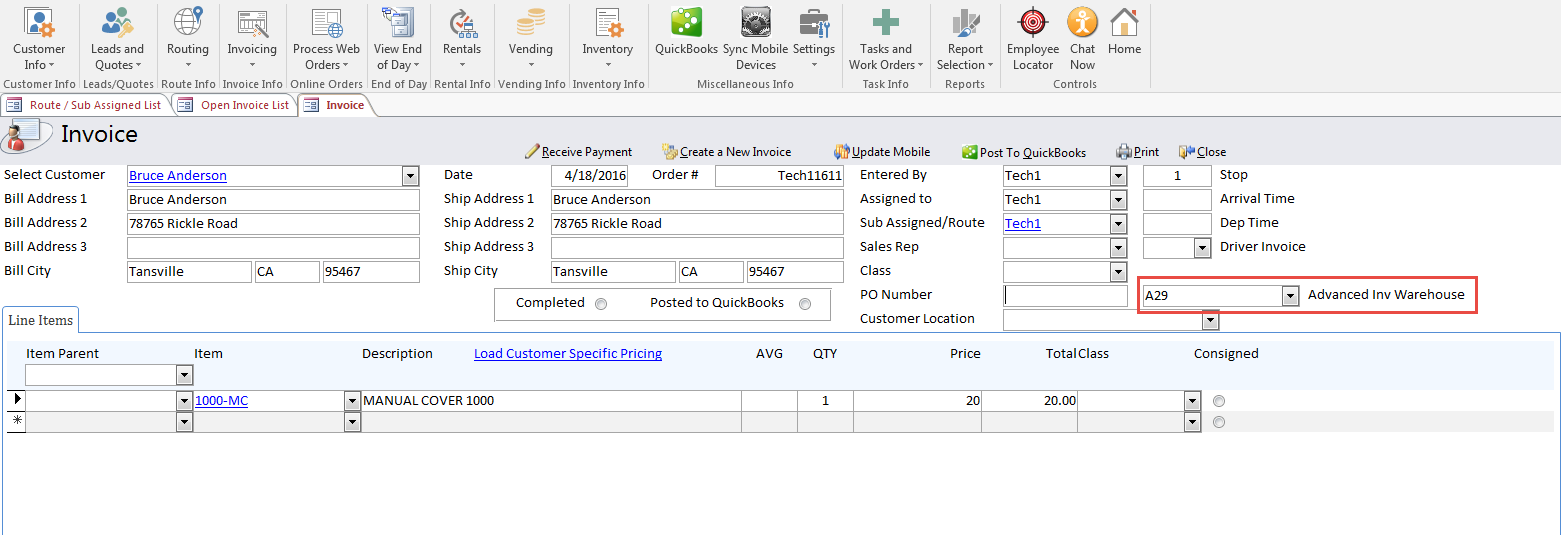
When you are ready to post invoices to QuickBooks you must now ensure there is a selected warehouse for each invoice before you post to QuickBooks.
If there are open invoices pending for QuickBooks you can set the associated route warehouse location on the invoice itself OR you can let these post to the default warehouse location that was setup in the Control Settings.
When you auto-generate invoices in the future, the warehouse that was assigned to the driver in the Route List will automatically populated the auto-generated invoice.
Note: In Quick Books, Items can be set as Service, Inventory and Non-Inventory, However only the Inventory Item Type will record to a Site/Warehouse.