1. First, you must turn on the option. Along the top of the software go to Settings -> Control Settings.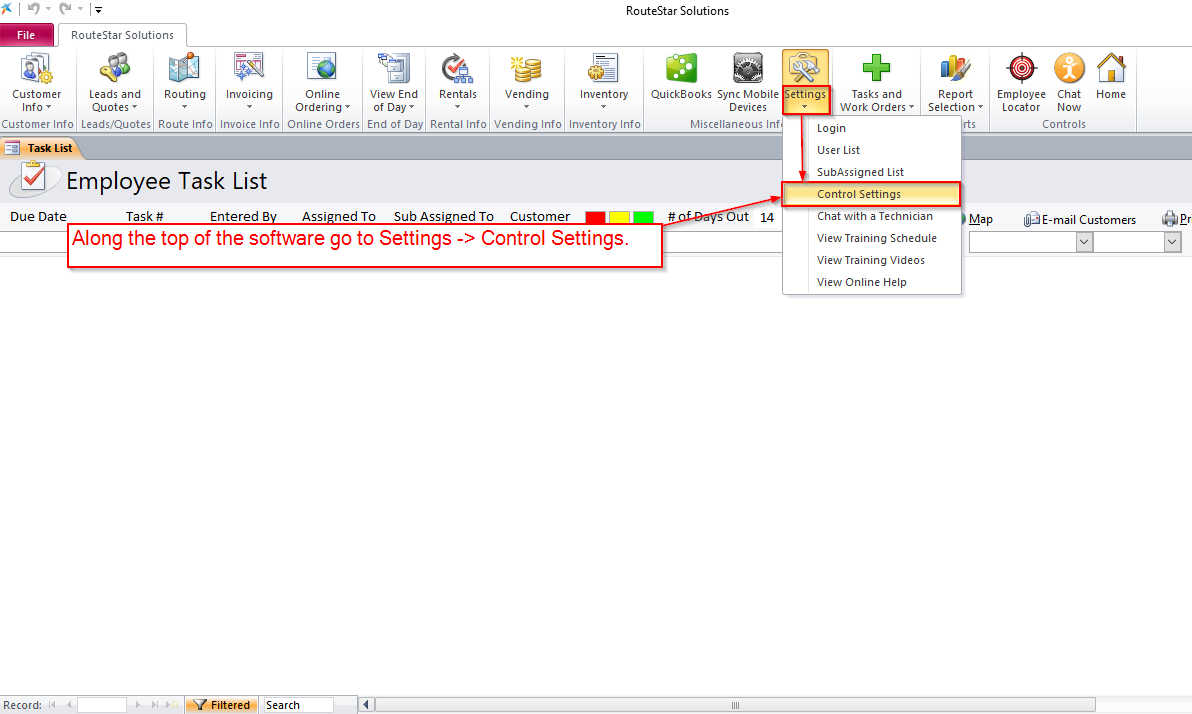
2. Click on the tab that says, "Miscellaneous". Set the option that says, "Prompt to enter Invoice Date and Route" to YES. Then click the Close button to save the change.
IMPORTANT - To get this option working, you must completely close out RouteStar then open it back up and sign back in.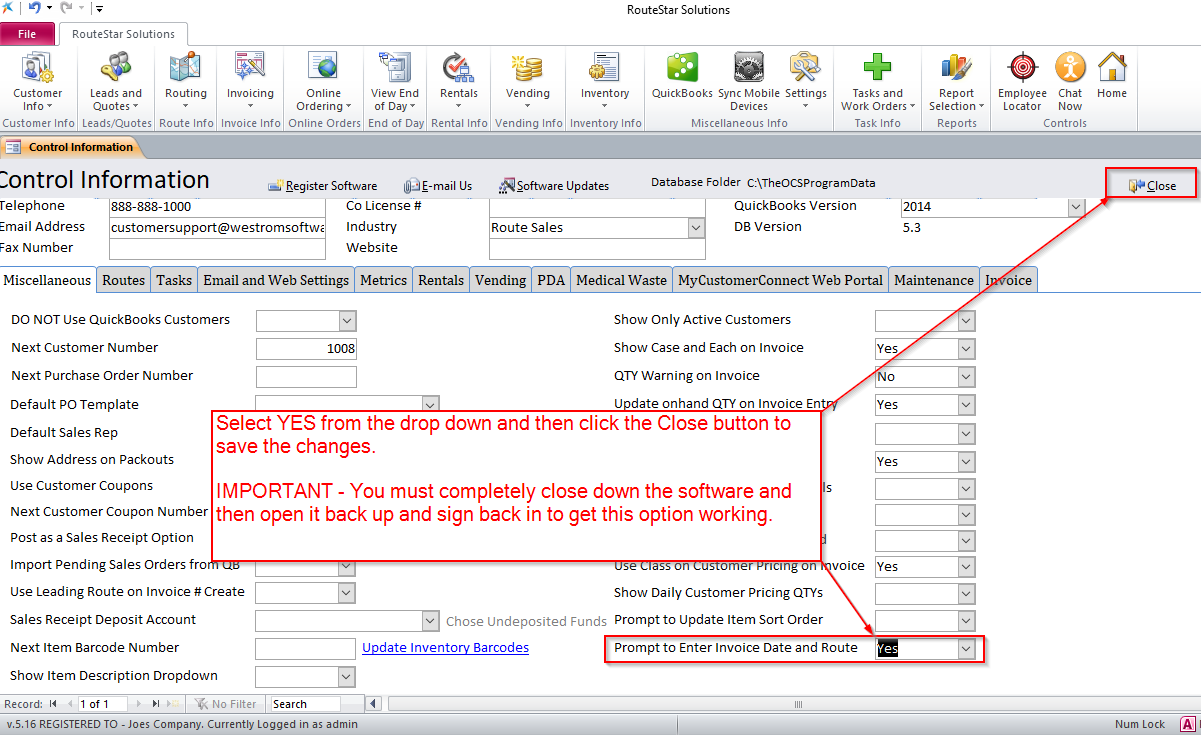
3. Now you can create a new invoice in the desktop software. Click on Invoicing - > Create an Invoice.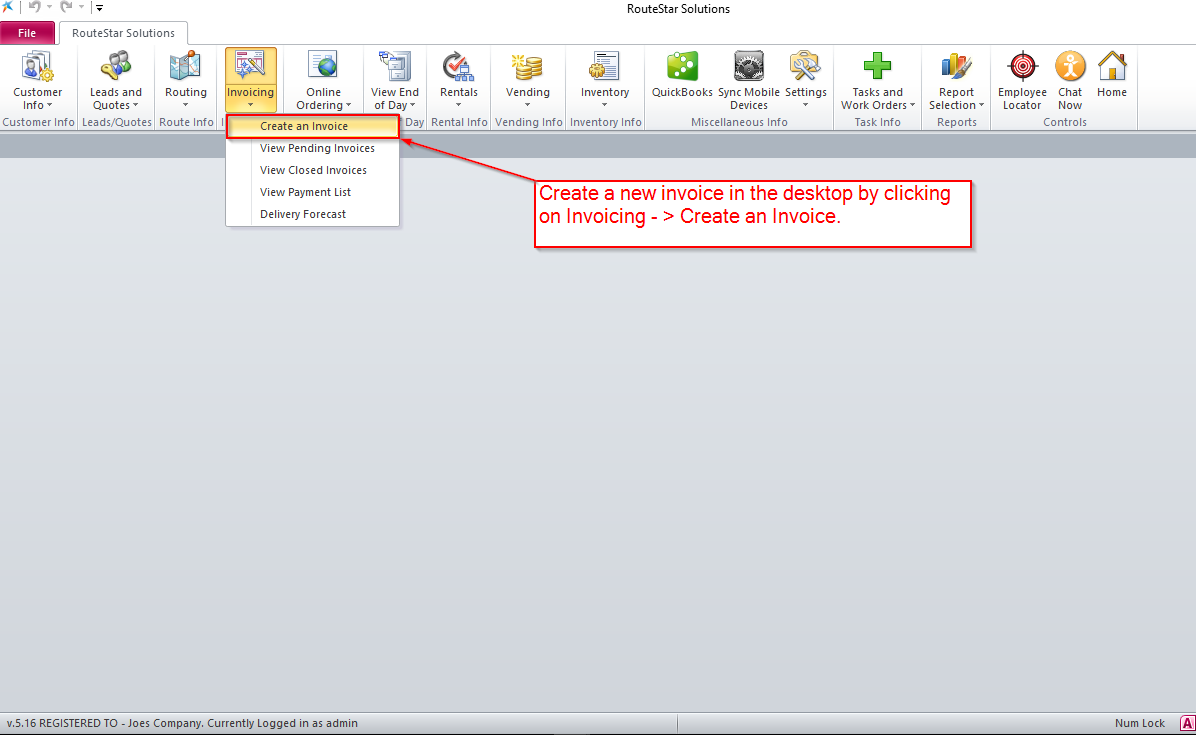
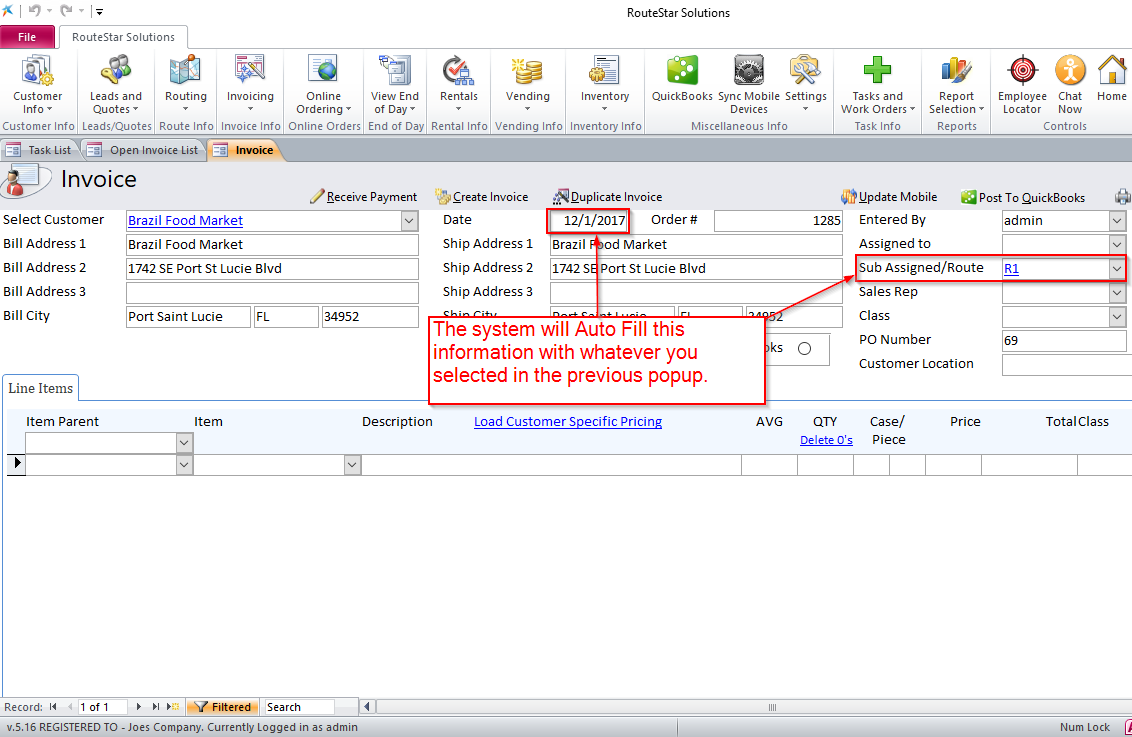
4. Select the customer name and you will get a popup. Enter the "Delivery Date" and the "Select a Route" for this Invoice. The "Delivery Date" is the date of the Invoice and the "Select a Route" is the Technician that you are assigning this Invoice to. When you click the OK button, that information will Auto Fill into the Invoice.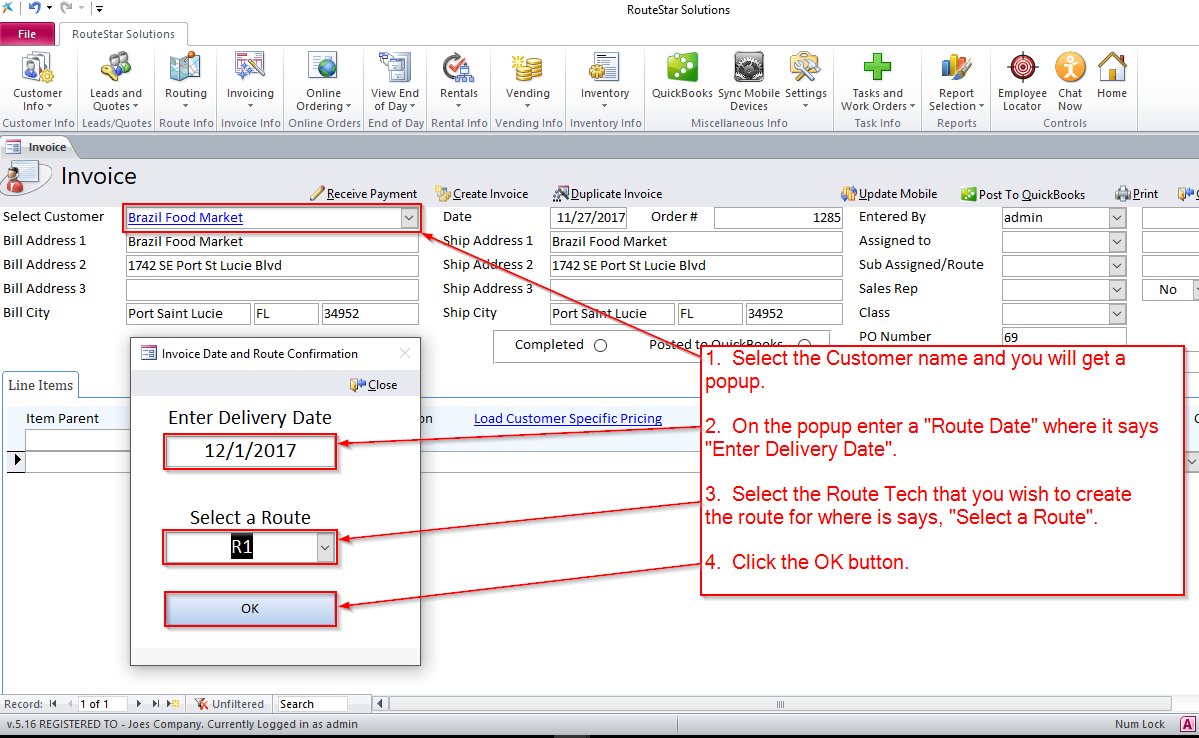
5. As you see below, the system auto filled the invoice with what you selected in the previous step.